Add a New Job
Creating Jobs from the Add New Job window.
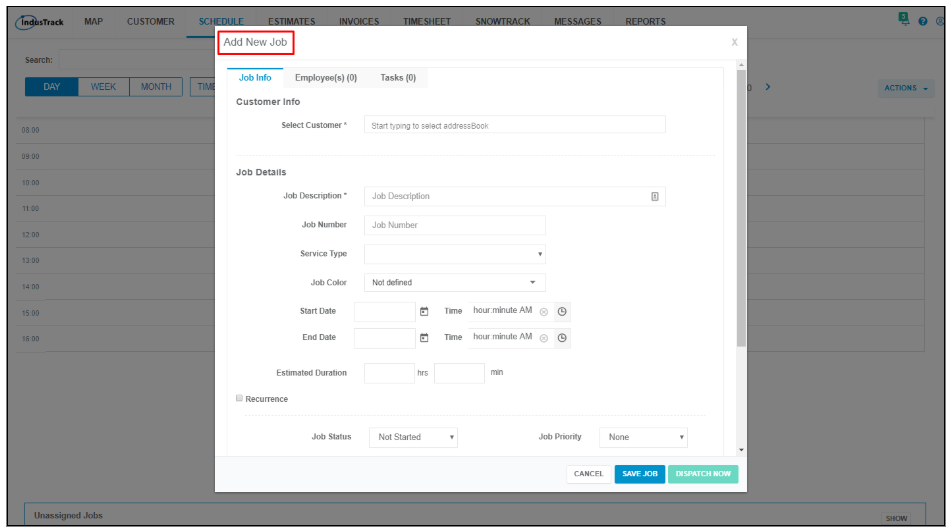
The Add New Job window has 3 tabs, Job Info, Employees, and Tasks. Fill in the details for each tab.
Job Info

This is where you will add your customer’s information and basic job info such as the job number and start date and time.
Customer Info
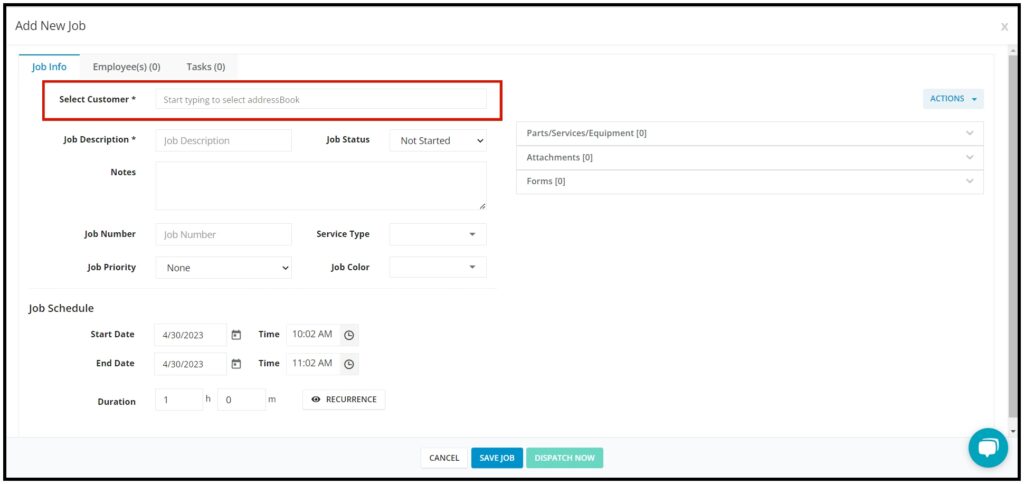
Customer
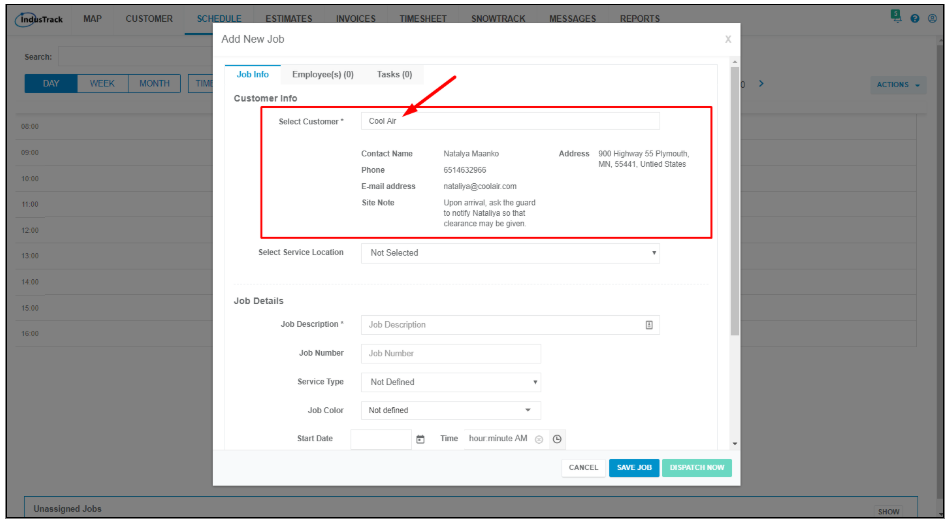
On the Select Customer field, start typing the name of the customer into the field. As you begin typing the name, IndusTrack will begin looking in your customers for matching entries. When you see the one you are looking for in the list, click on it to select the customer.
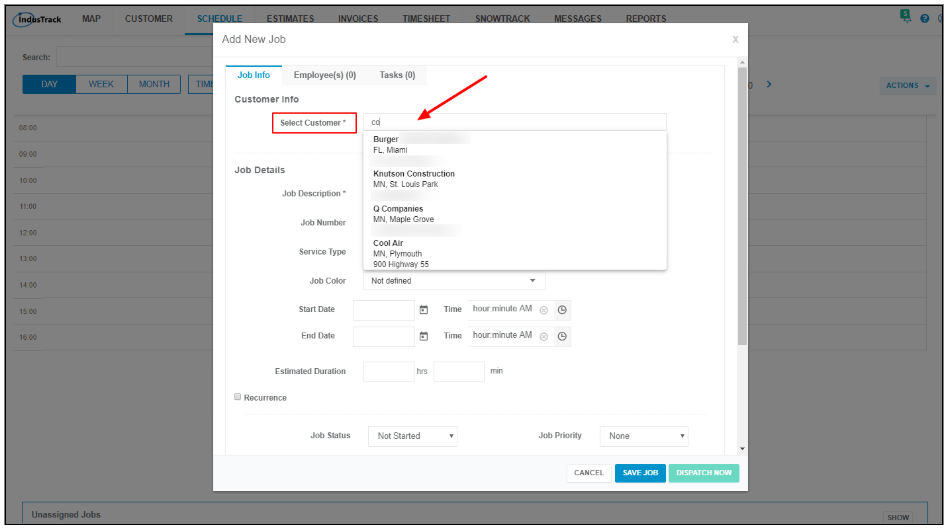
Once the customer is selected, the contact info and address will be displayed. If there are any site notes that have been entered into the profile for the customer, these will also be displayed.
If an profile has not been created for the customer, you can scroll down at the very bottom of the customer list dropdown and click Create a New Customer or will have to create one first before the job can be created for them. To create an profile for the customer, go to the Customer module.
Service Location
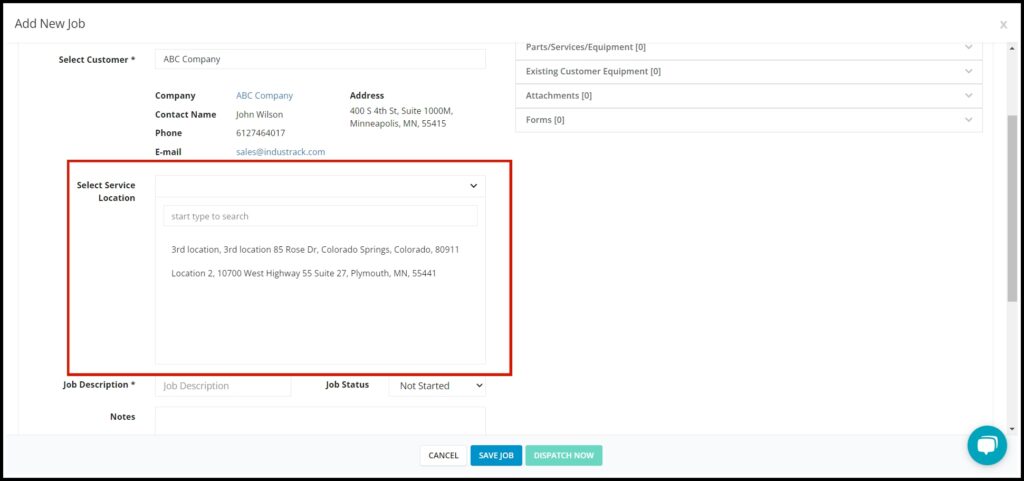
The Select Service Location field will come up if the customer’s billing and service addresses are different or if there is more than one service location listed in their profile.
Leave the field empty if the job will be done at the address indicated on the customer information. Otherwise, select the service location from the list.
Job Details
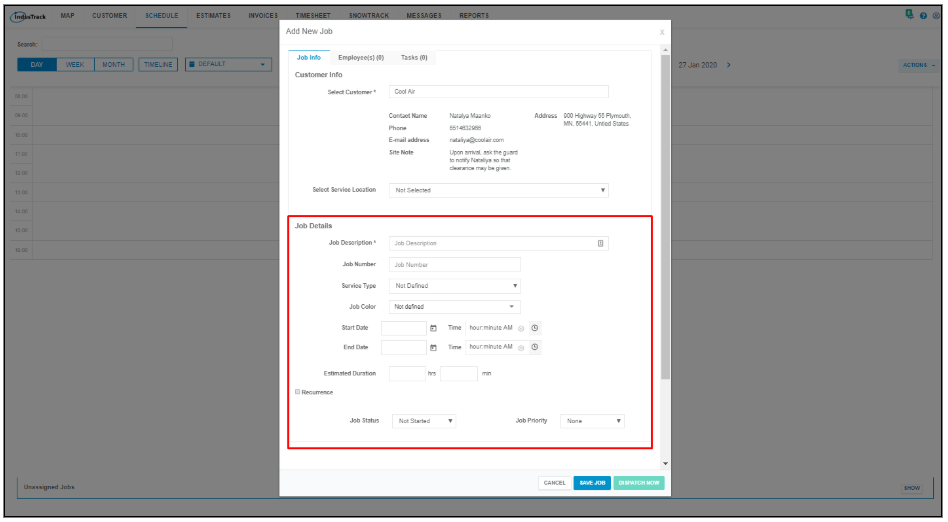
Job Description
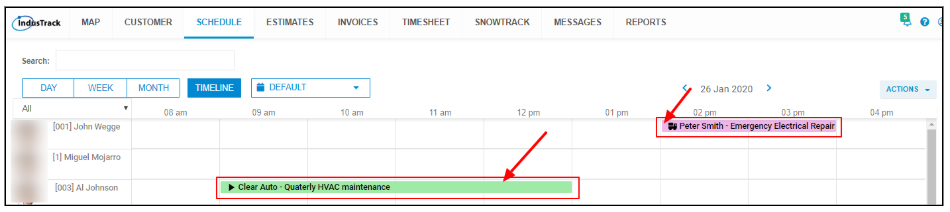
In this field, enter a simple description or name for the job. This will appear on the calendar together with the customer’s name.

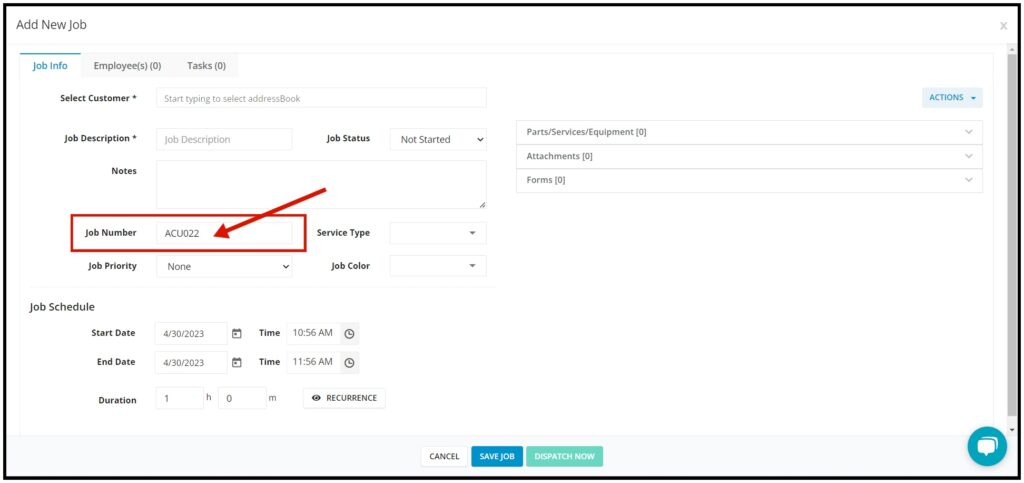
Job Number
Add the job number series here.
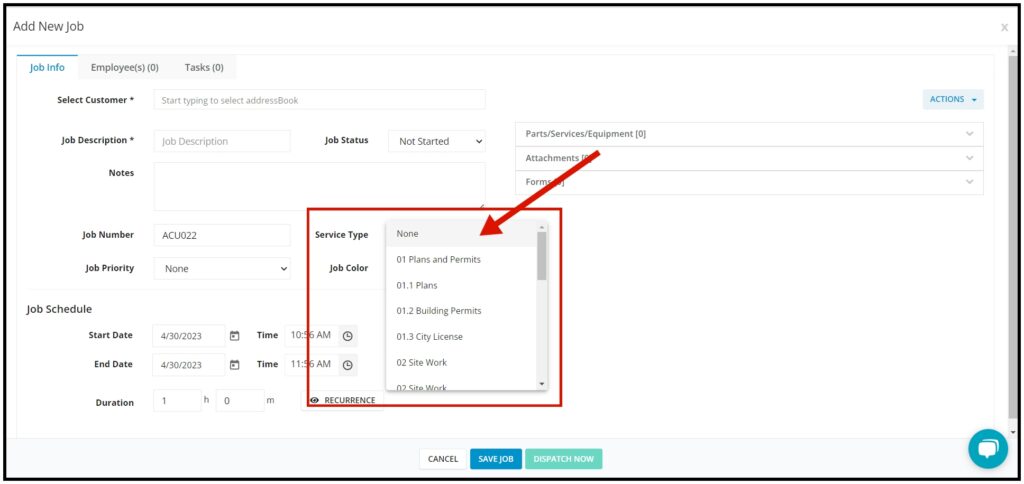
Service Type
Select the service type from the drop-down list. Service types are set up in the schedule settings sections.
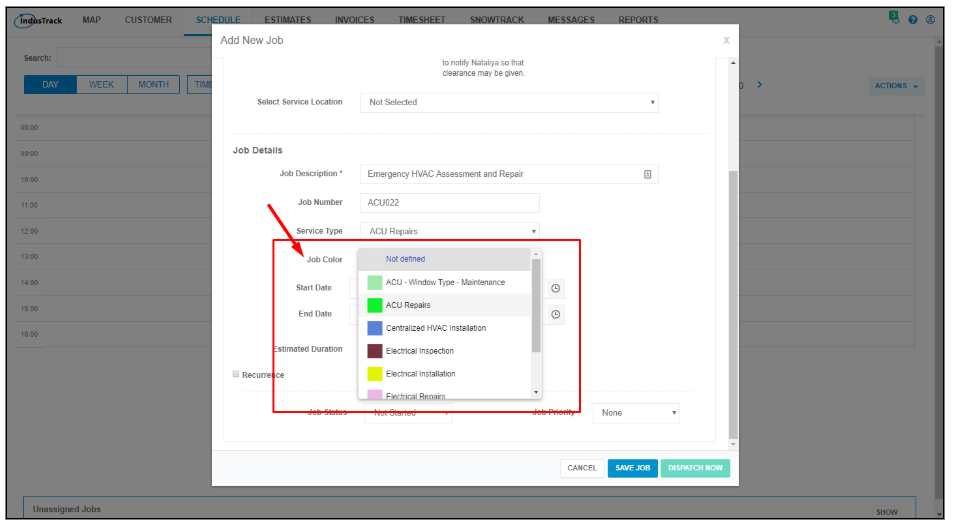
Job Color
Select the color code representing the job. The colors are shown on the map. Job colors are set up in the schedule settings sections.
Start Date and Time, End Date and Time, Estimated Duration
Enter the start date and time of the job. Below that, enter the end date and time. Instead of entering the end date and time, you can instead fill in the estimated duration or the estimated time the job will take to finish. The end date and time will automatically fill in.
If you started creating the job by clicking in the calendar schedule grid, the start date and time will already be filled in. You can edit these.
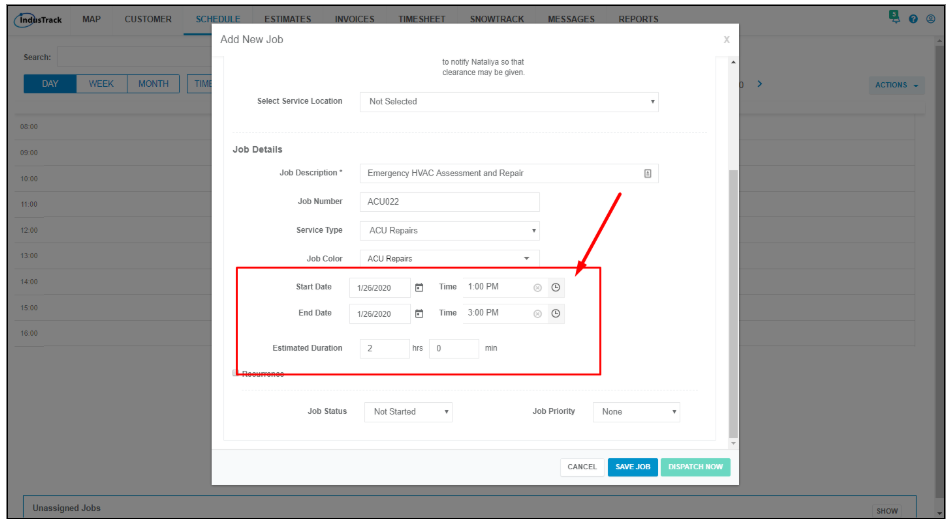
Note that these times are for purposes of creating the schedule only and do not necessarily mean that these will be the actual job start and end times for the field employee. The job reports will show the actual times your field employee actually arrived at and departed from the customer’s.
In the event that you do not yet have a specific date for the job that you are creating, you can leave the date and time blank and the job, when saved, will go into the Unassigned Job section.
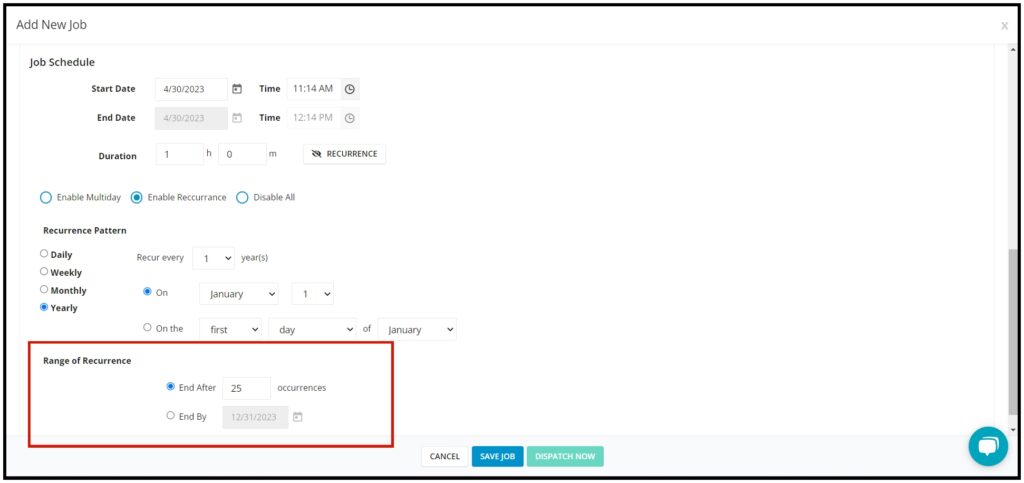
Recurrence
If this is a recurring job, you can set the recurrence by ticking the checkbox of Recurrence. When this is ticked, the recurrence fields will come up.
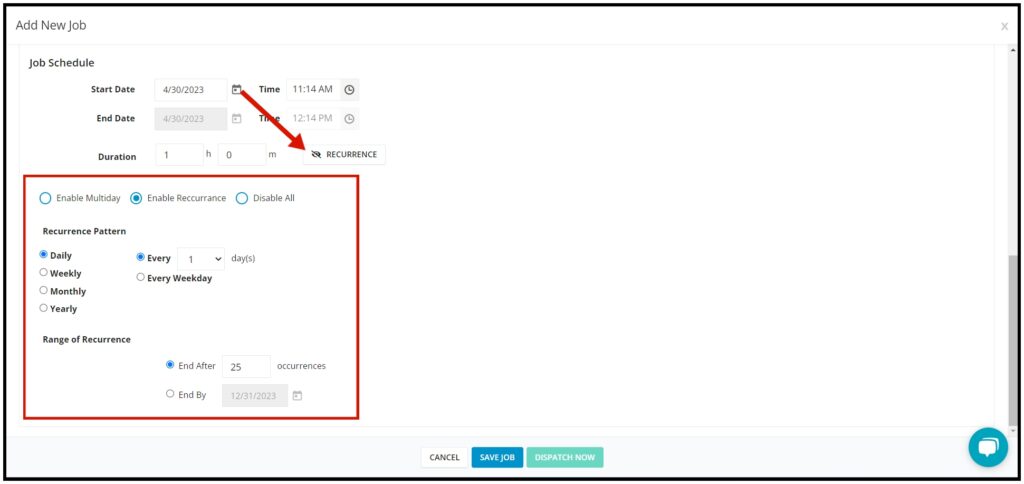
Recurrence Pattern
Select how often the job should recur – daily, weekly, yearly, monthly. Depending on what you select, add the settings.
Daily – Select to schedule the job every weekday only or every day or every specified number of days.

Weekly – Select the specific day of the week when the job will be scheduled. Also, the frequency of the weekly occurrence or every specified number of weeks.

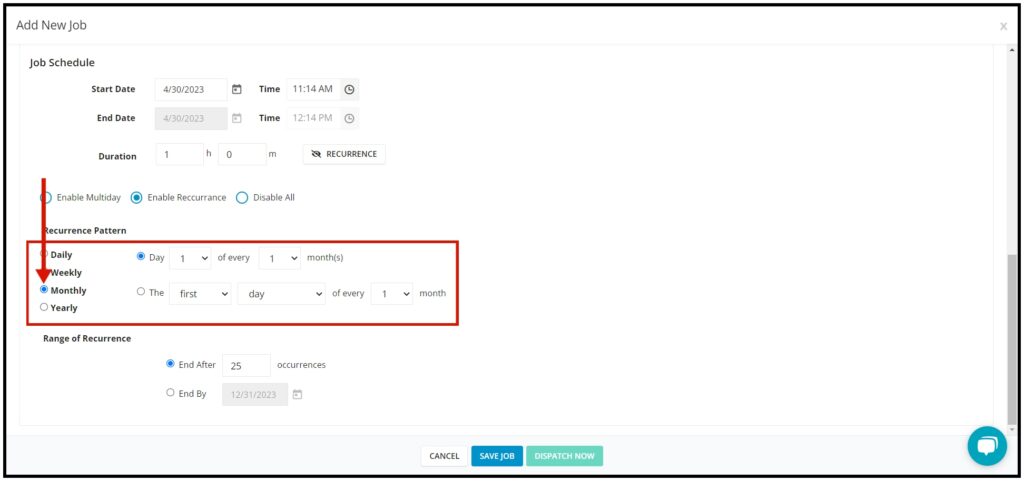
Monthly – Select the specific date of the month when the job will be scheduled. You can select to set the occurrence to be a specific date of the month and to occur with an interval of a specified number of months. Or you can opt to set the job to occur on a specific day of the month with an interval of a specific number of months.
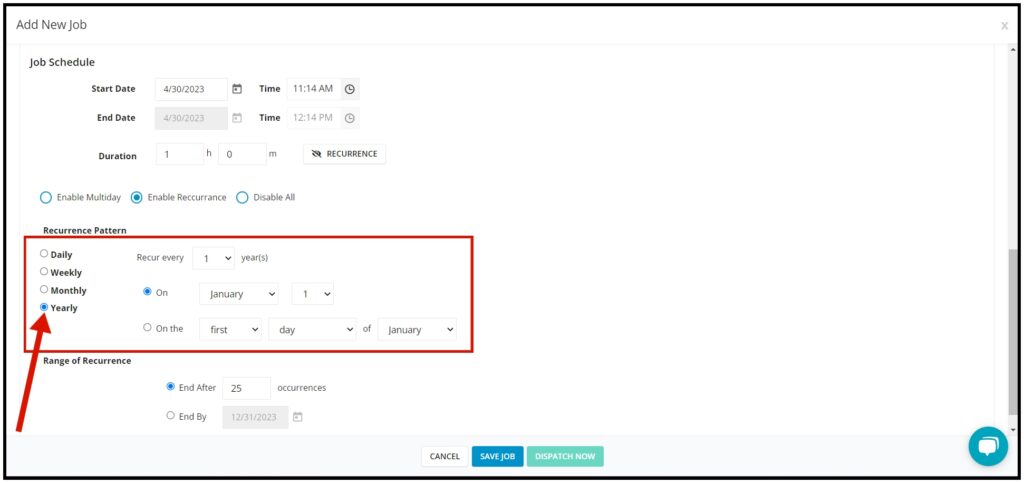
Yearly – Specify the interval of years by which the job will occur. Select either a specific date or day of the year (month and date/day) by which the job will occur.
Range of Recurrence
Set when the recurrence should end. Select from either a specific date or after a number of occurrences.
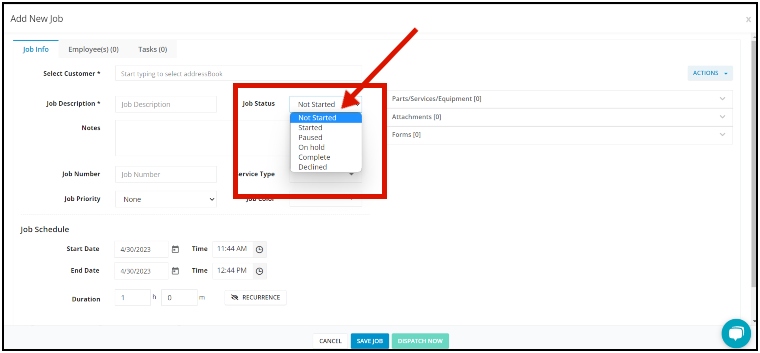
Job Status
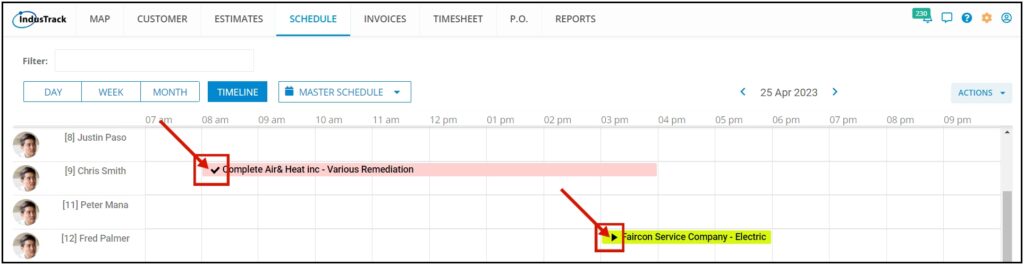
Select from the options, not started, started, paused, complete, declined. The job status will be displayed as an icon on the calendar.
If you are creating a job that has already been done so that you can create an invoice from it, select the status Complete.
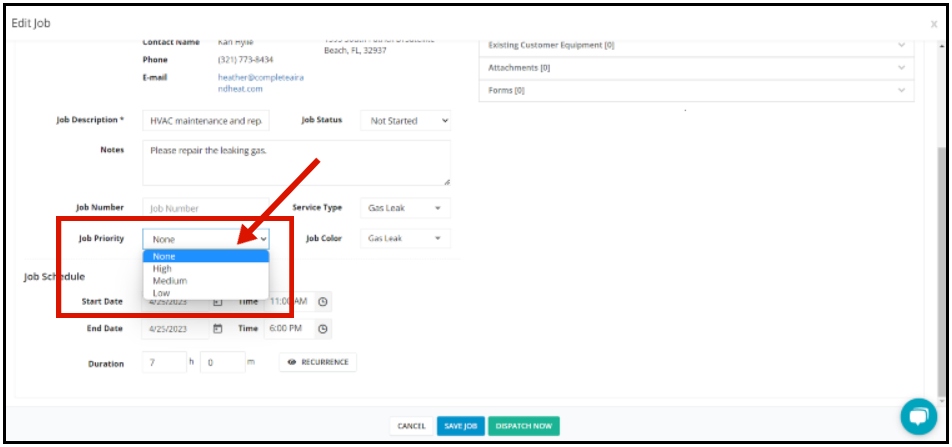
Job Priority
Set the job status to either low, medium, or high priority.
Employee(s)
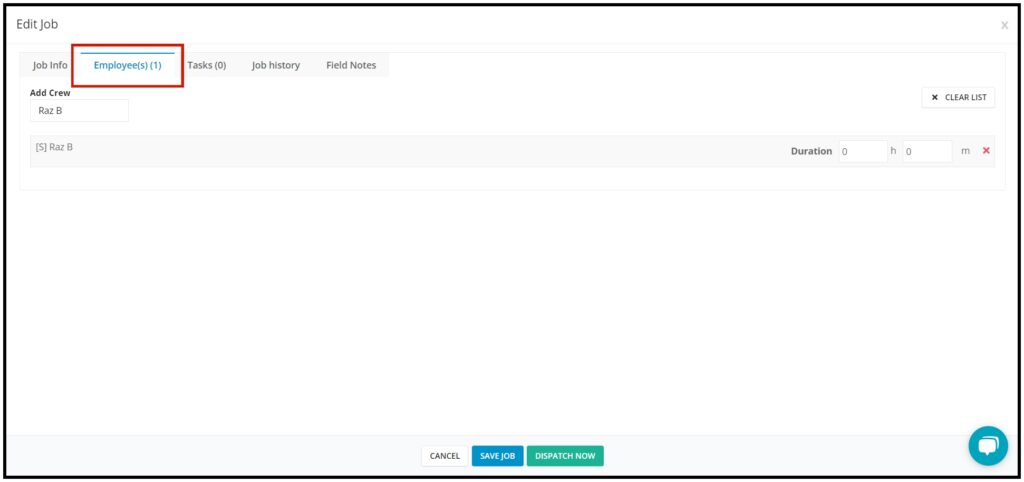
Add Crew
Select the field employee(s) or employee group(s) the job will be assigned to.
If you started creating the job by clicking in the Timeline View schedule grid, the field employee will already be assigned. You can add more field employees to the job or remove the crew previously selected.
If the job is created from a custom calendar, only field employees and employee groups that are assigned to the custom calendar will be on the drop-down list.
If in the event that you don’t know who the job will be assigned to at the time you create the job, you can leave the employee list empty and the job will go into the Unassigned Job section.
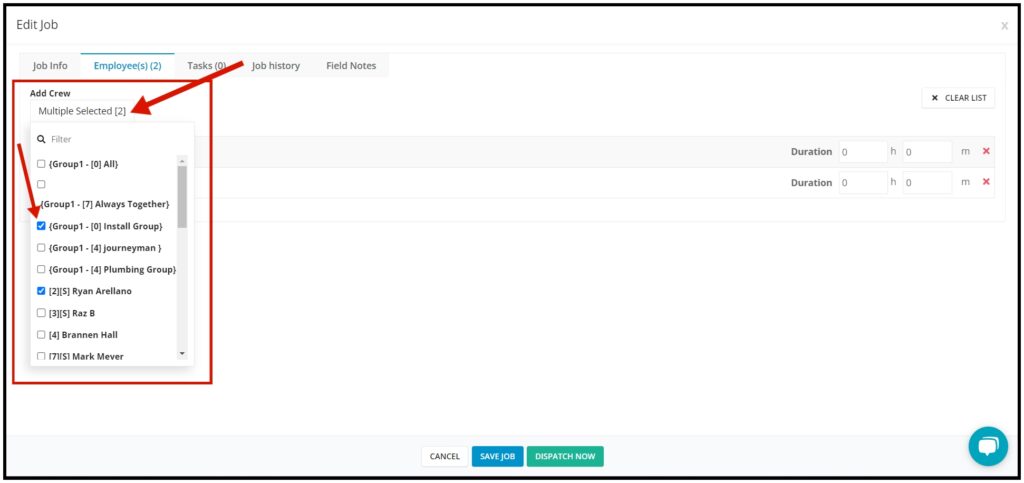
Add a crew
- Click on the Add Crew Field.
- Tick the checkbox to the left of the field employee’s or group’s name. As you tick, the name will already be added to the list. For an employee group, all the crew assigned to that group will be added to the list individually.
- Click anywhere on the window to close the list.
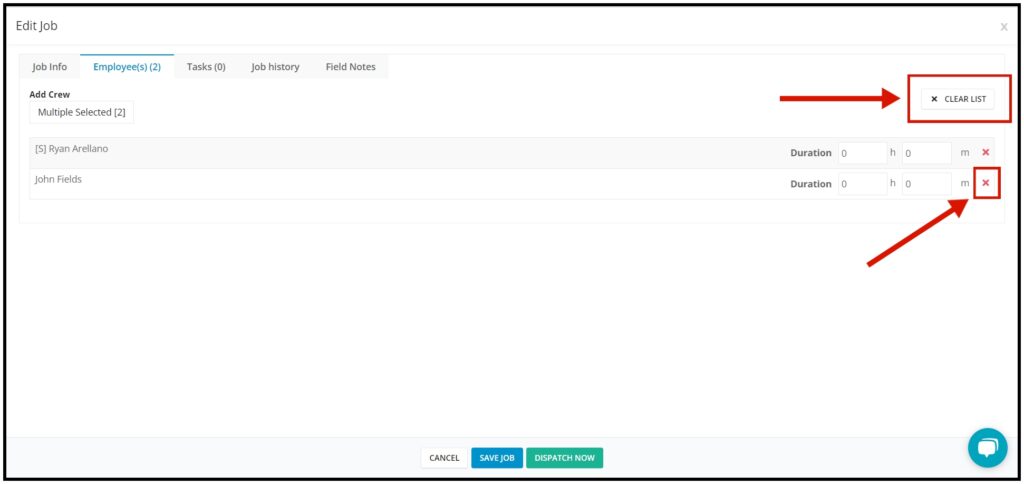
Remove a crew
- To delete a field employee’s name, click on the Delete icon (X) below the crew’s name.
- To delete all of the crew on the list, click the Clear List button.
Tasks
Adding a task or tasks to a job will help the field employees know exactly what they need to do on the job.
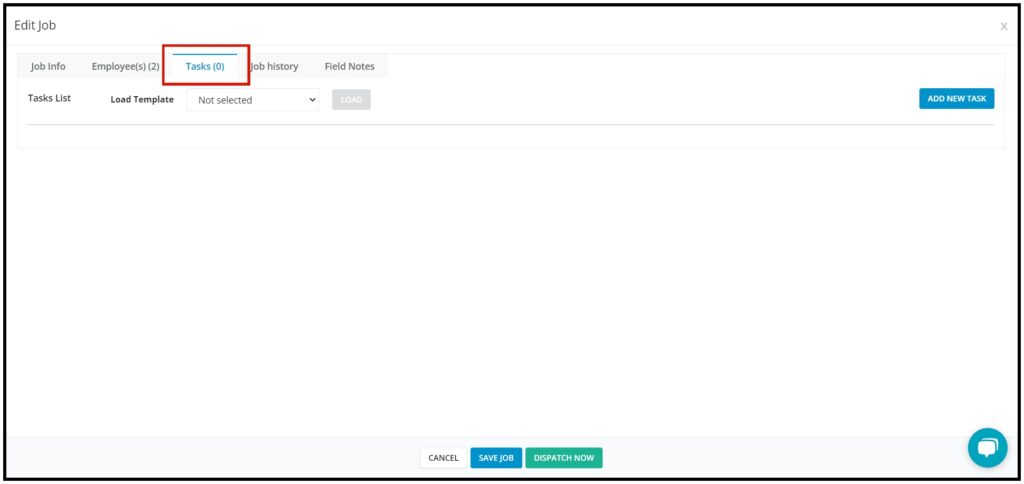
Load Task Template
Task templates are useful in situations wherein you have standard tasks that are done in many jobs. Load saved templates so that you do not have to enter the same information over and over again when you create similar jobs. If needed, more than one task can be created for a task template. These task templates are created at the backend, specifically in the Schedule settings.
Click on the Load Template field to expand the list of available task templates. Select the template to be used for the job.
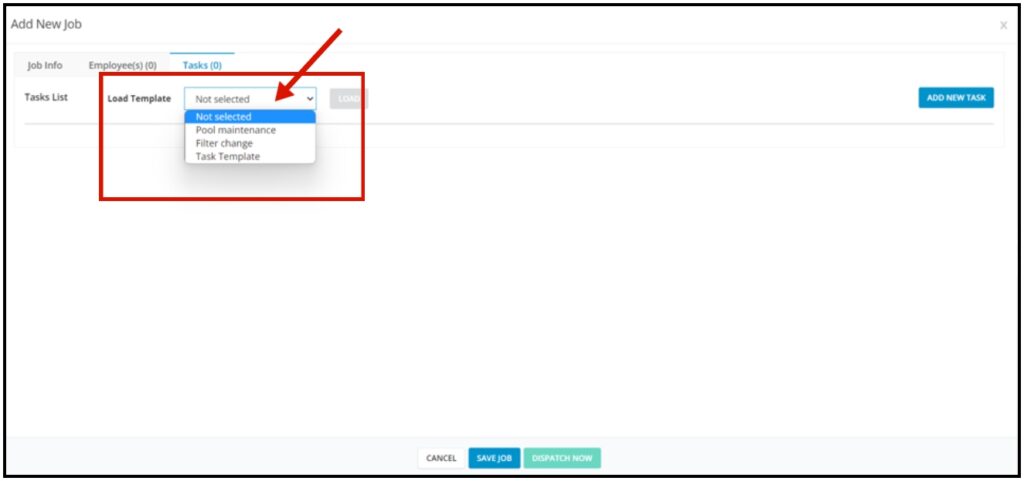
Click Load and the template will be added. If there is more than one task for the template all tasks will be loaded. Once you have loaded the task template, you can edit them further by changing the desired fields.
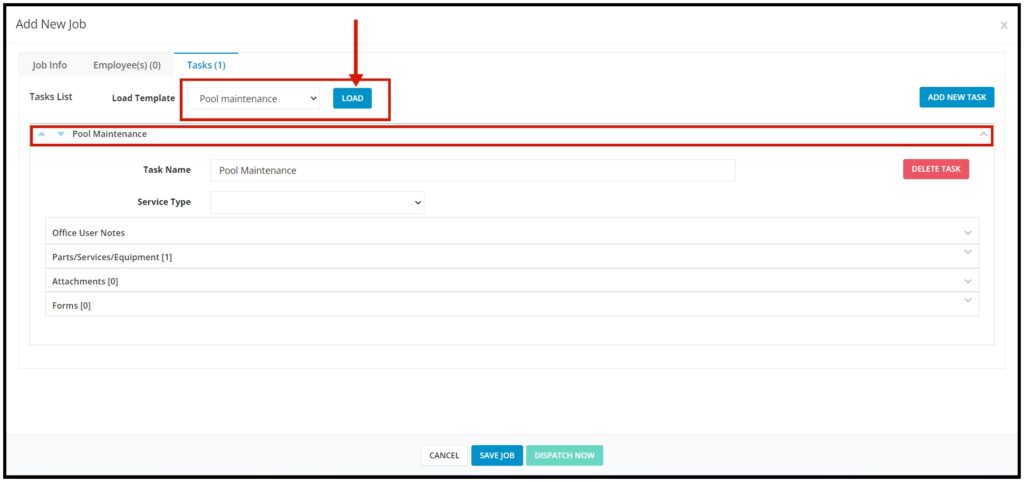
Note that only one task template can be loaded for every job. If a task template has already been loaded or a new task has already been created, loading another task template will cause the previous ones to be deleted. A new task, however, can be added after a task template has been loaded.
Add New Task
Click the Add New Task button.
The New Task window will come up. The Job Description that you added under Job Info will be the task name. Fill in the details of the task fields.
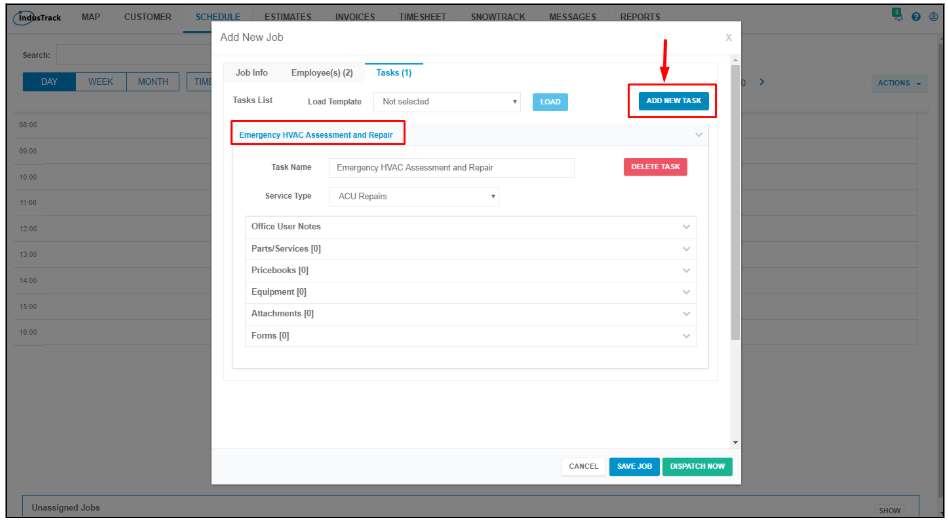
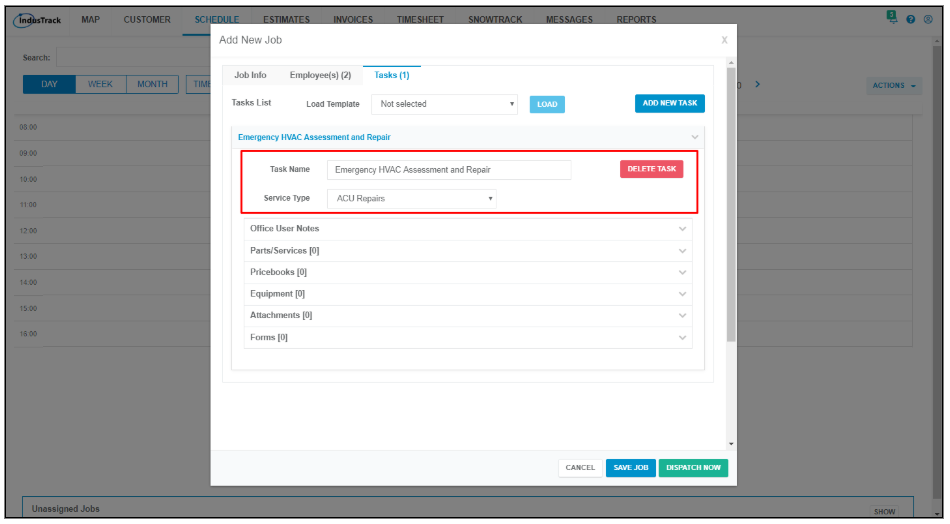
Task Name – The Job Description that you added under Job Info will automatically be the task name. If you want to change this, just edit the name.
Service Type – Select the service code for the task. If you added a service code under Job Details, this will automatically be indicated here. Otherwise, select one. If there is no code, create one or leave the field empty.
Office User Notes – Click on the chevron to expand the field. Key in a note, reminder, or special instructions on the Notes box for your field employees.
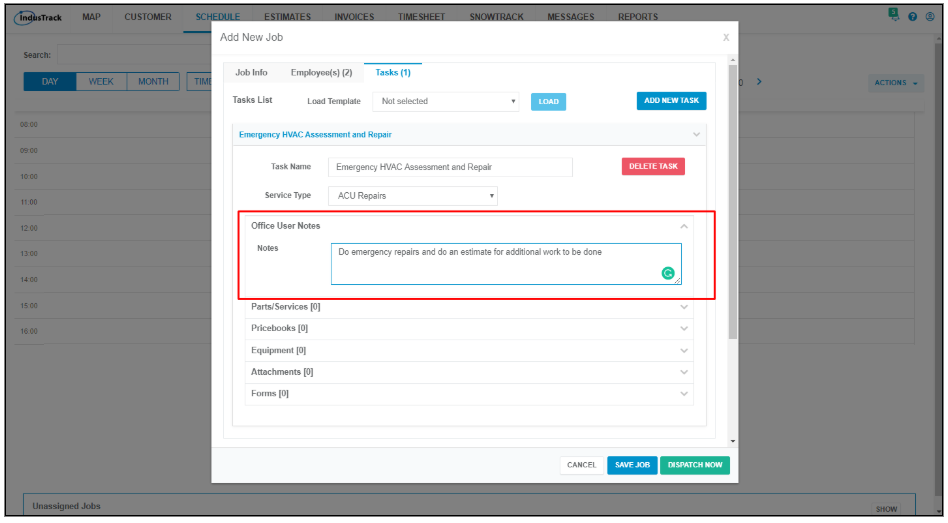
Notes created here will be recorded on the Notes tab of the Customer’s profile once the job is saved.
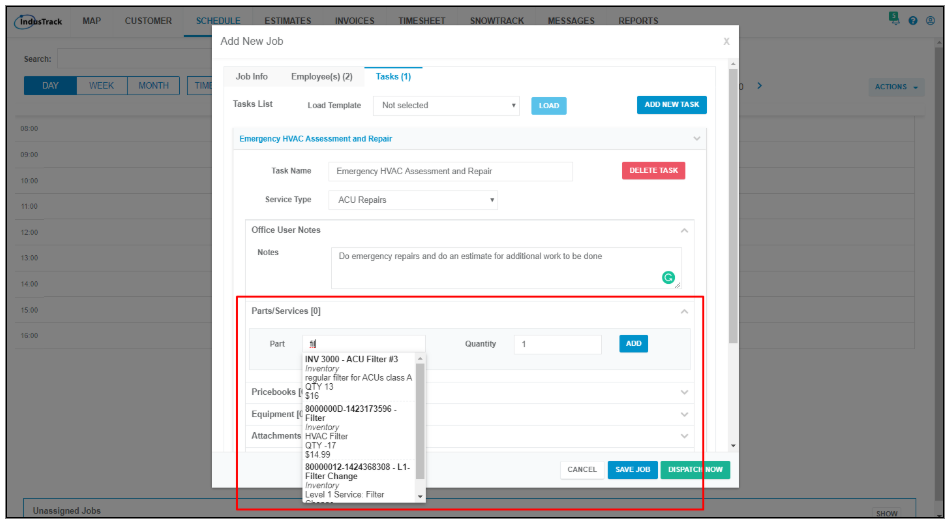
Parts and Services – click on the chevron to expand the parts menu. Add the parts and materials (inventory or non-inventory) to be used on the job. Click on the field and start typing either the name or code of the material. IndusTrack will search the inventory list for matching items. Select the desired item then enter the quantity and click add. The item will move into the list above. Add the service or services to be performed the same way that you added the materials. Items appearing in this section will appear as line items when the job is converted into an invoice.
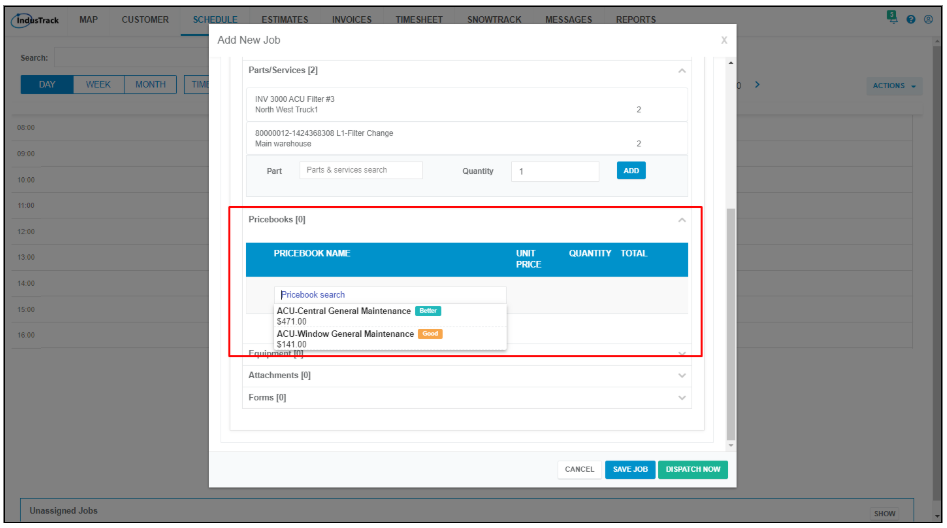
Price books – click on the chevron to expand the field. Click on the field and start typing either the name or code of the Pricebook item. Select the desired Pricebook item from the matching items and click Add. Leave this field empty if it does not apply. Items appearing in this section will appear as line items when the job is converted into an invoice.
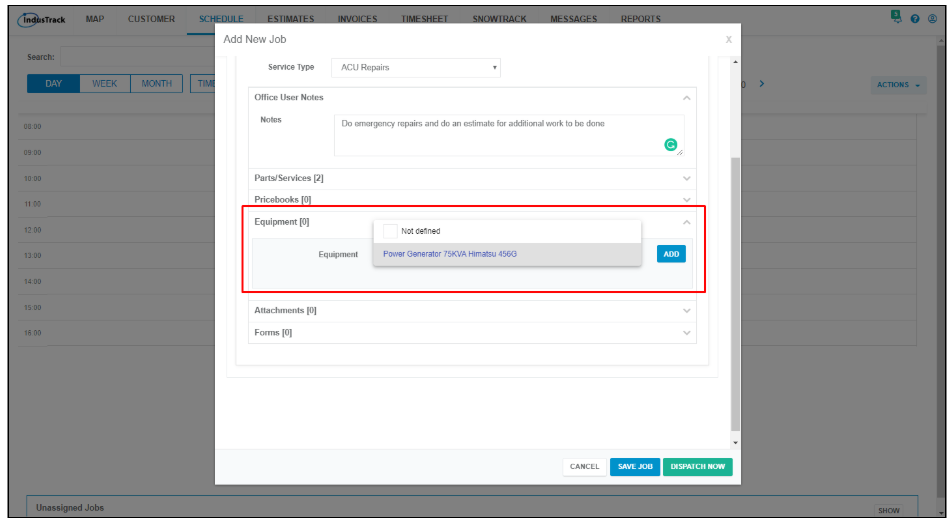
Equipment – Click on the chevron to expand the field. Search for and add the equipment to be used.
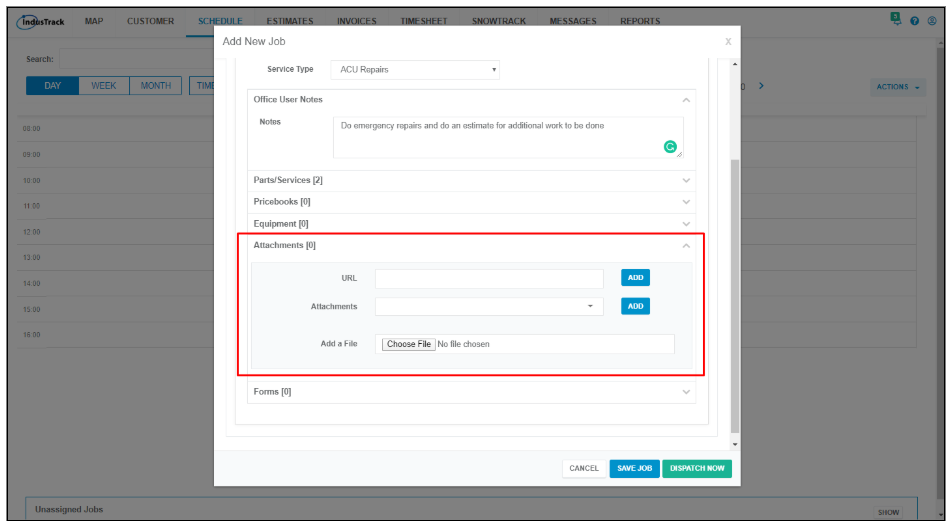
Attachment – Click on the chevron to expand the field. Add pictures, installation manuals, floor or electrical plans, or other relevant references. Either upload a file or enter a URL address that your filed employees will be able to click on to open the web page.
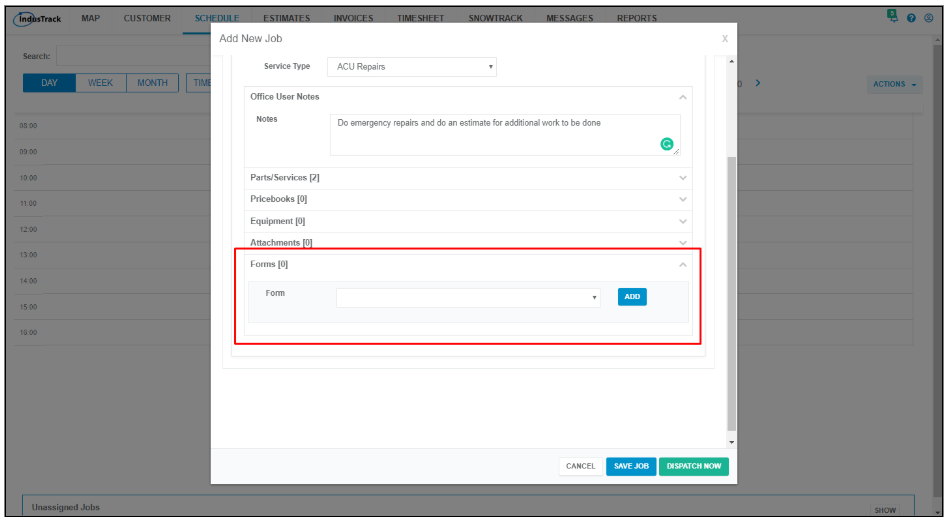
Forms – Add a form that has been set up in the system. If you had IndusTrack digitize any forms which need to be filled out or signed by the field employee or customer you can attach these under this section. Choose the desired form from the drop-down menu and click Add.
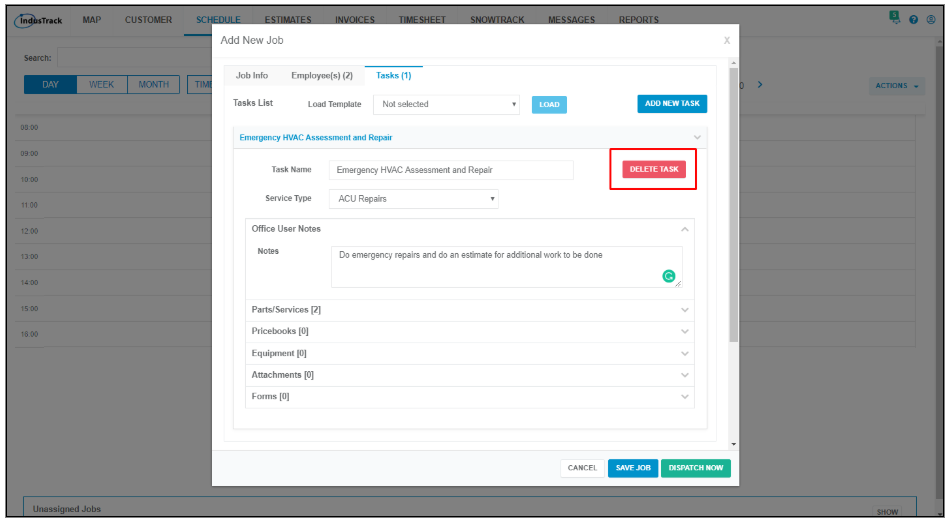
Delete a Task
- Click on the task to expand the details.
- Click the Delete Task button to the right of the task. If a task template has more than one task, each of these tasks can be deleted individually.
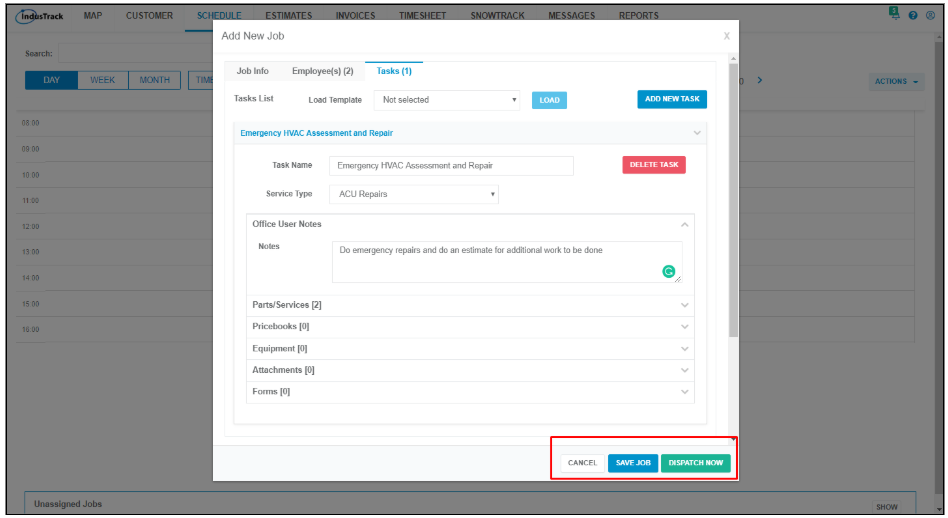
Save or Dispatch the Job
To send the job to your field employees in the field, click the Dispatch Now button. this will both save the job into the calendar and send it to the mobile devices of your field employees. If you want to save the job into the calendar or unassigned jobs but do not want it to be visible to your field employees, click the Save button.
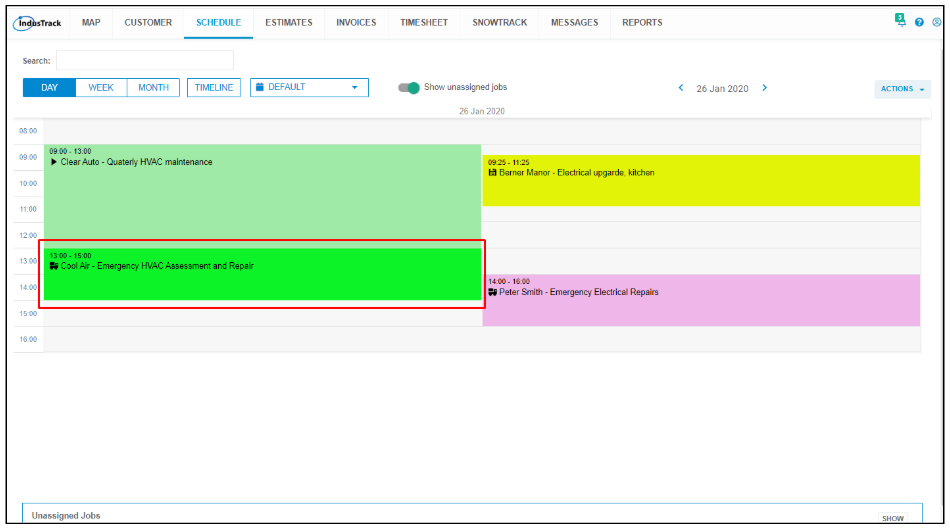
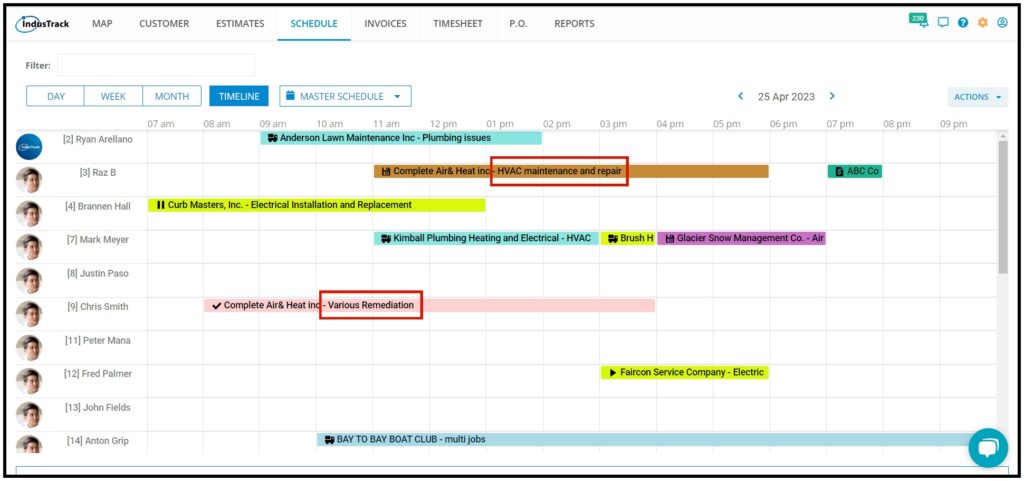
The job will be added to the calendar.