
Create an Invoice for Multiple Completed Jobs
In IndusTrack, there is an option to convert multiple completed jobs into a single invoice. This is useful if you do multiple jobs for a single customer during a billing cycle and would like to invoice them one time for all of it. For example, you performed a job for a customer for 3 days in a row. Instead of sending 3 invoices, one for each day, you can send a single invoice that will cover all three days.
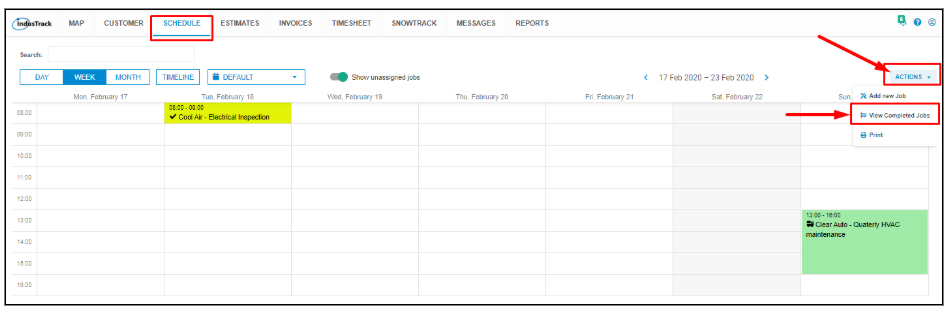
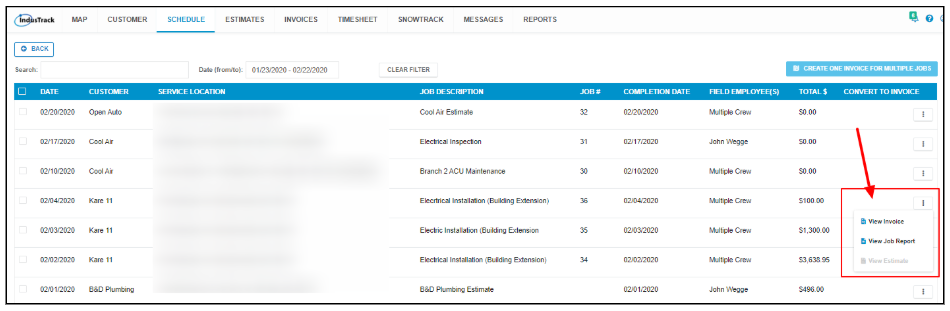
Access this feature from the Schedule Module. Go to the Actions button on the calendar page. Select View Completed Jobs.
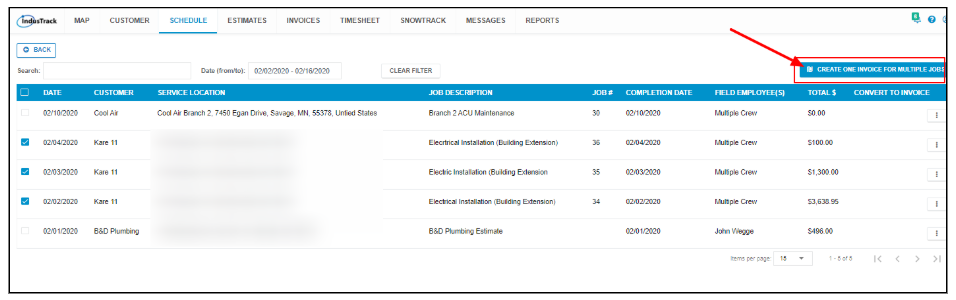
Use the search bar to bring up the jobs for the customer. You can also use the date filter to narrow down the list.

Tick the checkbox to the left of the jobs to be converted into an invoice. All selected jobs must be from the same customer.

Click Create One Invoice for Multiple Jobs at the upper right-hand corner of the page.
The successful conversion of the jobs to an invoice will come up at the lower right-hand corner of the screen.

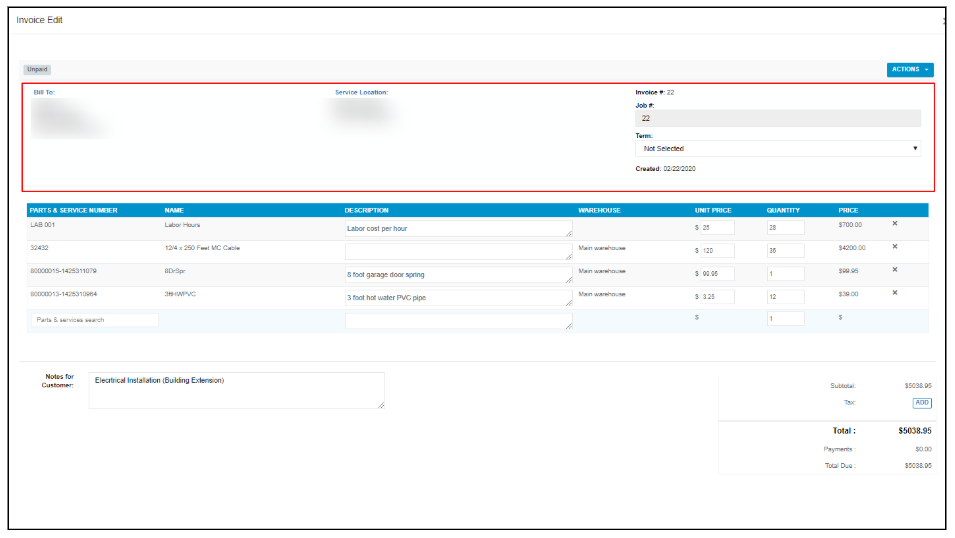
The created invoice will open.
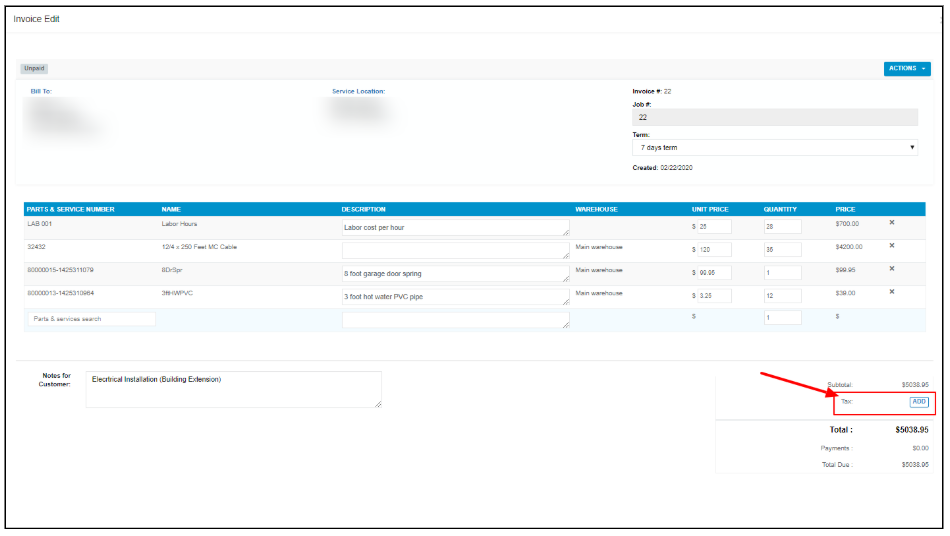
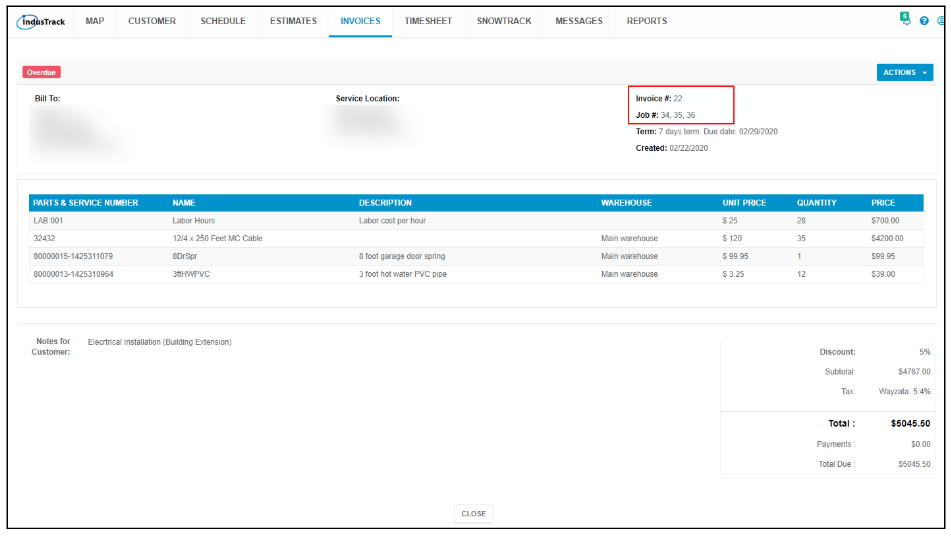
The Invoice number, if auto-increment is set up, will be indicated on the Invoice. The job number, and customer details, including the terms of payment, will also be indicated.
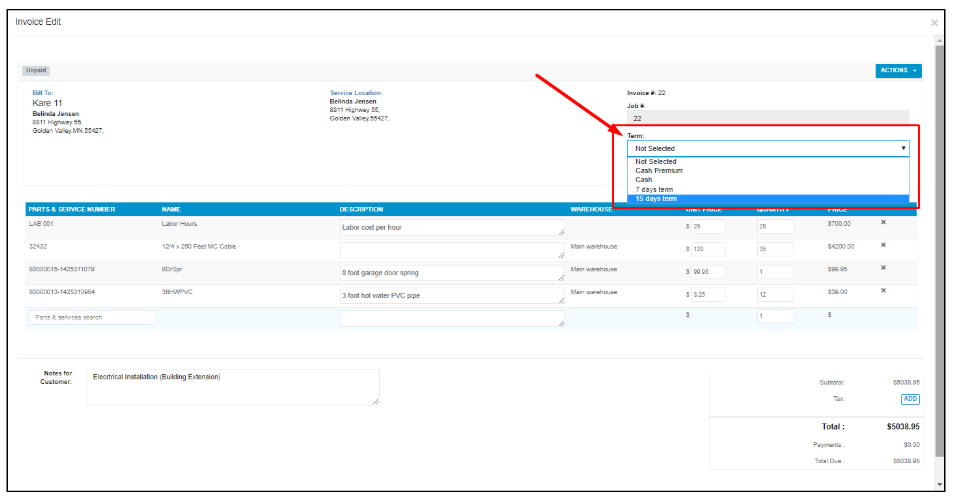
If the Terms of Payment has not been set up for the client or you want to apply a different one, click the arrow down and select from the list.
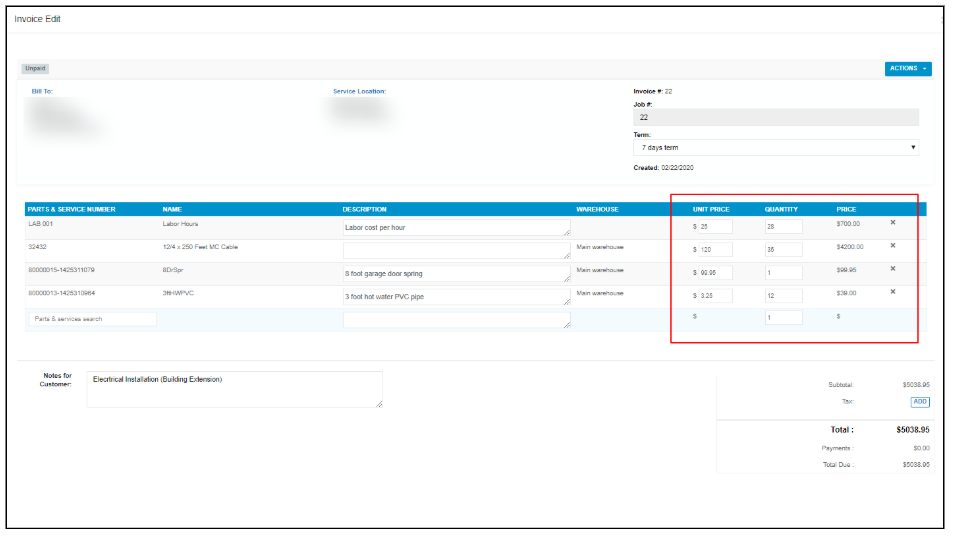
The job details such as the materials, services, and labor will also be indicated as line items on the invoice.
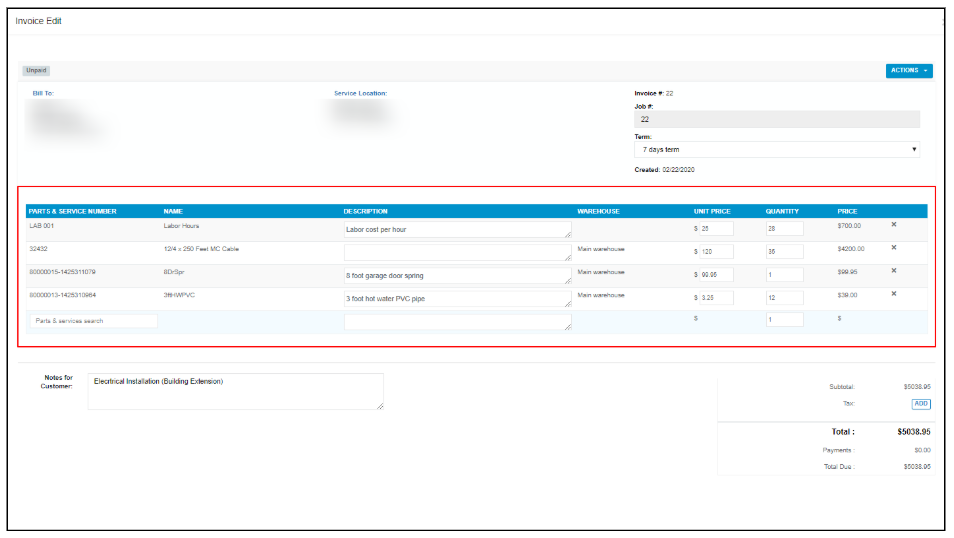
The job details of all the selected jobs will be summarized. The quantity of the parts that are common to the jobs will be added together. Each part or service will appear in only one line item on the invoice.
The job details can be edited or deleted. You can also add more to it. To learn how to do this, refer to Creating Invoices. The process is the same even if the job details were summarized into one invoice.
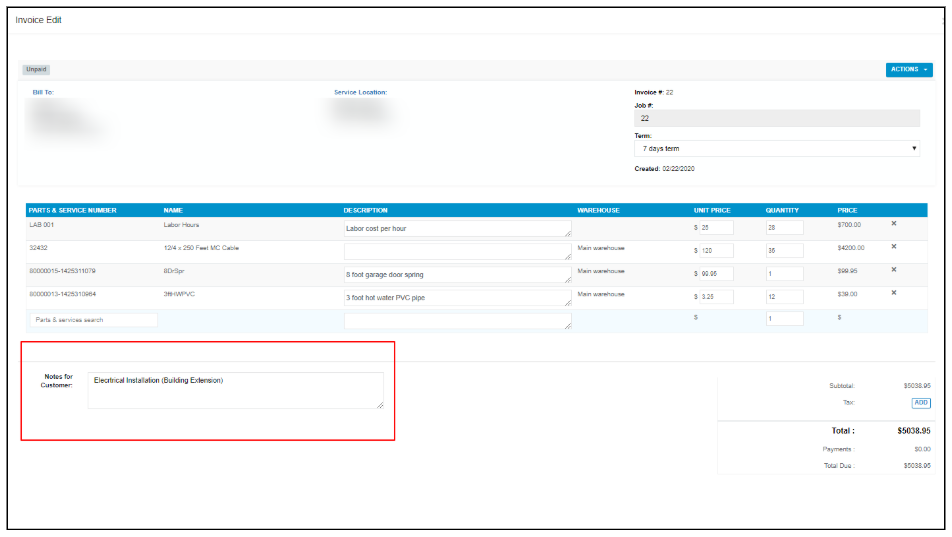
Any notes that have been added to the jobs will also be reflected on the invoice. You can edit or delete the notes or add a new one.
If the tax rate has been set up for the customer, this will already be on the invoice. If not, you will have to add the applicable tax rates. If necessary, you can also revise the tax rate indicated.
Tax Rates are set up under Company Settings. The Tax Rate applicable for a specific customer is assigned when their profile is created under the Customer Module.
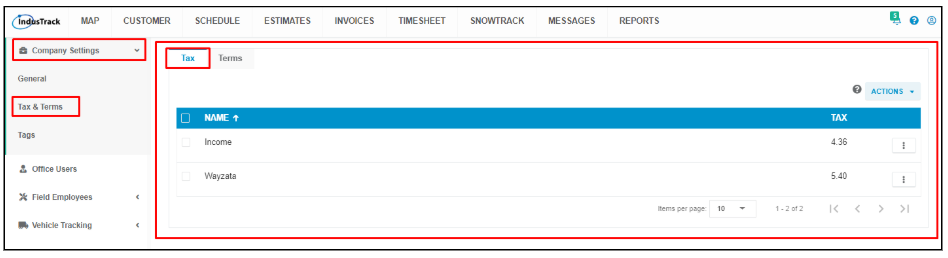

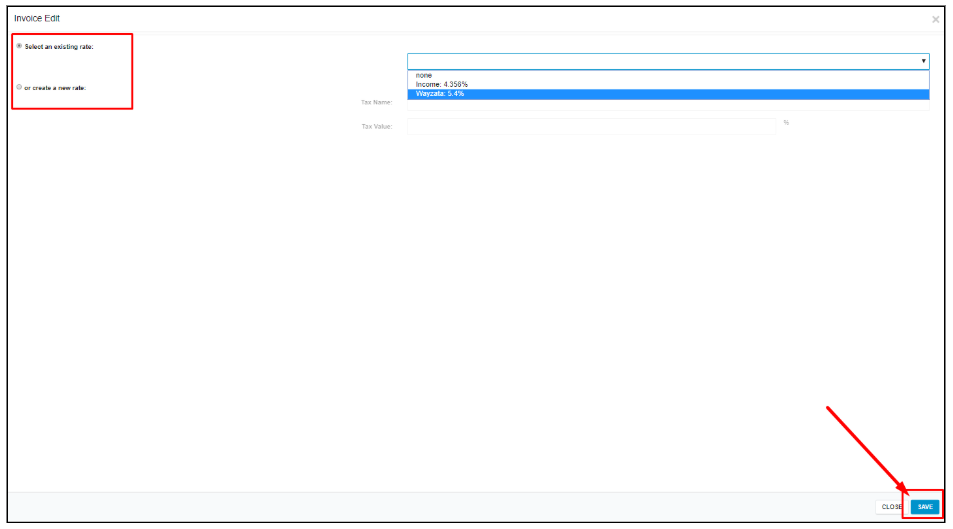
If no tax rate is set up, click Add on the tax field. If this is already set up but you want to revise it, click the tax rate on the tax field.
You can create a new tax rate or choose from a list of existing tax rates from the drop-down. Save the tax rate at the bottom once done.
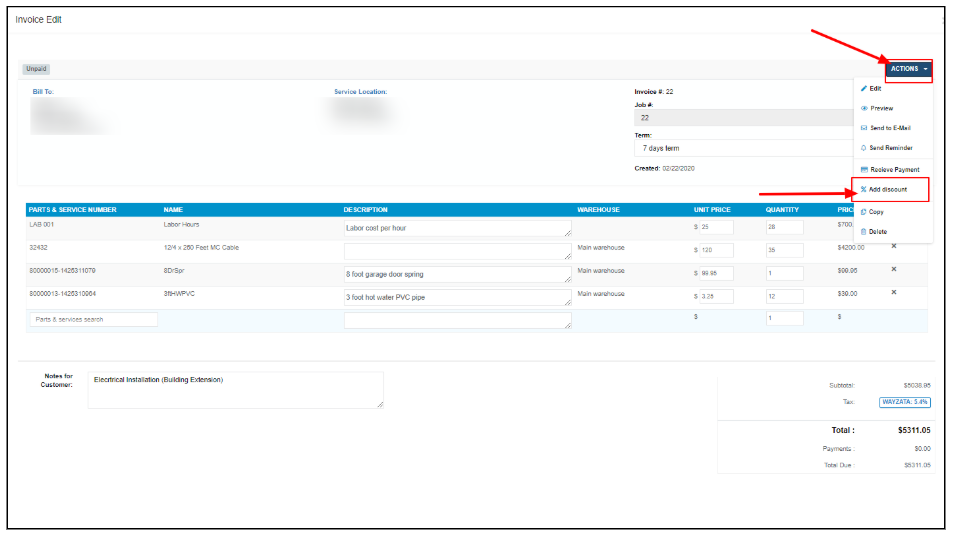
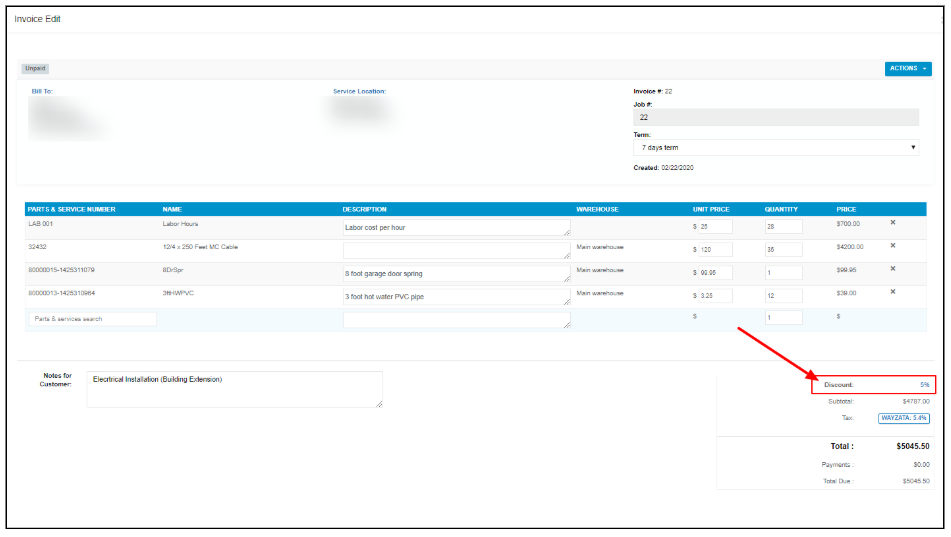
To add a discount, go to the Actions button and select Add Discount.
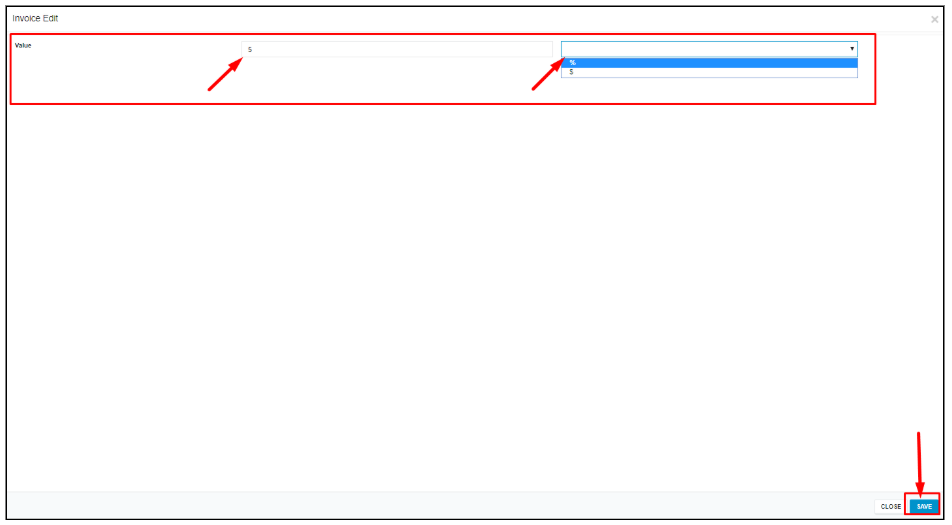
On the discount page, enter the value of the discount. Indicate if the entered value is a dollar amount or a percentage discount. Select from the drop-down and Save the discount.
The Discount field will be added to the invoice.
If you need to further manage the invoice, go to the Actions button and select the option from there. Refer to Manage Invoices for the procedures.

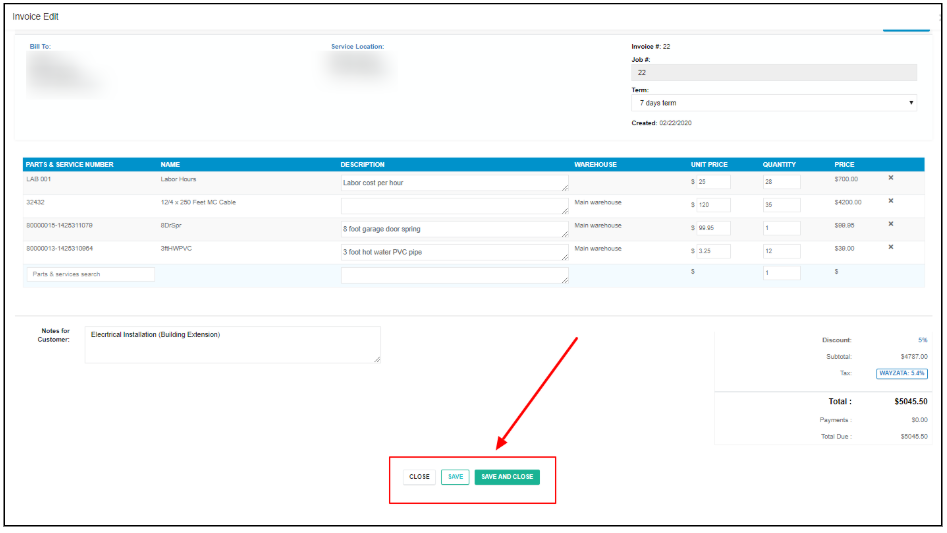
Click the Save button to save the new invoice. The invoice will remain open and you can continue working on it. To save and exit the invoice click the Save and Close button.
You have now created an invoice from multiple completed jobs for a customer.
Updated Lists
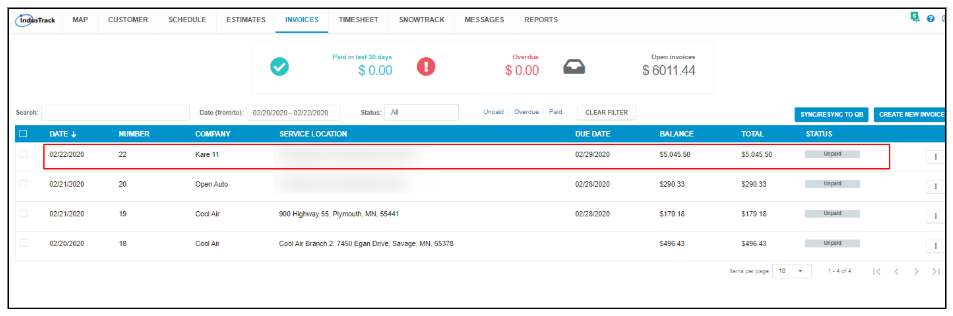
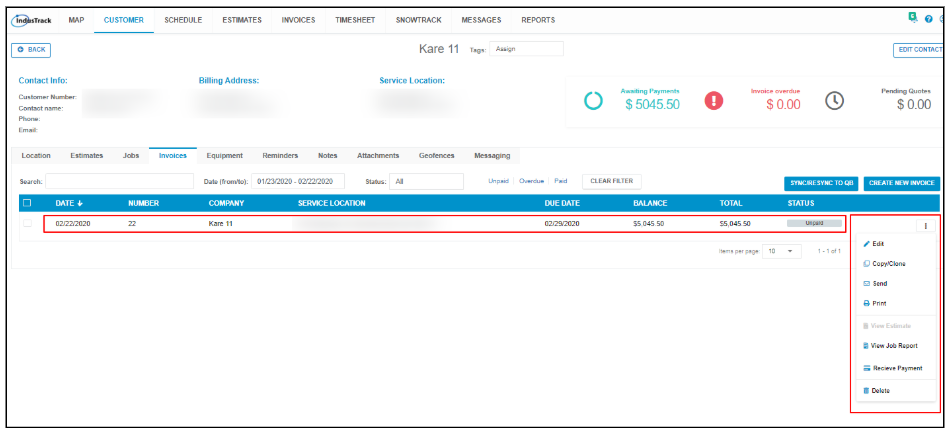
The new invoice will be added to the Invoice List at the Invoices Module. You can further Manage the Invoice from here.
From the Completed Jobs Report on the Schedule Module, clicking on the 3-dot menu to the right of the jobs will now show View Invoice instead of Convert to Invoice. Click on the link and the Invoice Edit window will come up. You can Manage the Invoice from here.
The customer’s profile will also be updated. The new invoice will be added to their Invoice list found at the Invoices tab. You can Manage the Invoice from this tab.
In the Jobs tab, you can view the invoice from each of the converted jobs.
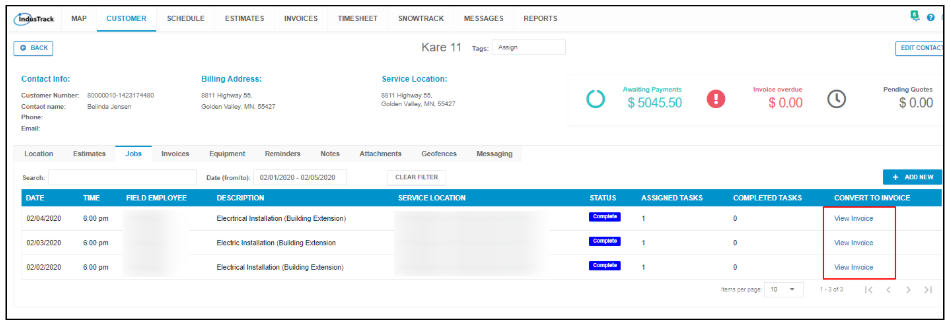
Click on the link and the Invoice Edit window will come up. You can Manage the Invoice from here.
