
Mobile Inventory
The Mobile Inventory module allows users to locate Parts that are available in warehouses that are near their location. It is helpful in situations where the parts you need for the job are not in your vehicle.
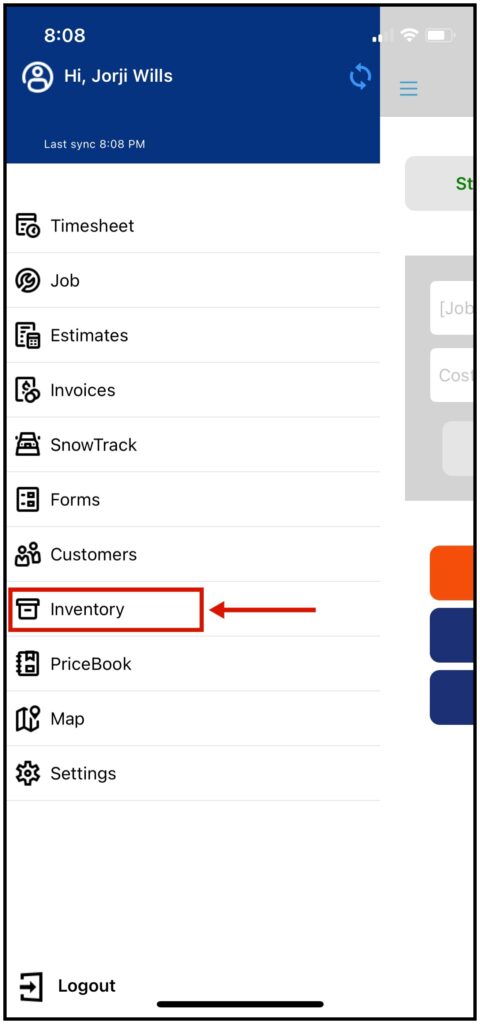
Locating the Inventory Module
Tap on the three bars located in the upper left corner of the page. It will load the dashboard, and select Inventory.
Search the Inventory
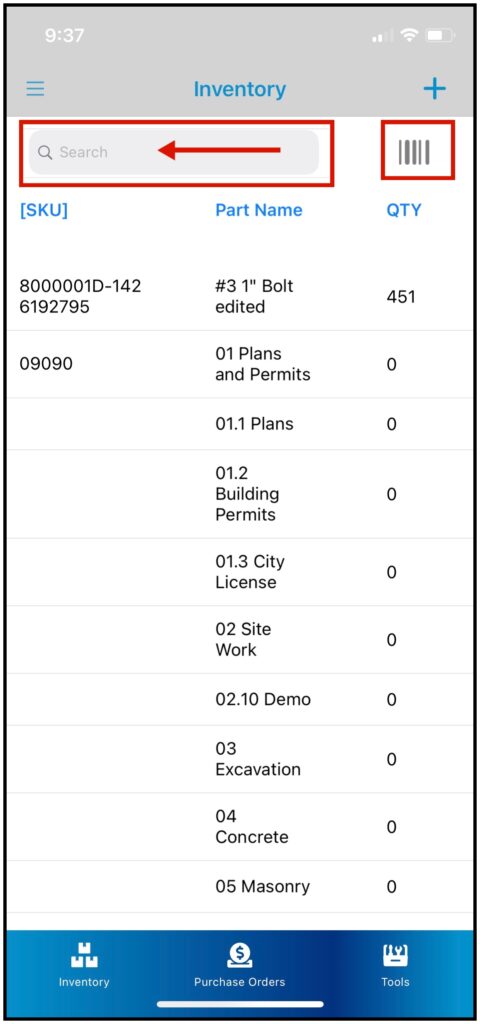
Once you get to the Inventory Page, find the parts you need by using the search field or by scrolling down manually on the listed parts.
Use the Barcode Icon to Scan Inventory parts.
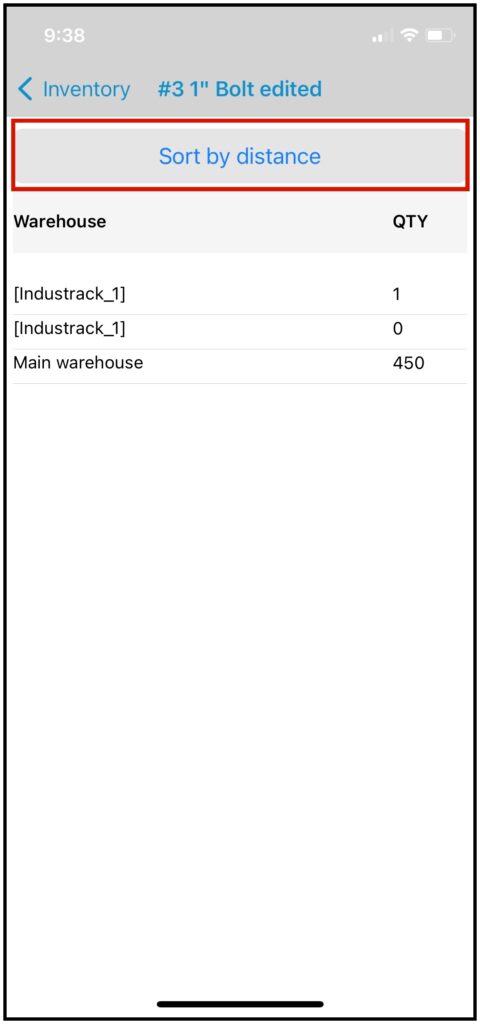
If the part is available on the list, tap on it and it will take you to the Part Details Page. It will give you a list of warehouses where the part is available.
You can use the Sort by Distance button for you to find the nearest warehouse at your current location. The top on the list is closest to you.
Adding Parts on the Inventory
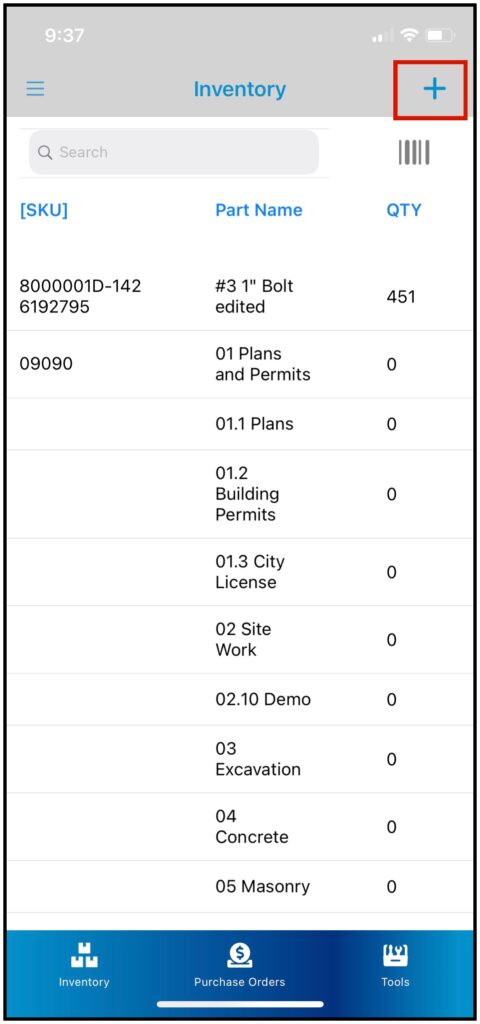
This module also allows you to add Parts to the inventory manually. Just tap on the Add / + button in the upper right corner of the page.
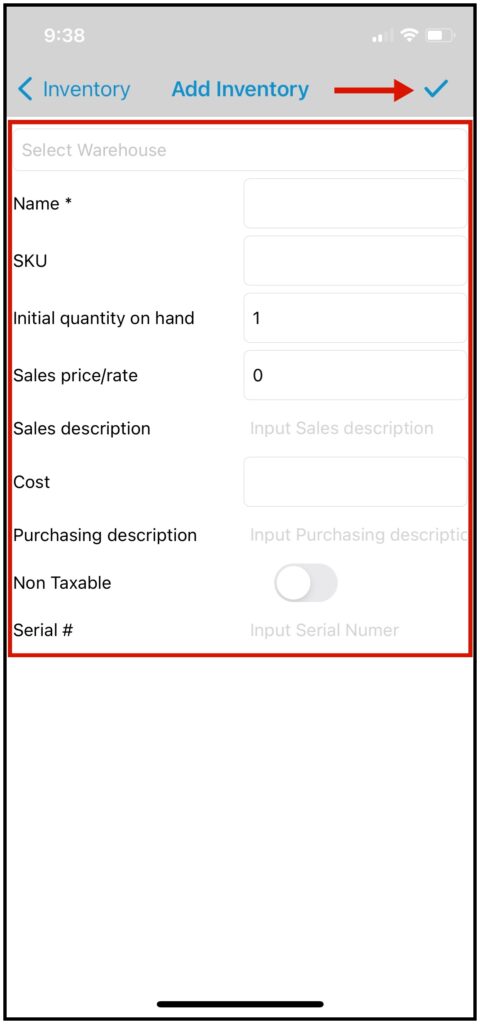
It will take you to the Add Inventory Page.
Select a warehouse by tapping Select Warehouse. Please fill out the form. The Name field is required. Other fields such as Initial Quantity on Hand, Sales Price, and Cost should also be filled out because it can help with the Estimates report and Job Tasks.
To finalize everything, hit the Check button in the upper right corner to save the inventory.
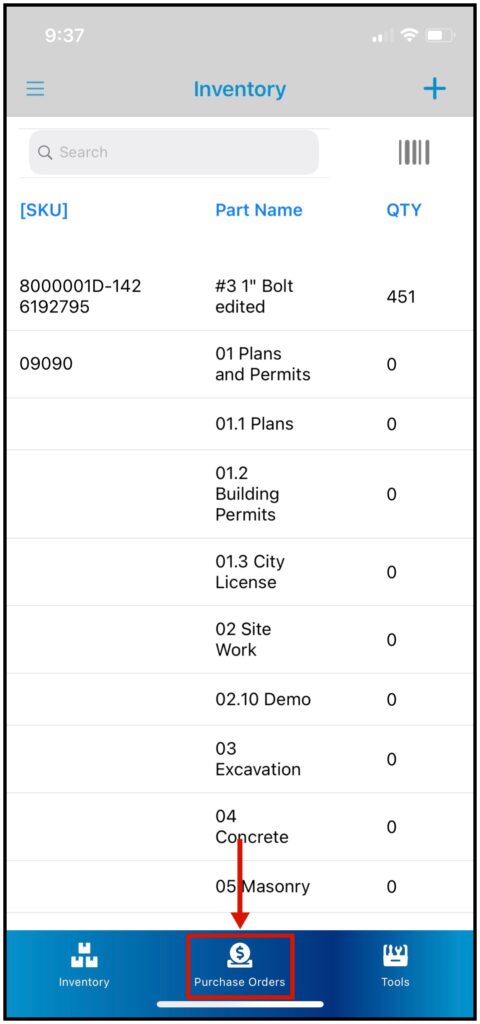
Purchase Orders
Click on Purchase Orders to view all existing purchase orders.
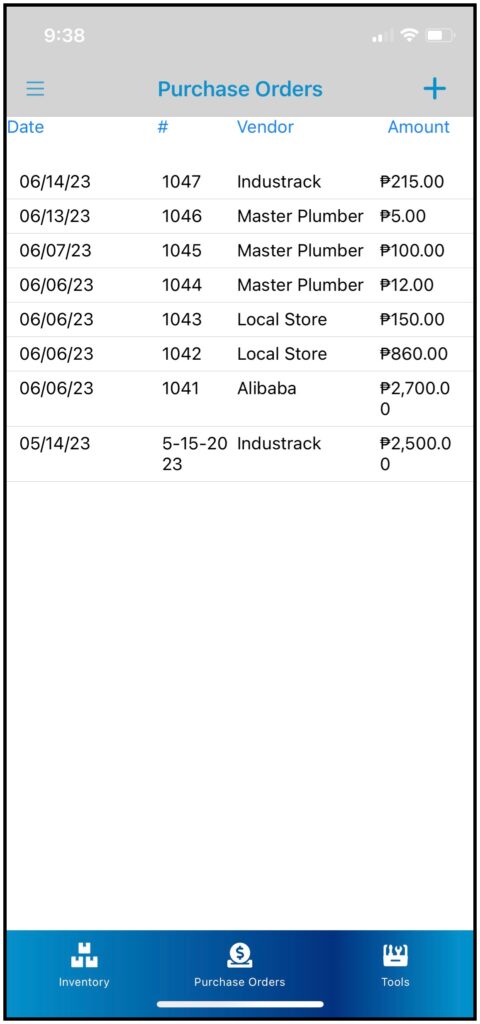
Purchase Order
Click on Purchase Orders to view all existing purchase orders. Select one of the existing purchase orders to view and edit.
Purchase Order
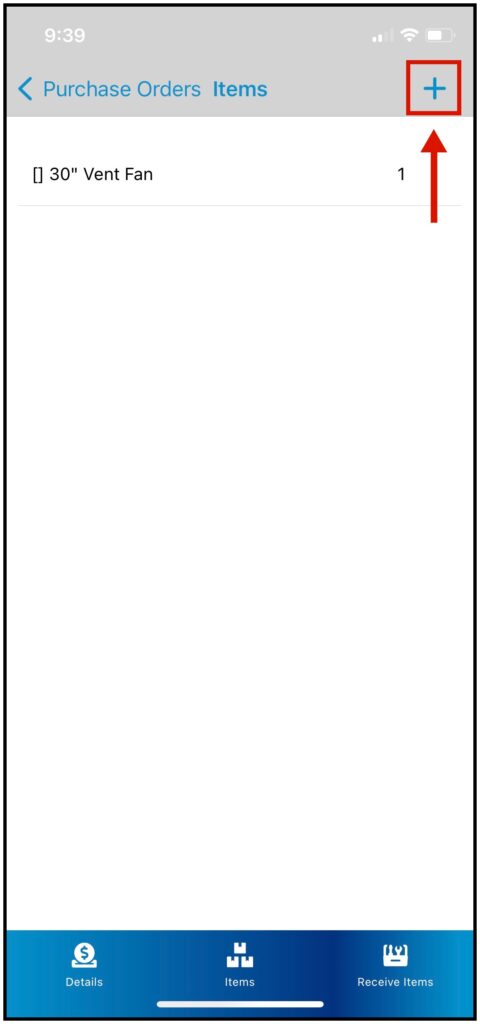
After clicking an existing purchase order, it will show you the list of all items that were added to the purchase order.
Click on the Plus Icon to add a new item/s.
Add Items to Purchase Order
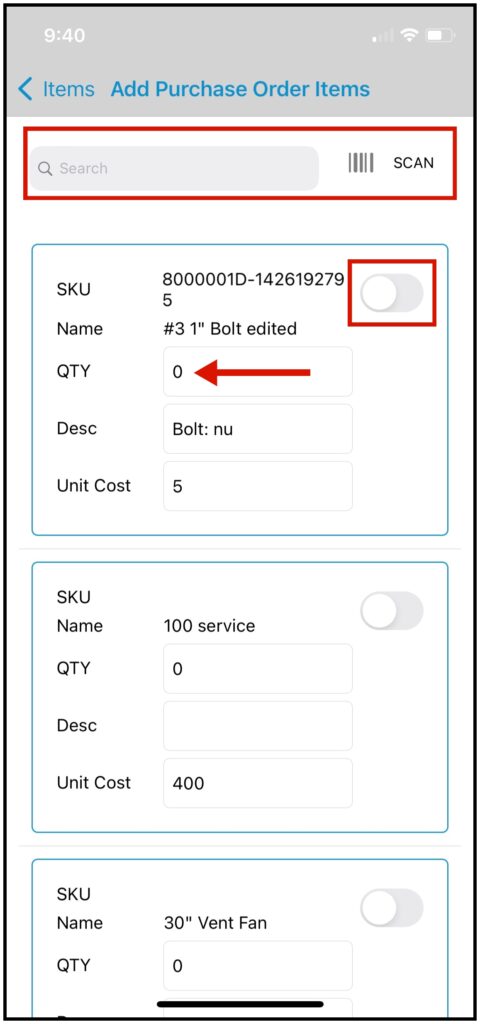
After clicking on the Plus Icon, it will redirect you to this page where you will be able to see the inventory items list.
Search in the search bar or scan using a barcode to look for an item you want to add to the purchase order.
To add the Item/s, add a quantity and enable the toggle button.
Tap the back to Items List, you will see that the newly added item/s are added to the purchase order.
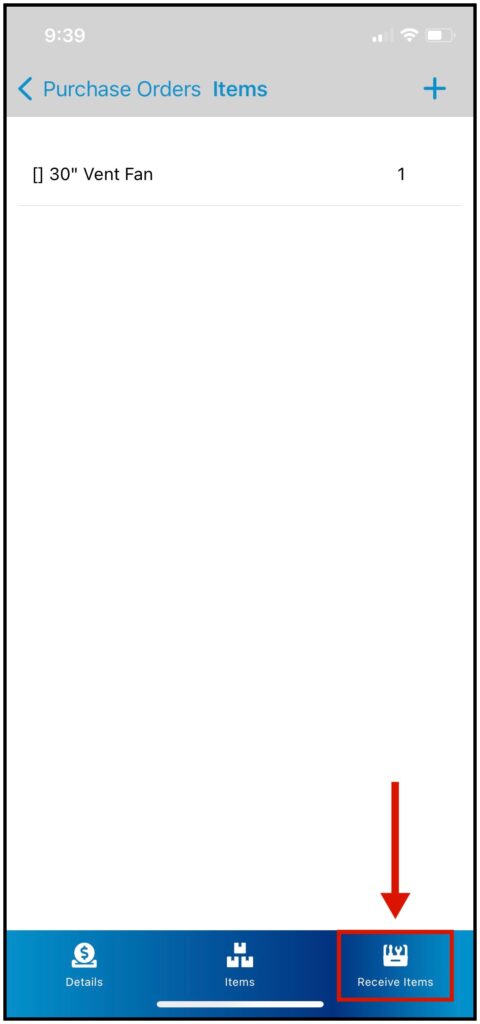
Back in the Items List, once you are done adding new items to the purchase order click on Receive Items to receive the inventory.
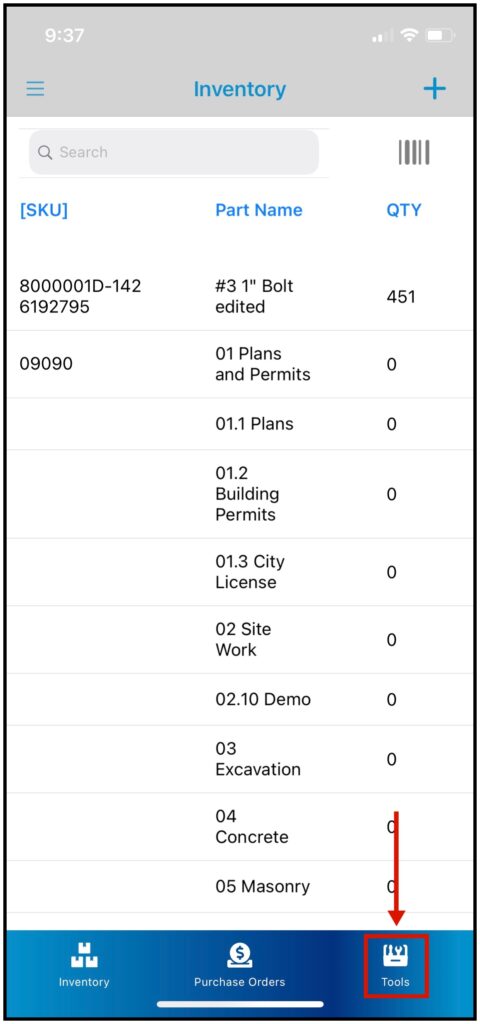
Tools Inventory
Click on Tools to view all the Tools Inventory List.
Tools Inventory
Tools are used when techs are doing or on a job, Tools are added by the office user once they dispatch a job for the tech. Techs will also have an option to add a tool to the job.
Once the tech is done using the tool/s, they can check it in back to the inventory. This will track and show in the report which employee used the tool/s.
Click on Tools to view all the Tools Inventory List.
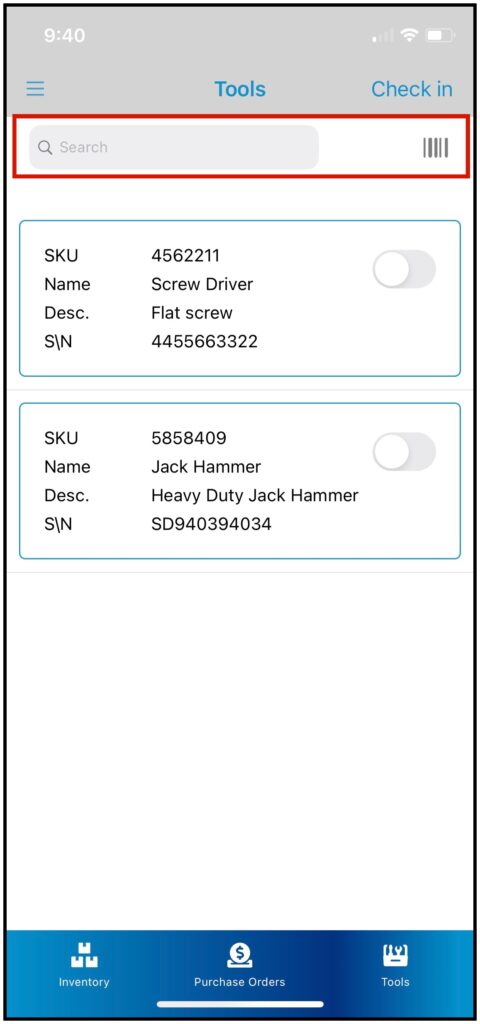
On the Tools Page, it will show you the list of all Tools Inventory.
Search by the search bar or use the barcode icon to search for a tool.
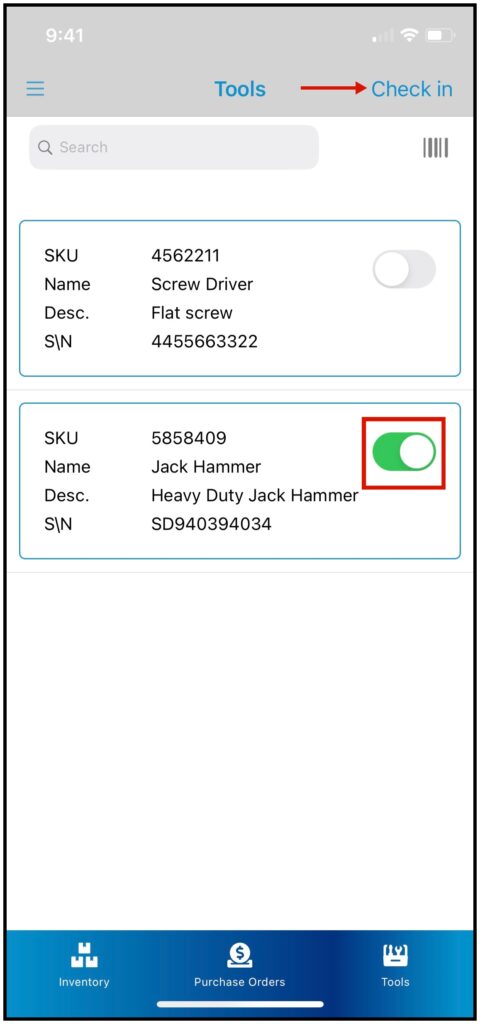
Check-in Tools
After using the tool on a job, check in back the tools to the inventory.
Click on the Toggle Icon and click on Check-in.
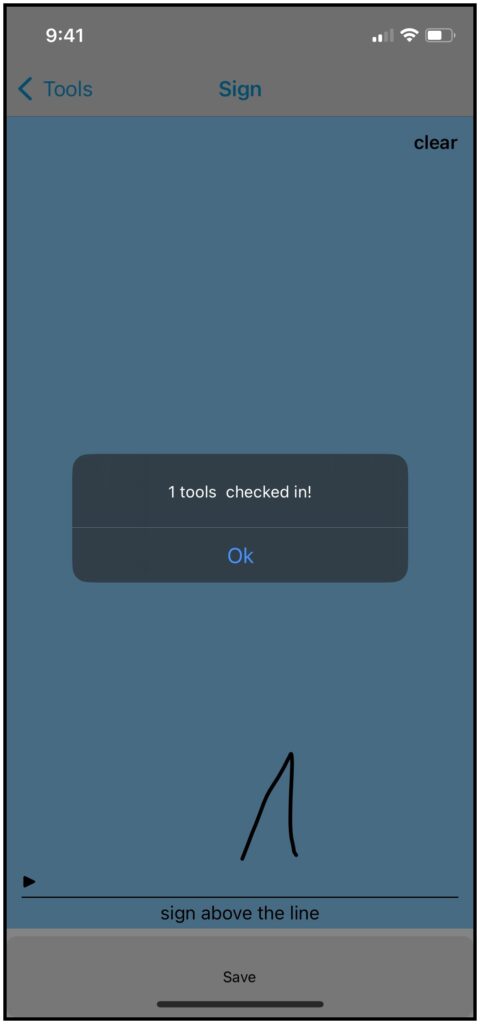
A Signature Pad will pop up, input your signature so the office user will know who checked in the tool/s.
Click on Save after signing, and a notification will pop up that you’ve checked in x number of tools.