
Pricebook Categories
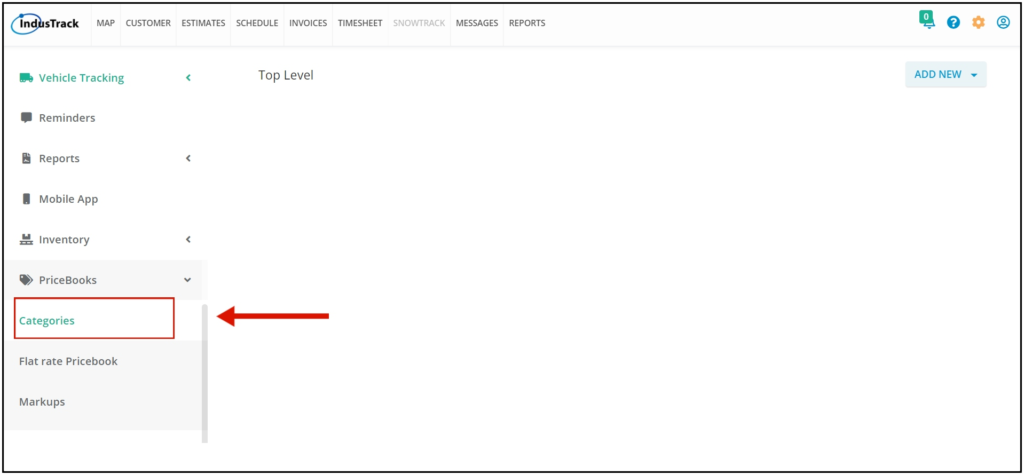
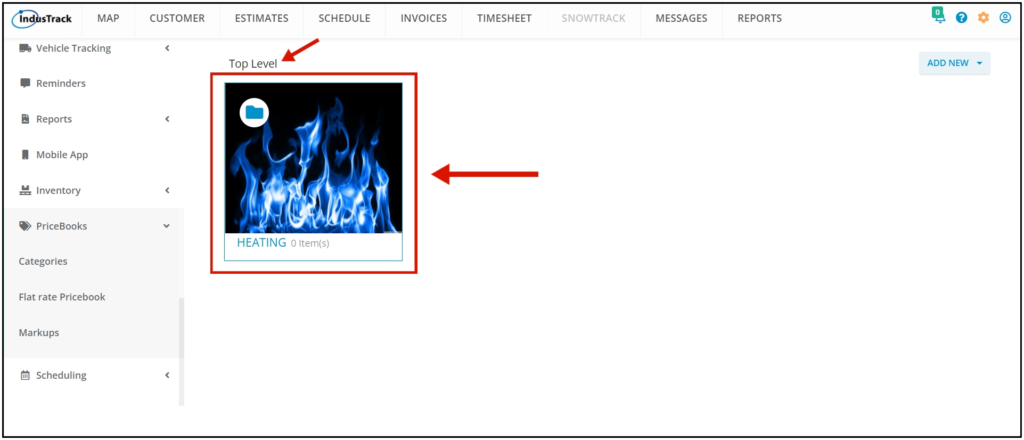
PriceBooks items are grouped into categories. To access the categories page go to Settings > PriceBooks > Categories. This opens the Top Level of the PriceBook.
Category Top Level View
You will be able to see here in the Top-level all the main Pricebook Categories.
Create Pricebook Category
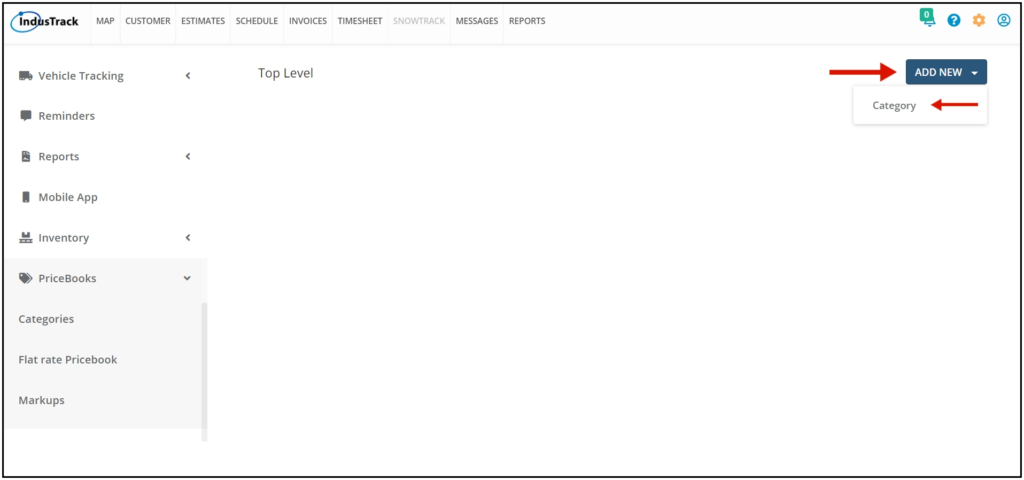
1. Click the Add New button at the upper right-hand corner and on the drop-down, select Category to add/create a new category.
2. After clicking on Add new Category, an Add Category window will pop up. Give the category a name (Note that category name is required). You can also add a Category Image (optional).
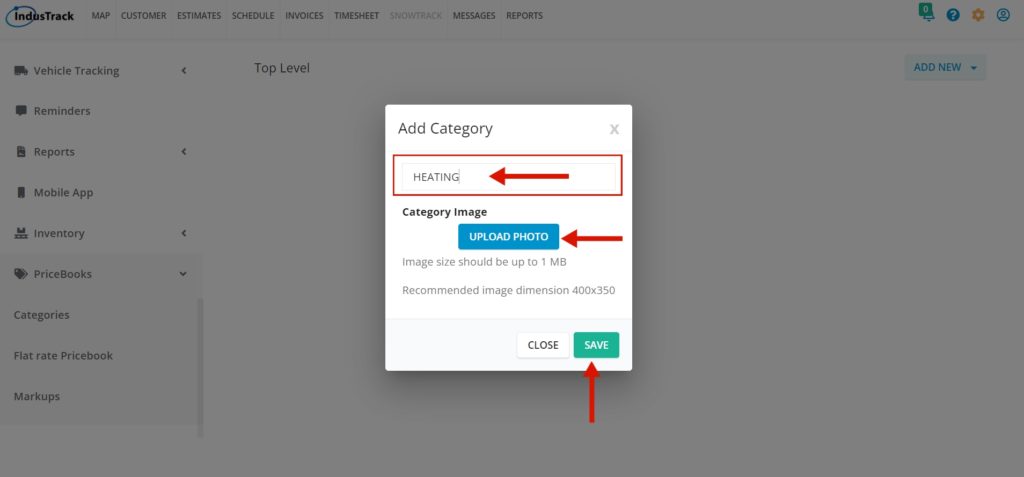
- Click on the Upload Photo button on the Category Image field.
- Upload Photo from your computer file.
- Image size should be up to 1mb only, with dimensions of 400×350 (recommended). The image will not upload if it is bigger than 1MB.
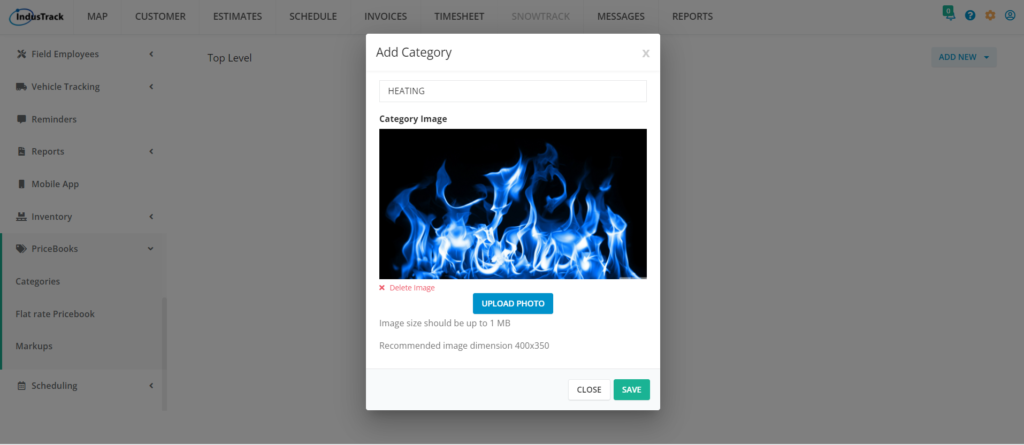
3. Now that we gave the category a Name and uploaded a Photo, Click SAVE
4. After saving the main category we created, you can see that it has been added to the list of categories that are located in the Top Level of the PriceBook. You will be able to see all Main Categories at the Top Level.
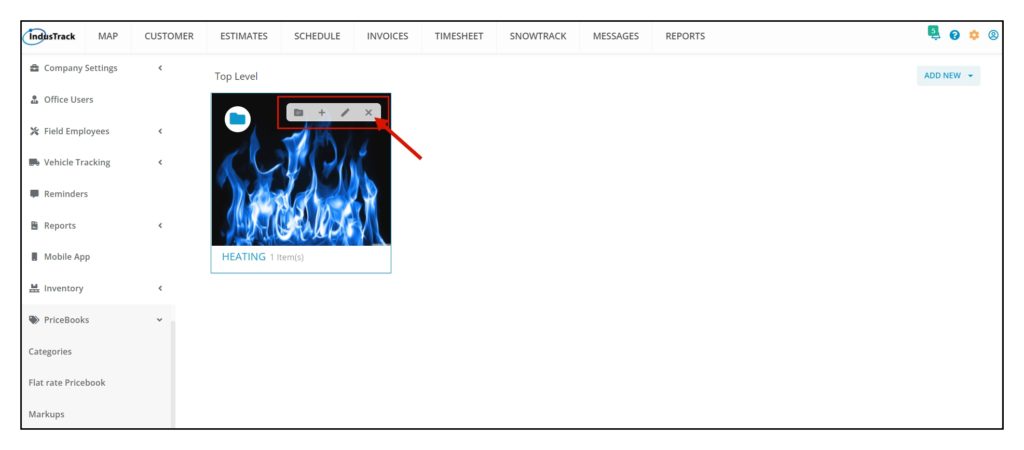
Edit or Delete a Category
Hover your mouse over the main Category box. You will see four different Icons.
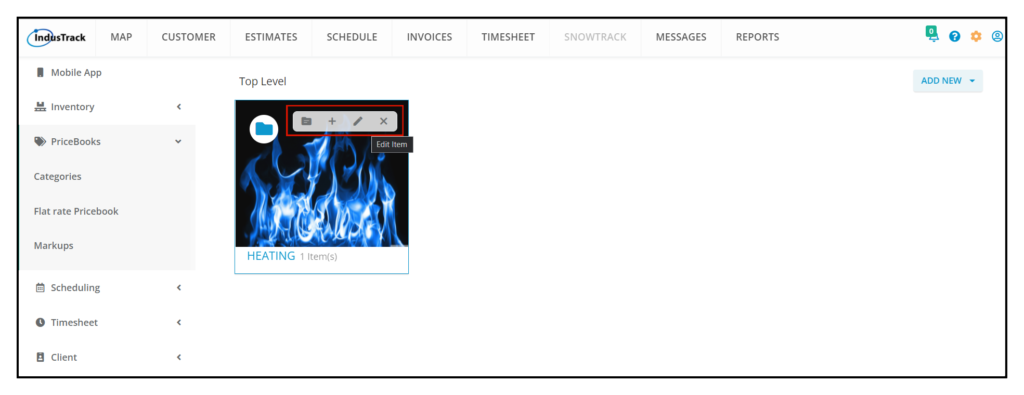
- To Edit the Category, click on the Pencil Icon. It will allow you to edit the Category Name and Category Photo.
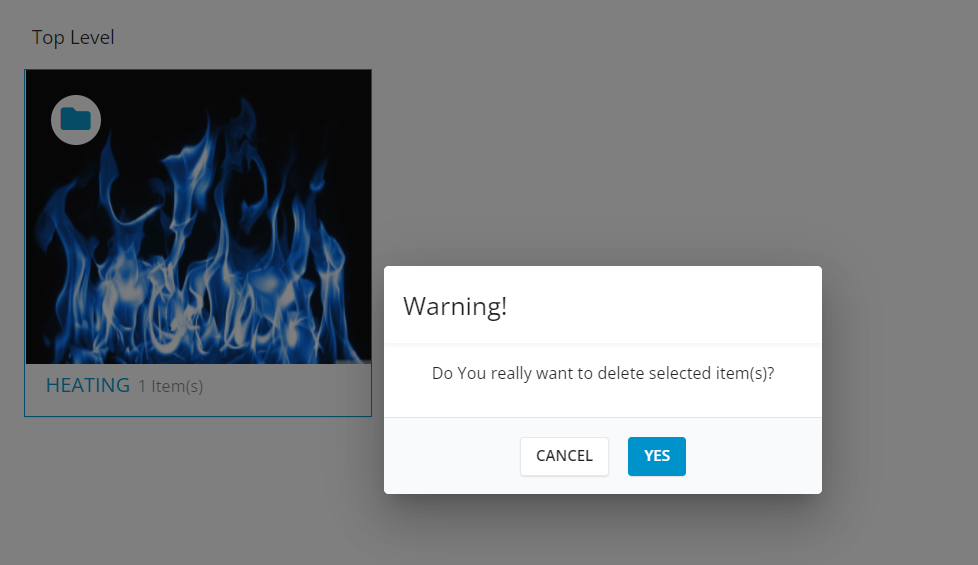
2. To Delete Category, click on the X Icon.
- A window will pop up and will warn you that you are about to delete a category. Click the Yes button to continue and Cancel to cancel the action.
3. To add Flat Rate into this Category, click on the Folder Icon.
- An add Assembly window will pop up, create an assembly name and add inventory items, services, and equipment. To know more about creating assemblies click Here.
4. To add a subcategory for this main category, click on the Plus Icon. An add Category window will pop up, give the category a name and upload a photo if necessary and click on Save.