
Assemblies
An assembly is a bundle of service(s), inventory, and/or non-inventory items packaged together. This could be for services frequently rendered or can also be created for special deals or promotions.
If you have standard services that contain multiple inventories, non-inventory, or service items, create assemblies to make adding them to estimates and invoices easier.
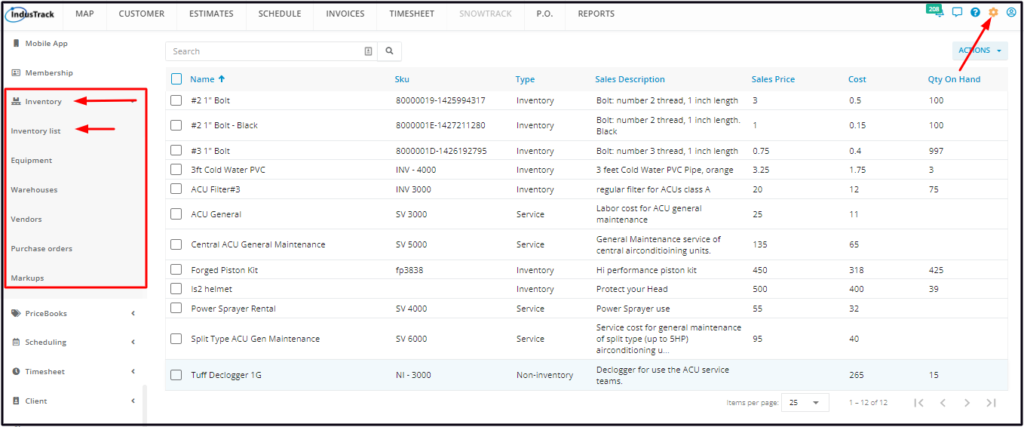
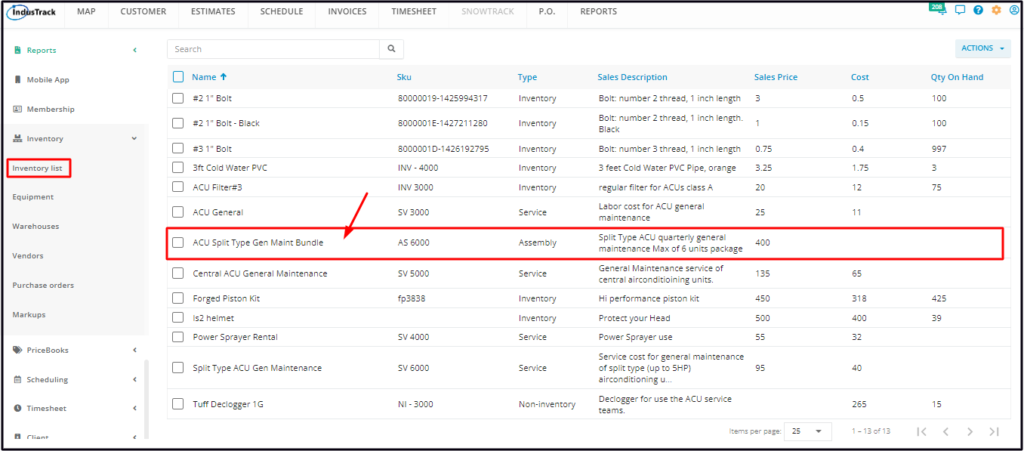
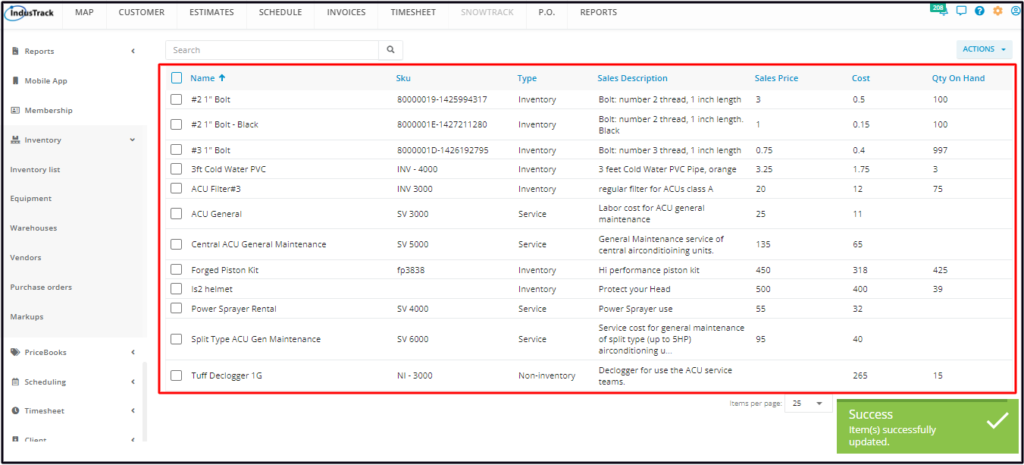
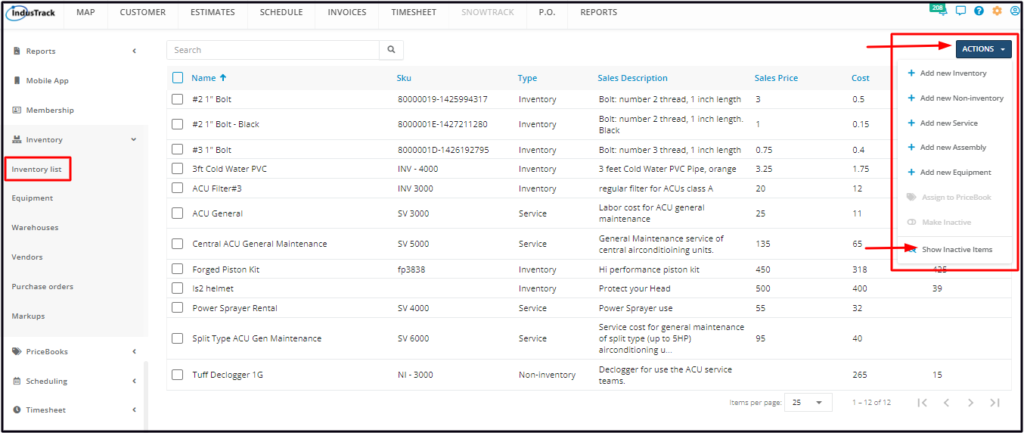
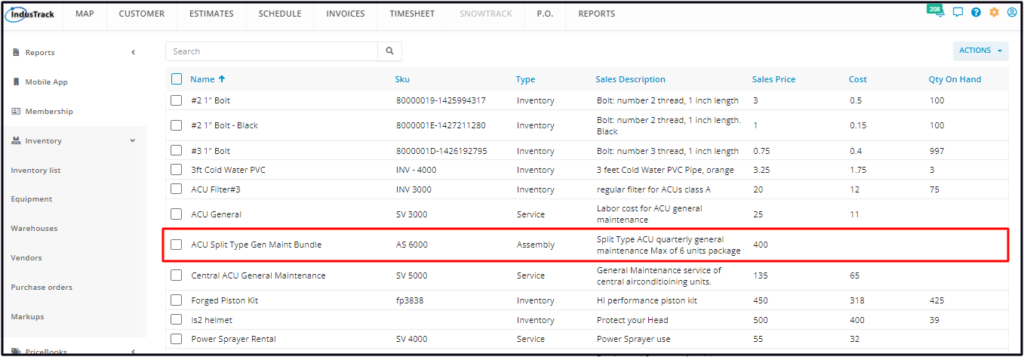
To create and manage Assemblies, go to Settings > Inventory > Inventory List.
Set Up a New Assembly
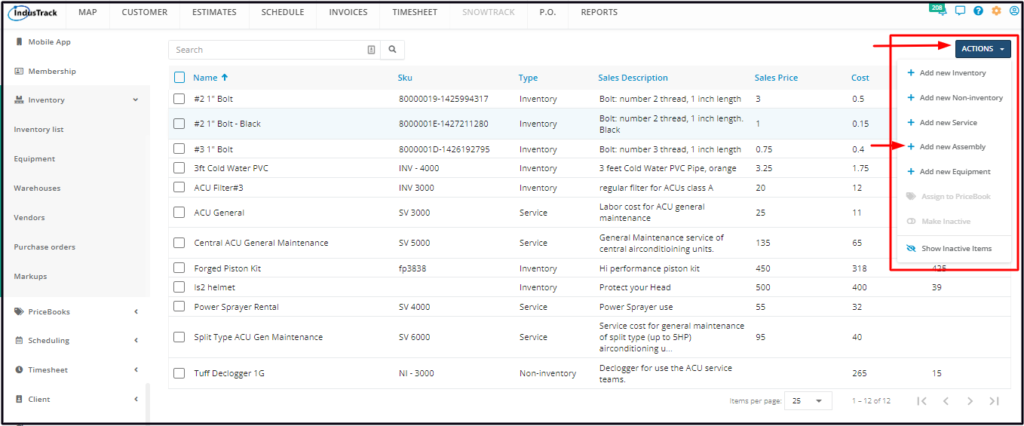
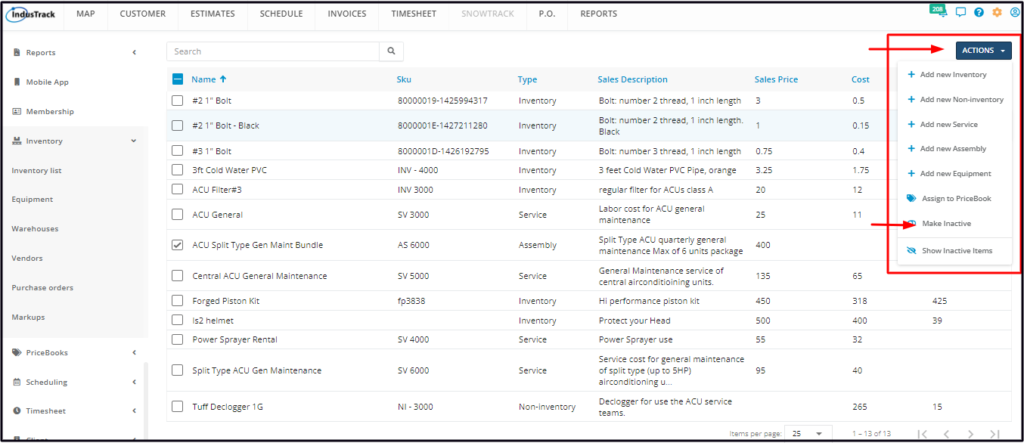
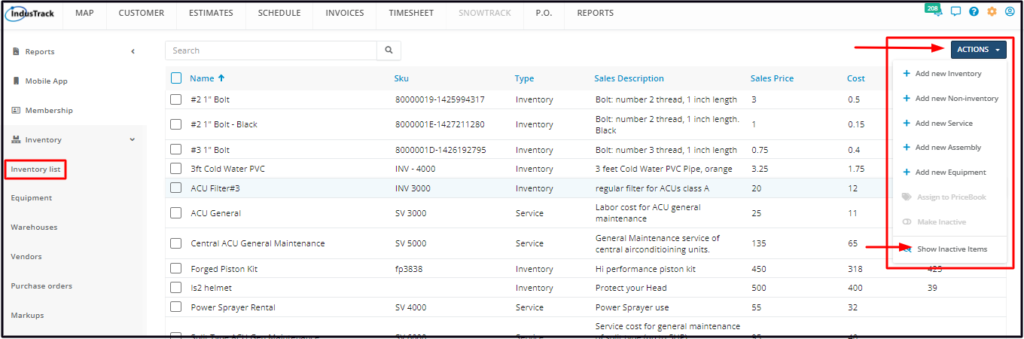
From the Inventory List page, click on the Actions button and select + Add new Assembly.
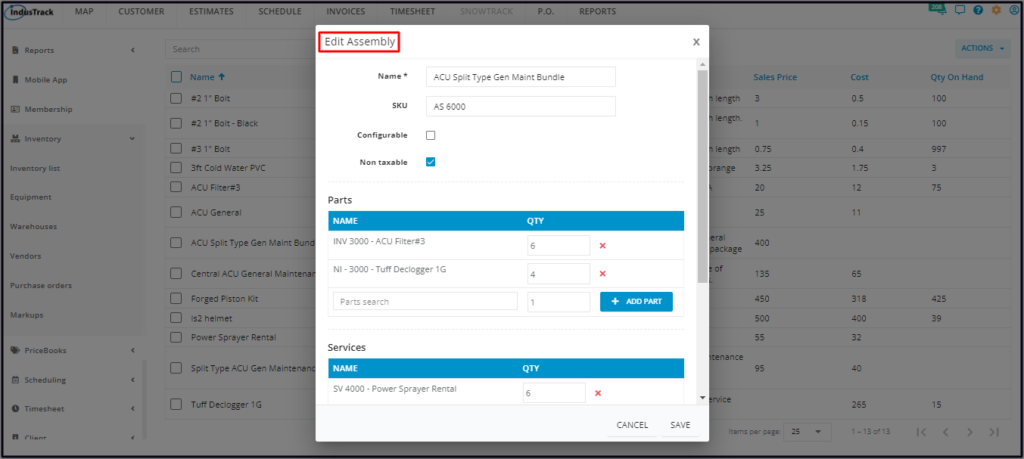
Fill in the item details on the Add Assembly window. Fields with (*) are required.
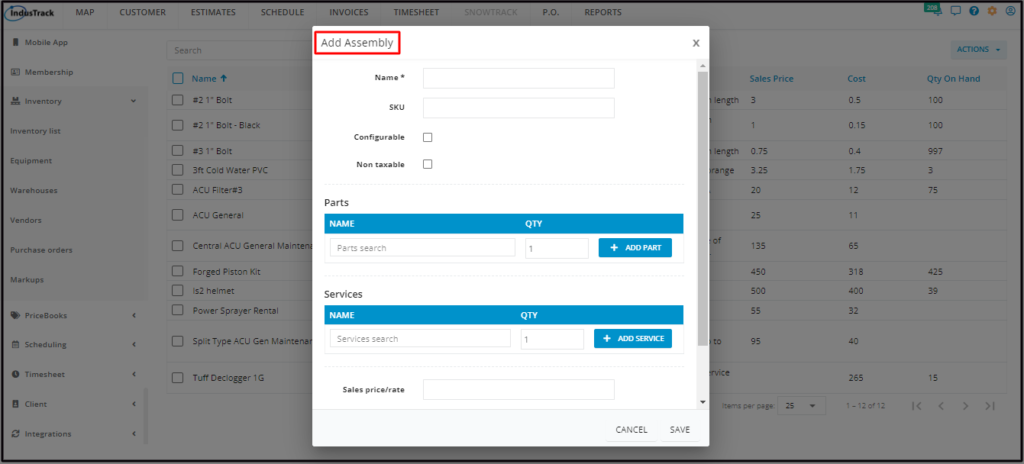
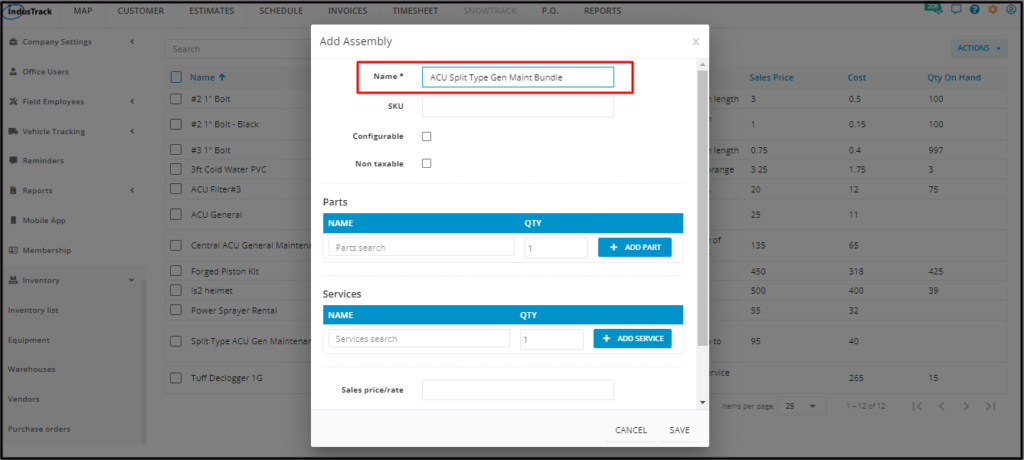
Name*
- Key in the name of the assembly/bundle/package.
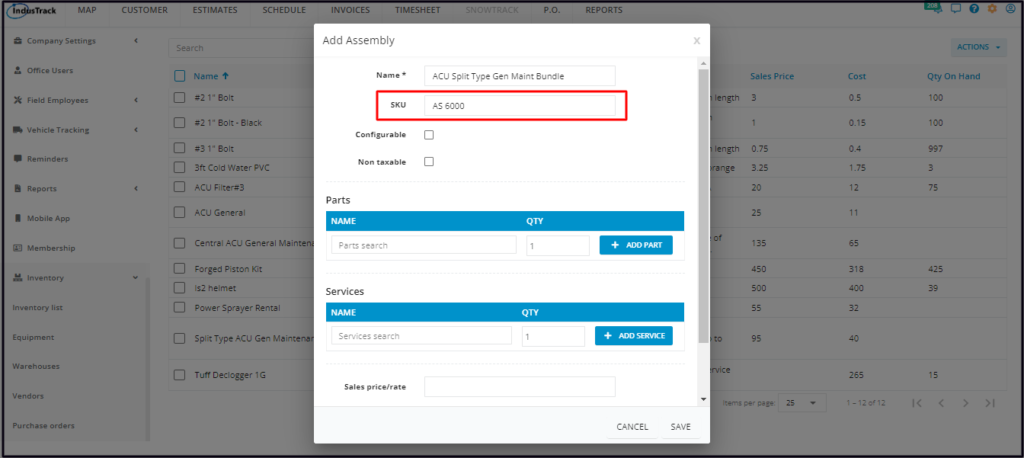
SKU
- Key in the item’s assigned assembly code.
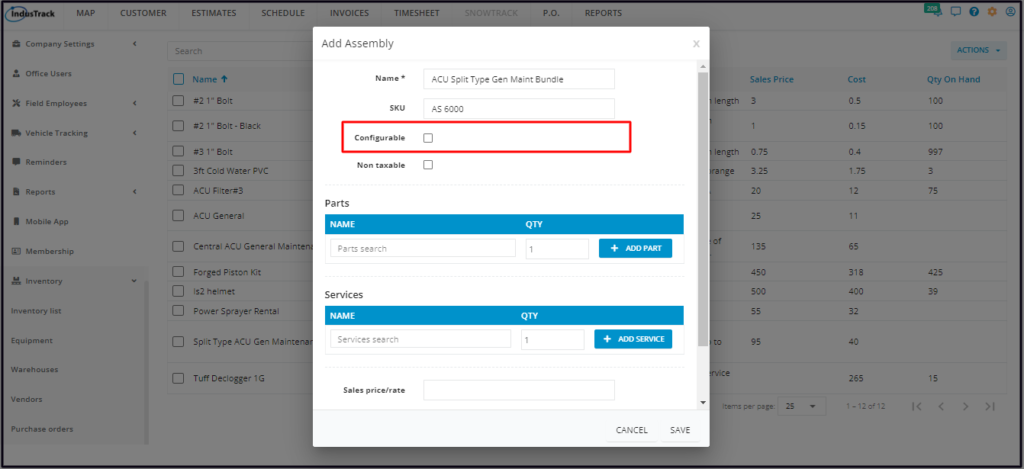
Configurable
- Tick the checkbox to create an Assembly that does not have a Sales Price/Rate. This will allow you to set prices when Estimates or Invoices are created. Leave the checkbox empty to set a standard price for the assembly.
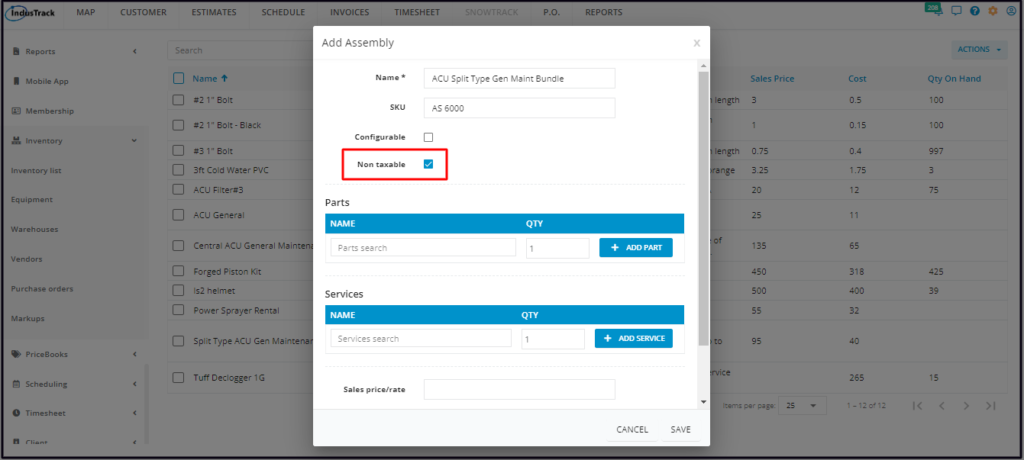
Non taxable
- If the assembly is not taxable, tick the checkbox. But if it is, leave the checkbox empty.
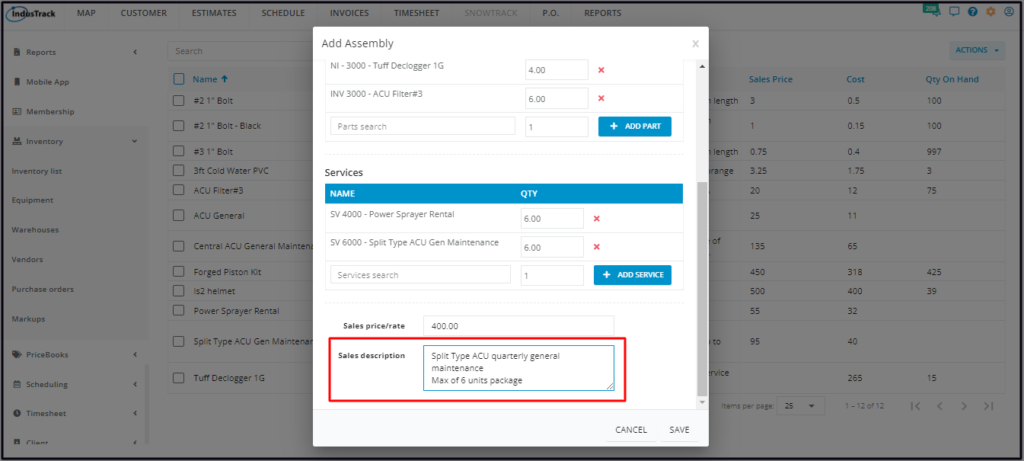
Parts
Add the parts or the items (inventory or non-inventory) to be used in the completion of the Assembly.
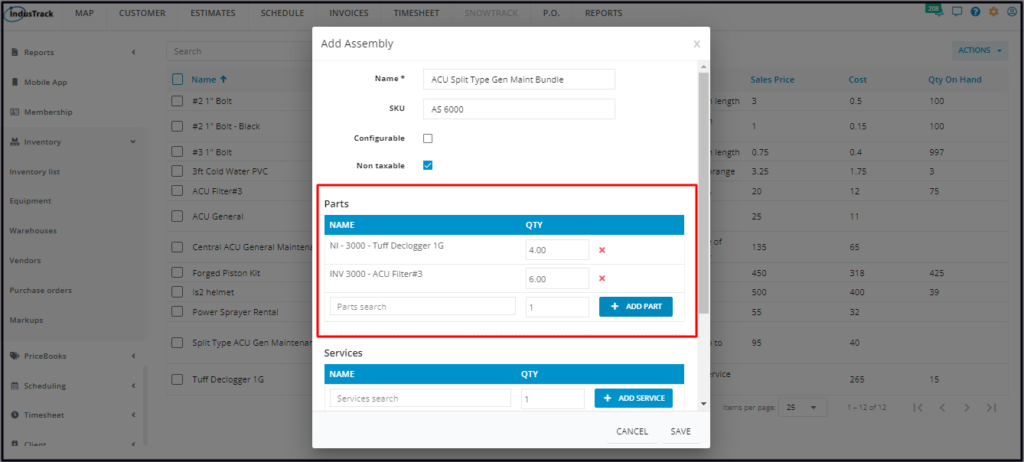
- On the Parts Name field, select the item from the drop-down list.
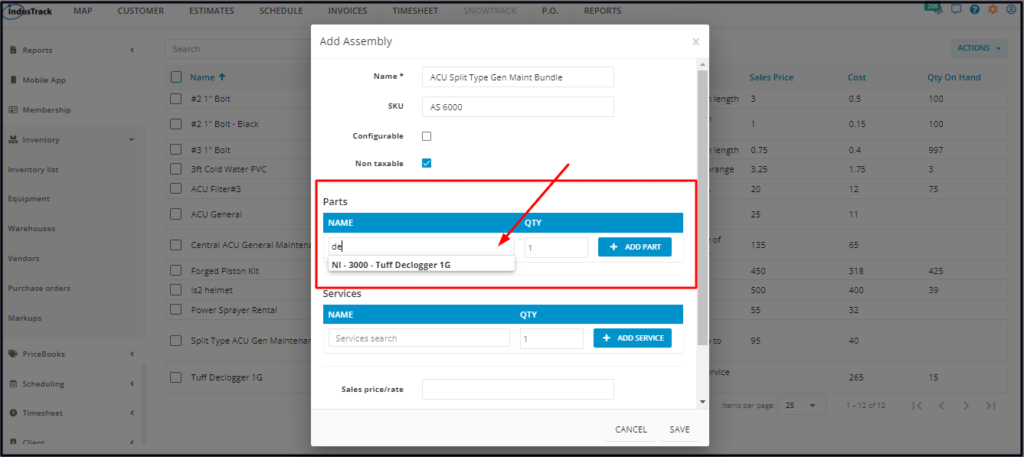
- Set the estimated quantity to be used to complete the assembly. The item has a default quantity of one (1). Update this if needed.
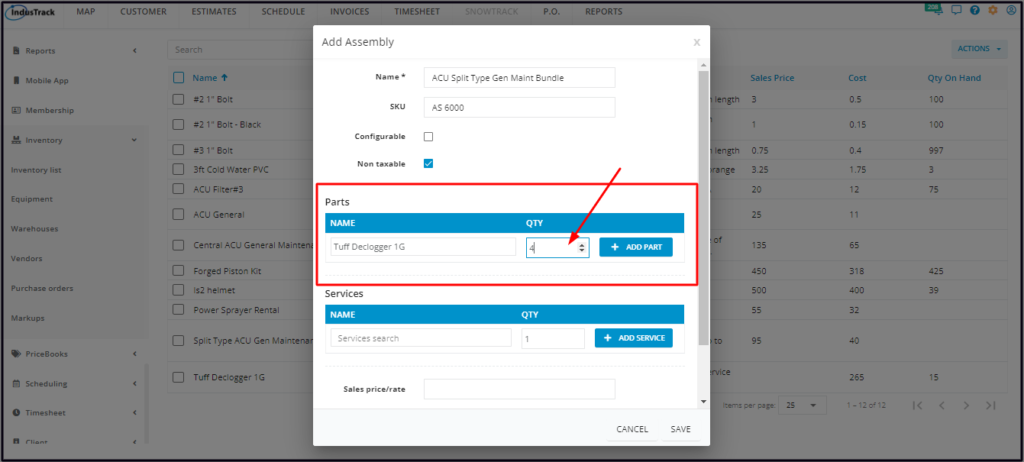
- Click +Add Part. A new item field will be created.
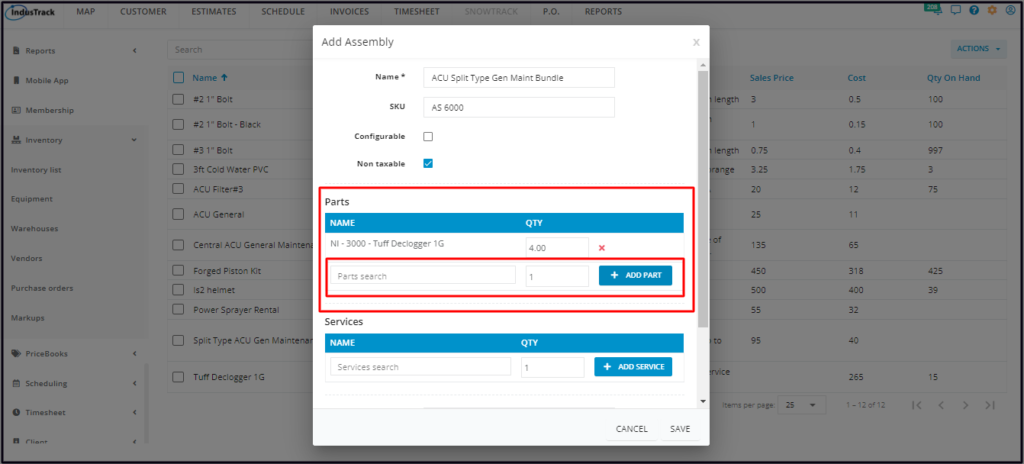
- Continue to add items as may be needed.
- Click the X button to remove an item.
Services
Add the service or services to be performed in the completion of the Assembly.
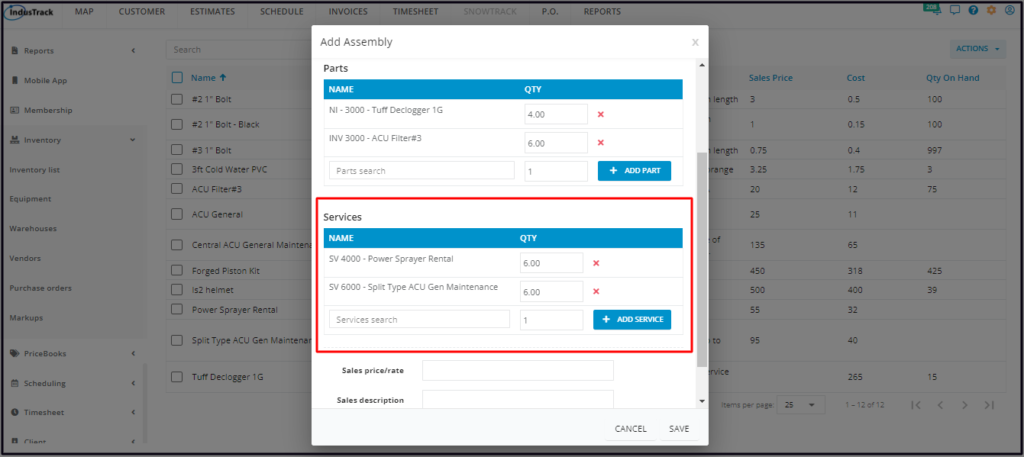
- On the Services Name field, select the service from the drop-down list of services.
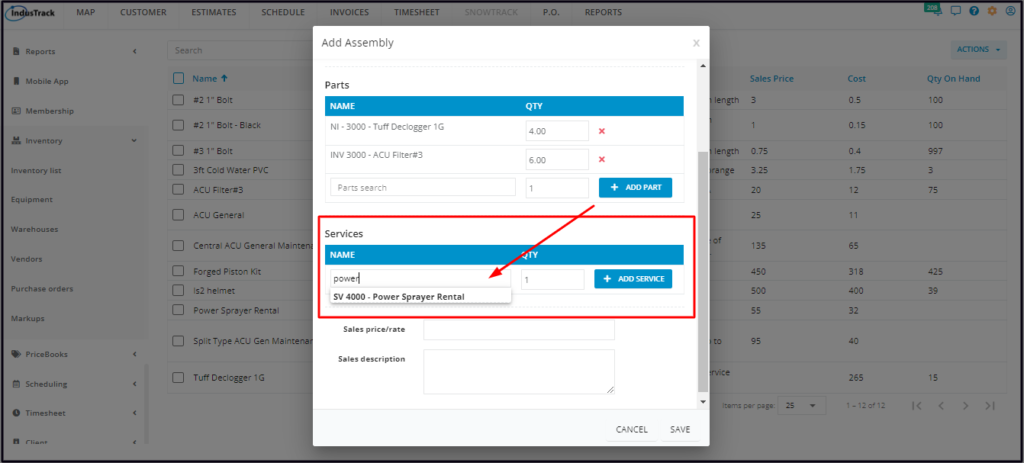
- Set the needed number of occurrences of the service to complete the assembly. This also has a default quantity of one (1). Update the quantity, if needed.
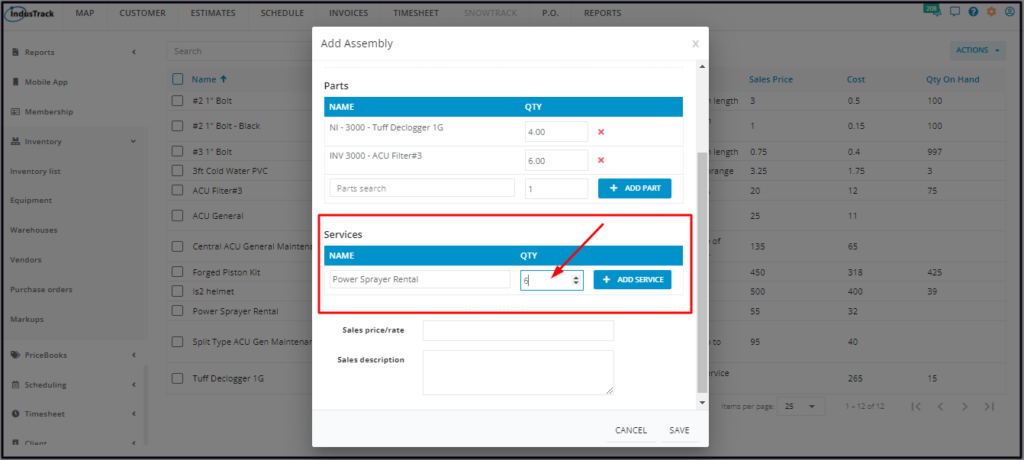
- Click + Add Service. A new service field will be created.
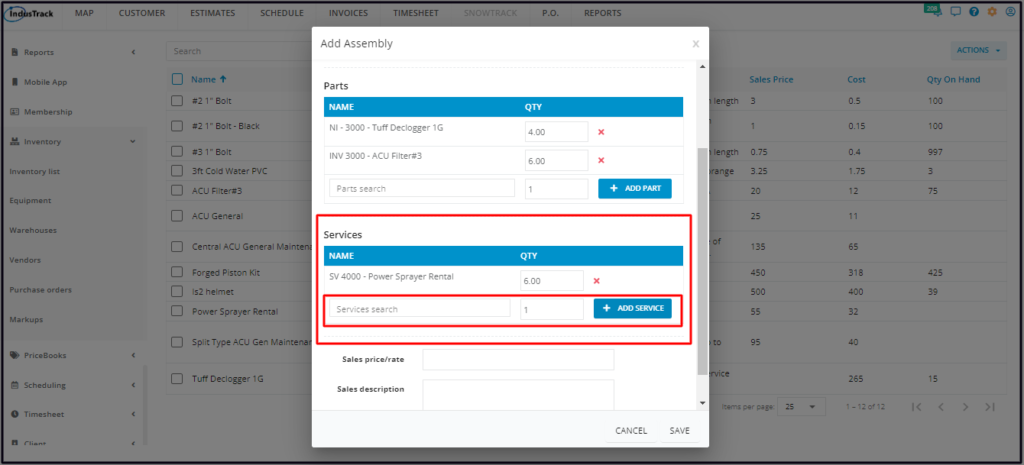
- Continue to add all services to be performed as may be needed.
- Click the X button to remove an item.
Sales Price/Rate
Key in the standard selling price of a single unit of the Assembly. This is the price quoted to customers.
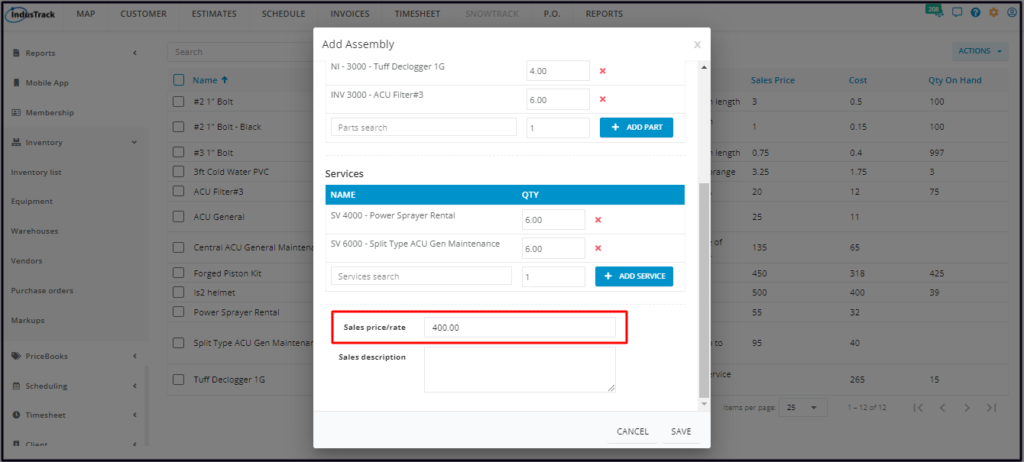
- If the Assembly is set to be Configurable, the Sales Price/Rate field will be removed.
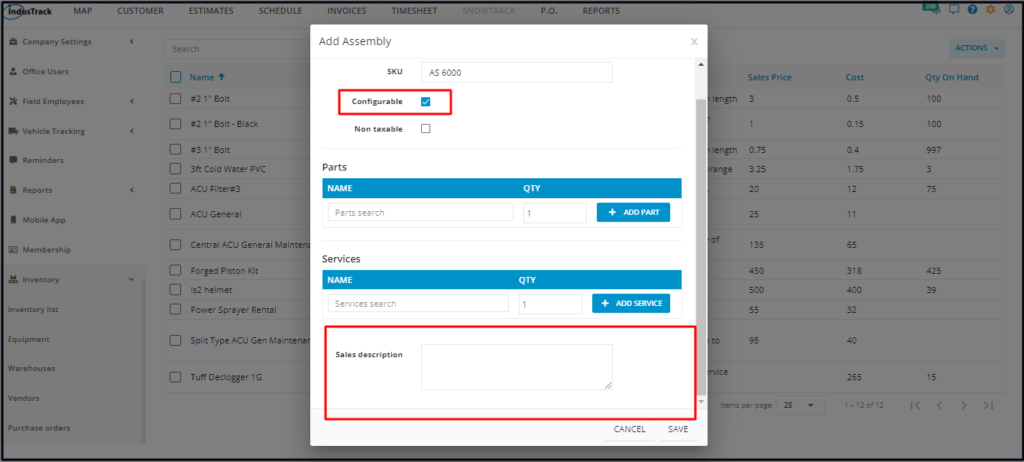
Sales Description
Key in a brief description of the Assembly.
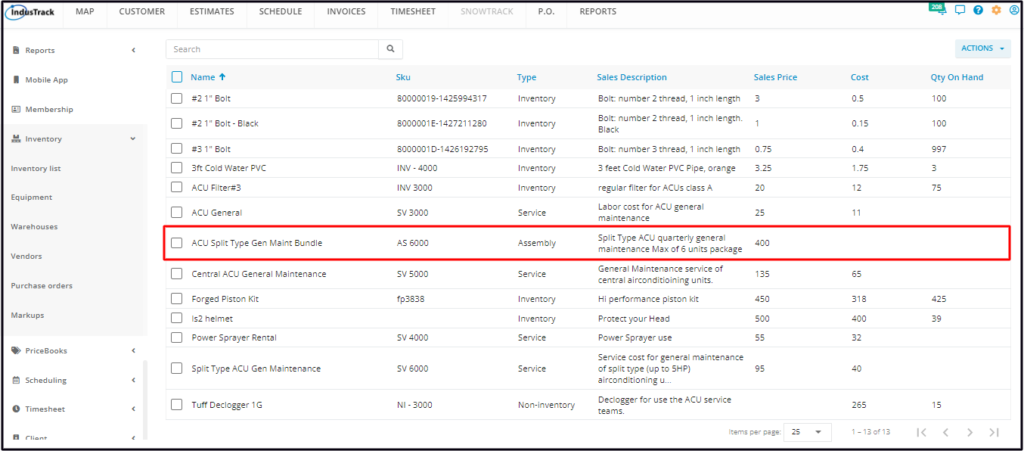
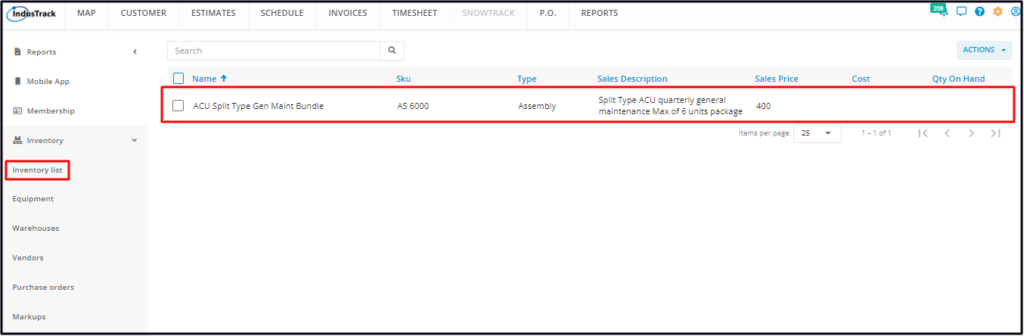
Save the new Assembly. The assembly will be added to the Inventory List.
Update the Details of an Assembly
Find the Assembly item to be updated from the list. Click anywhere on the row and the profile will open in edit mode.
Edit/Update as may be needed. Once done, Save the changes.
- An inactive Assembly item is not editable. This will have to be reactivated first.
Deactivate an Assembly
Deactivate an assembly if this will no longer be offered. This is an option to take instead of deleting the assembly which could cause errors.
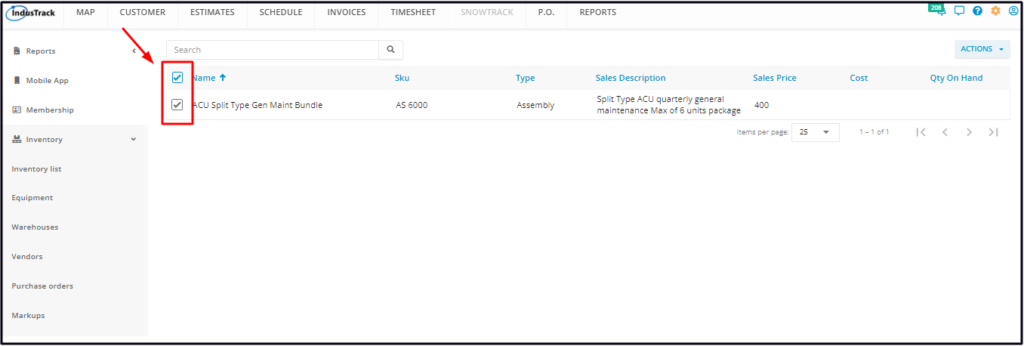
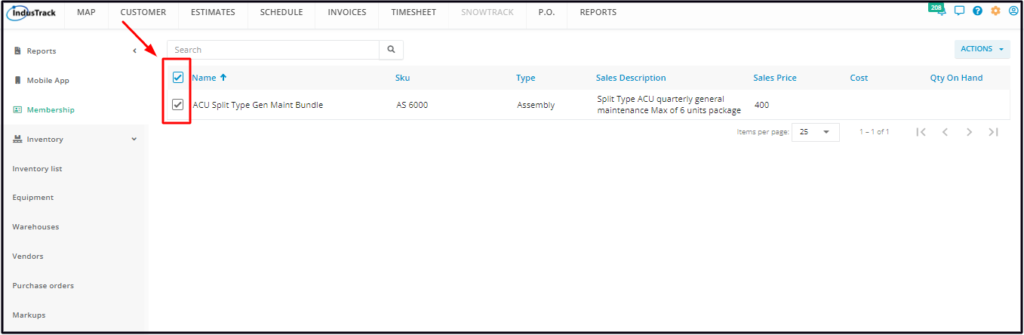
Find the assembly item to be deactivated from the Inventory List and tick the checkbox to its left.
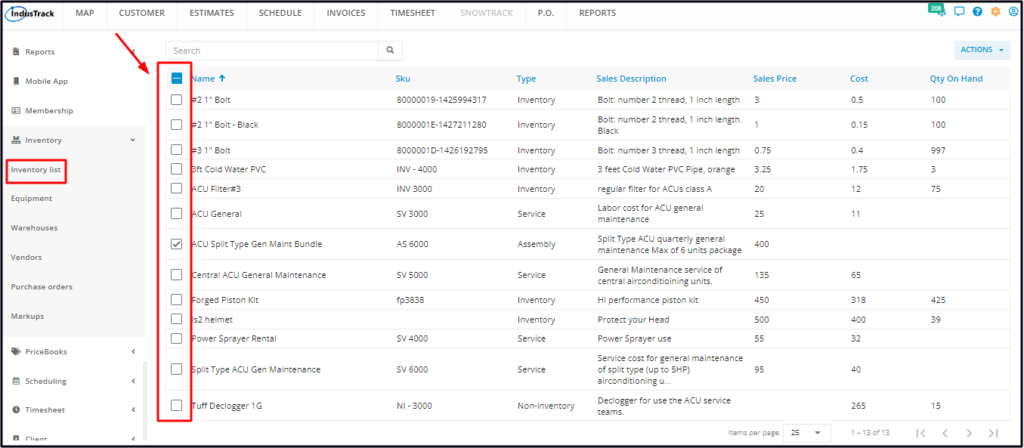
Click the Actions button and select Make Inactive.
- To deactivate multiple assemblies, tick the checkboxes to the left of all. If all items on the list will be deactivated, just tick the checkbox of the Name header. Just note that the list includes the other types of inventory. And then go to the Actions button and select Make Inactive.
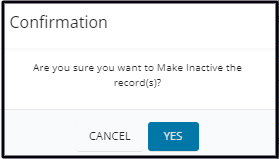
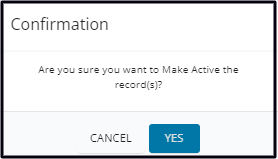
A warning window will come up. Click the Yes button to continue with the deactivation and Cancel to abandon the action.
The assembly item will be removed from the Active List and moved to the Inactive List.
Reactivate a Deactivated Assembly
Go to the Inactive Inventory List.
Find the assembly item to be reactivated from the list and tick the checkbox to its left.
Click the Actions button and select Make Active.

- To reactivate multiple assemblies, tick the checkboxes to the left of all. If all items on the list will be reactivated, just tick the checkbox of the Name header. Just note that the list includes the other types of inventory.
- Go to the Actions button and select Make Active.
A warning window will come up. Click the Yes button to continue with the reactivation and Cancel to abandon the action.
The item will be removed from the Inactive List and moved to the Active List. Update the assembly profile as may be needed.
Delete an Assembly
Delete an assembly that is no longer in use or was created in error. It is wise to exercise caution when using this function. Deleting an item may have an effect on other functions, settings or data.
If the item has an active status, deactivate this first. An active assembly item can not be deleted.
Move to the Inactive Inventory table.
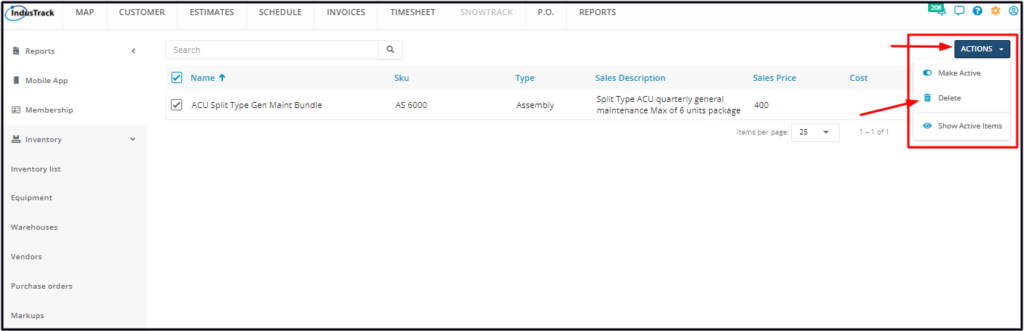
Find the assembly item to be deleted from the list, and tick the checkbox to its left.
- To delete multiple items, tick the checkboxes to the left of all. If all will be deleted, just tick the checkbox of the Name header. Just note that the list includes the other types of inventory.
Go to the Actions button and select Delete.
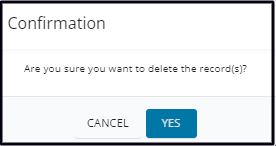
A warning window will come up. Click the Yes button to continue with the deletion and Cancel to abandon the action.
The assembly item will be removed from the Inactive Inventory list.