
Client Reminder
IndusTrack provides reminders/notifications that can be set up to automatically send to customers and staff. These are a great way to keep everyone in the loop with due dates and expiration dates without manually contacting each of them individually.
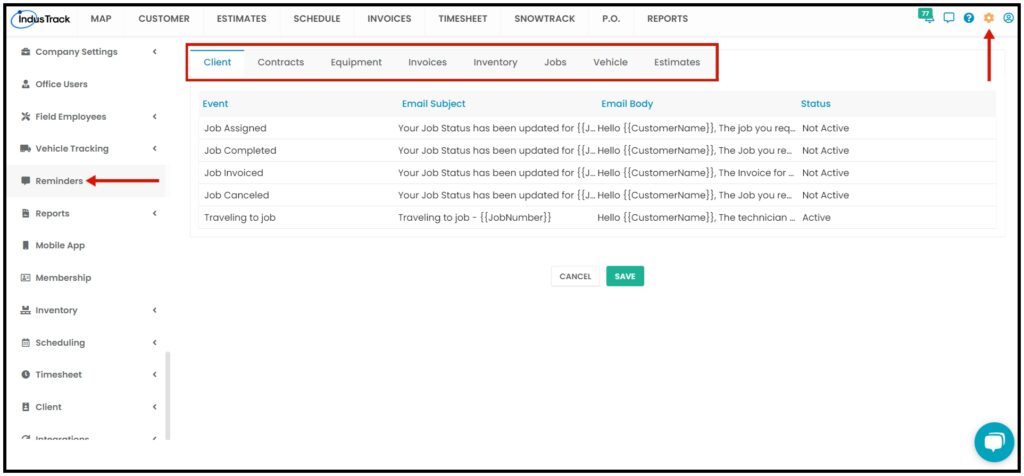
To set up your Reminders, go to Settings > Reminders.
Reminder settings are divided into 7 categories: Jobs, Invoices, Clients, Inventory, Contracts, Equipment, and Vehicles.
Client
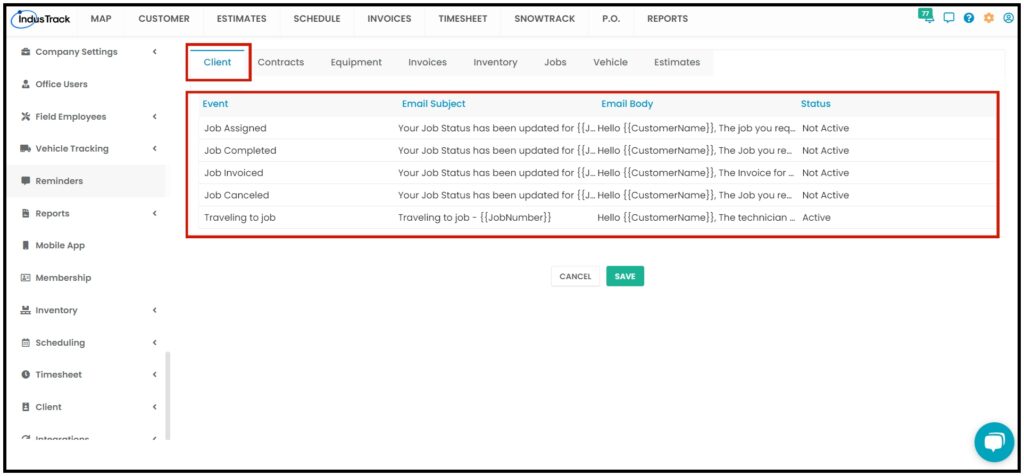
Client Reminders are a great way to keep your customers in the loop with the statuses of the jobs they requested or contracted without manually contacting each of them individually.
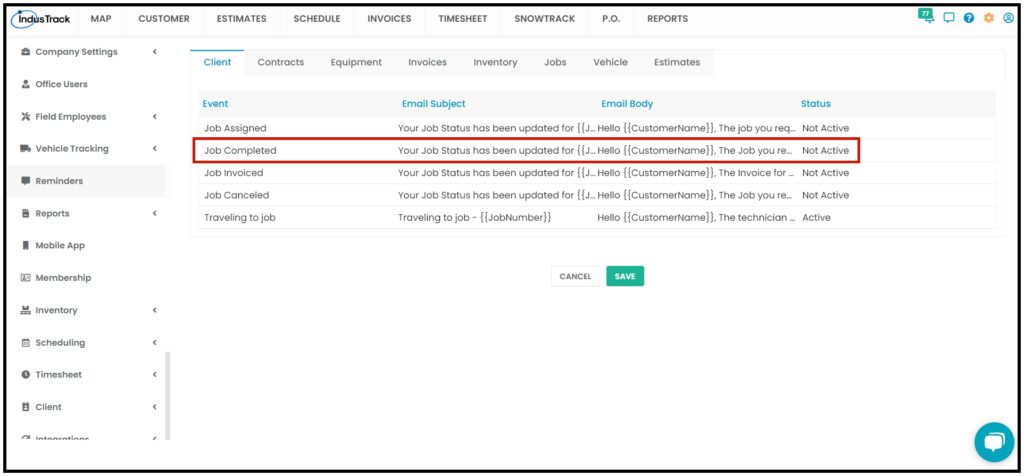
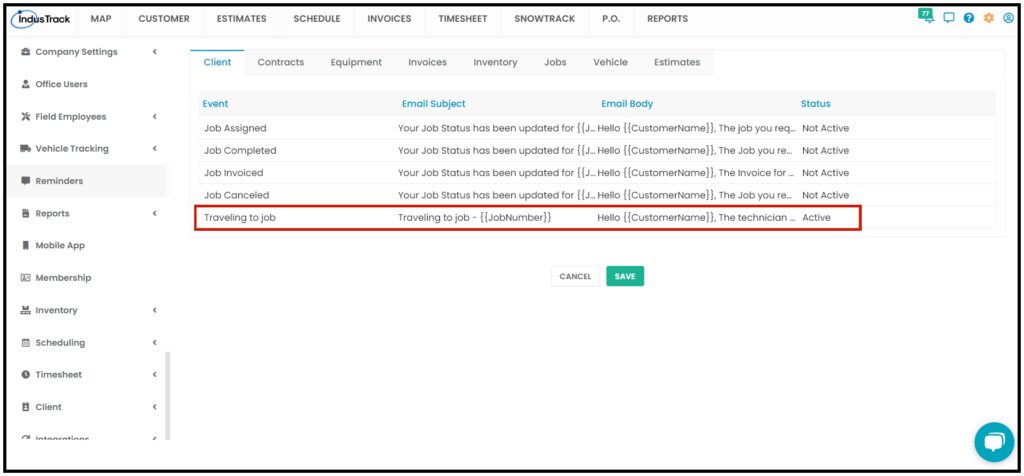
The Client Reminders consist of 5 Job notifications. Click to open the email template for each of the events that will cause the reminder to automatically send.
- Job Assigned
- Job Completed
- Job Invoiced
- Job Canceled
- Traveling to Job
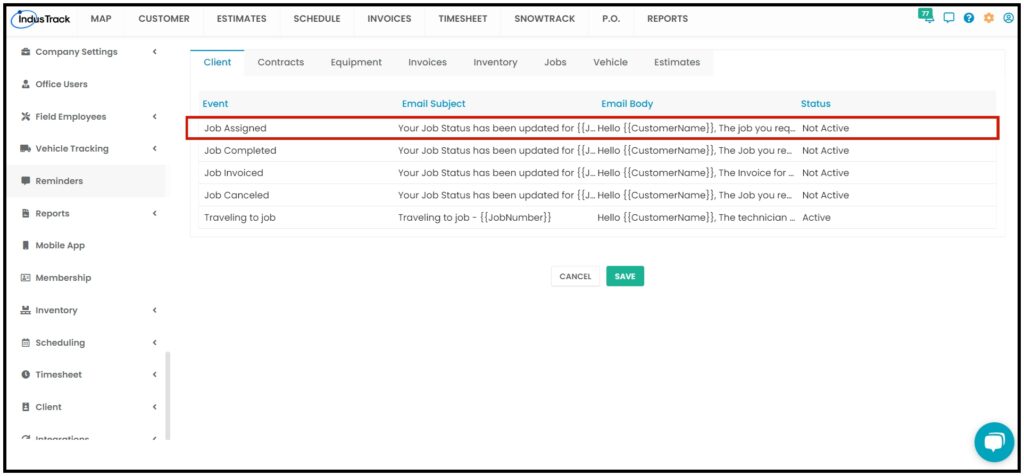
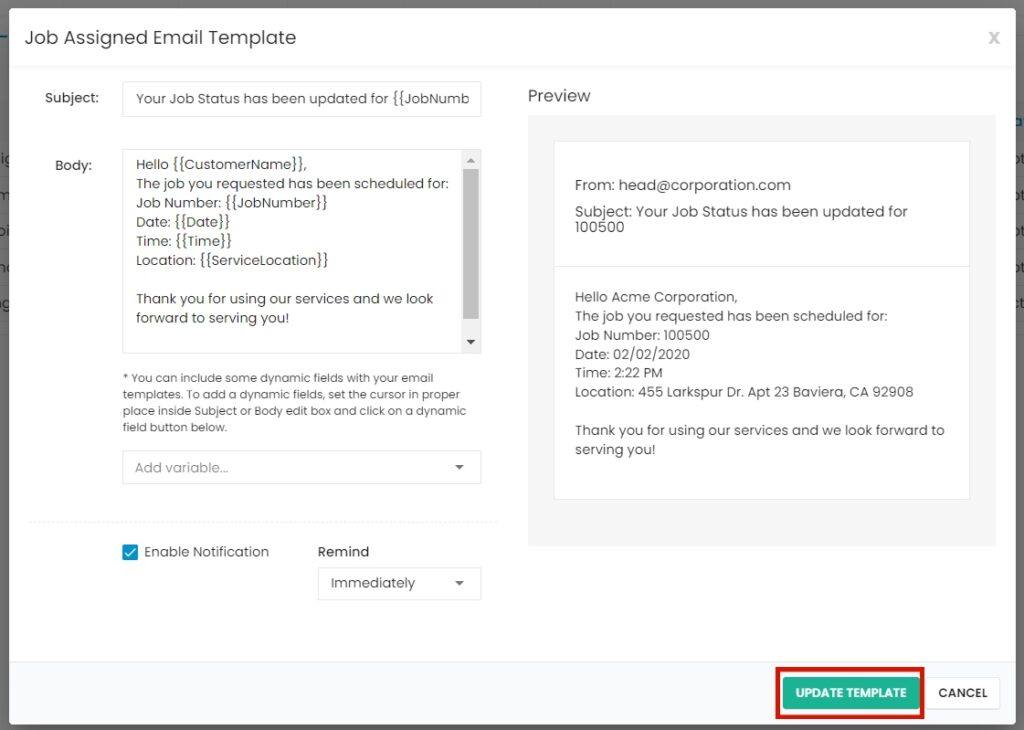
Job Assigned
This email reminder/notification is sent to the customer when the job requested/contracted has been scheduled. The notification includes the customer’s name, job number, scheduled date and time, and location.
To view or update the template, click anywhere on the row. This will open the editable Job Assigned template. To edit/update the template, see the section How to Update a Template below.
To enable the reminder, open the Job Assigned Email Template. Click on the checkbox of Enable Notification.
Select when the Reminder will be sent from the drop-down menu of “Remind“. Choices are Immediate, the Day of the Job, the Day Before, Two Days Before, and the Week Before. The point of reference for Immediately is when the job status is updated to “Scheduled”. For the rest of the choices, the point of reference is the actual scheduled date.
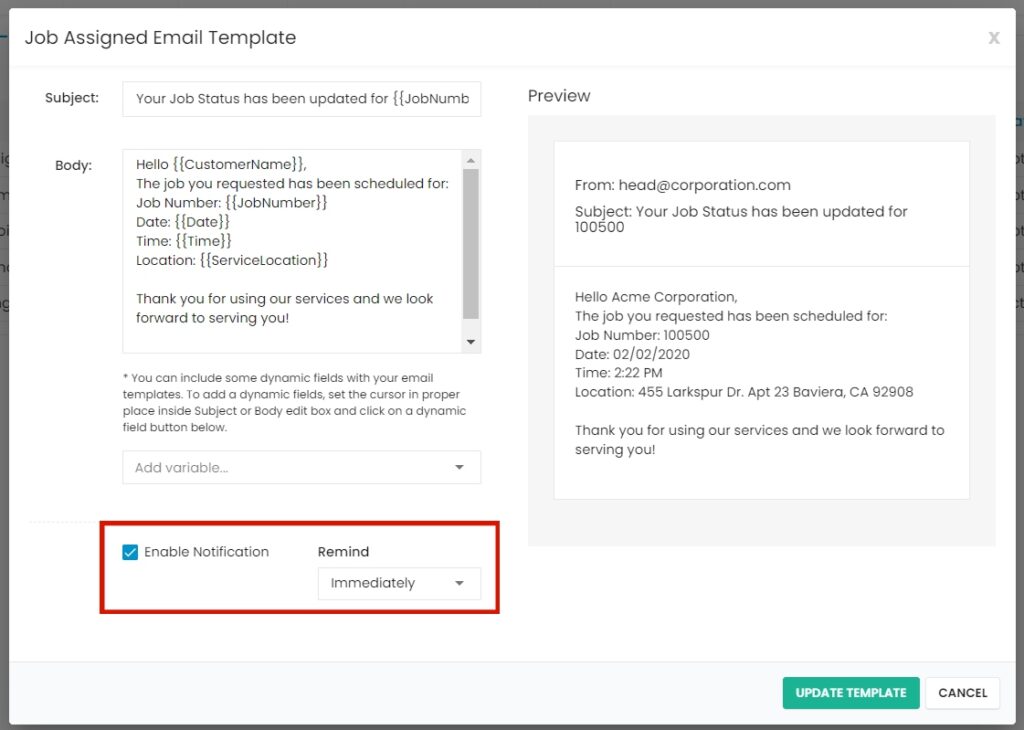
Update the template. The Job Assigned Reminder will be Activated.
To disable the reminder, deselect Enable Notification and Update the template.
Job Completed
This email reminder/notification is sent to the customer when the job requested/contracted status has been updated to Completed. The notification includes the customer’s name, job number, date and time of completion, and location.
To view or update the template, click anywhere on the row. This will open the editable Job Completed Email template. To edit/update the template, see the section How to Update a Template below.
To enable the reminder, open the Job Completed Email Template. Click on the checkbox of Enable Notification and Update. The Job Completed Reminder will be Activated.
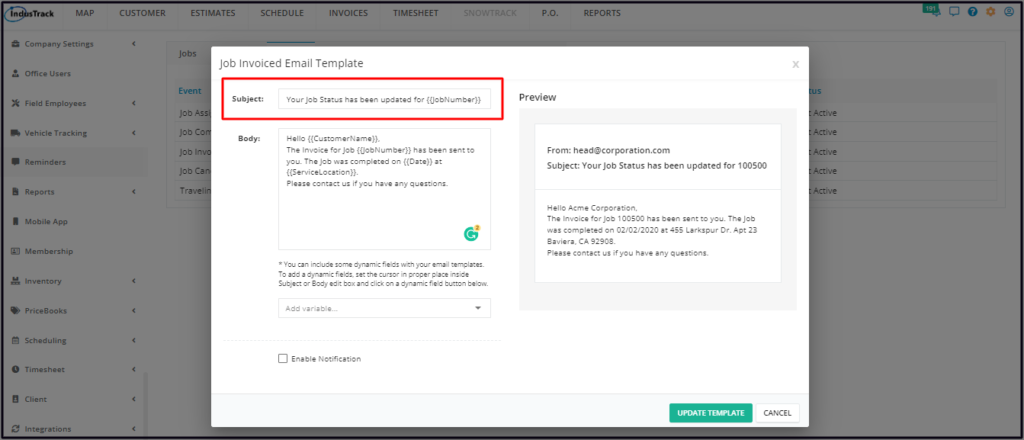
Job Invoiced
This email reminder/notification is sent when the Job Invoice is forwarded to the customer. The notification includes the customer’s name, job number, date of completion, and location.
To view or update the template, click anywhere on the row. This will open the editable Job Invoiced Email template. To edit/update the template, see the section How to Update a Template below.

Job Canceled
This email reminder/notification is sent when the Job requested/contracted has been canceled.
The notification includes the customer’s name, job number, date and time of cancellation, and location. The reason why the job was canceled is not included in the template. Edit/update the template to include this, if preferred.
To view or update the template, click anywhere on the row. This will open the editable Job Canceled Email template. To edit/update the template, see the section How to Update a Template below.

Traveling to Job
This email reminder/notification is sent to let the customer know that the Field Employee is on his way to perform the job requested/contracted. The notification includes the customer’s name, job number, location, and the estimated Time of Arrival.
To view or update the template, click anywhere on the row. This will open the editable Travelling to Job Email template. To edit/update the template, see the section How to Update a Template below.
How to Update a Client Reminder Template
The 5 Client Reminder email templates have all been pre-formatted and are ready to be used when enabled. The templates can, however, be revised according to your preferences.
To edit the Subject, click on the field and update as needed.
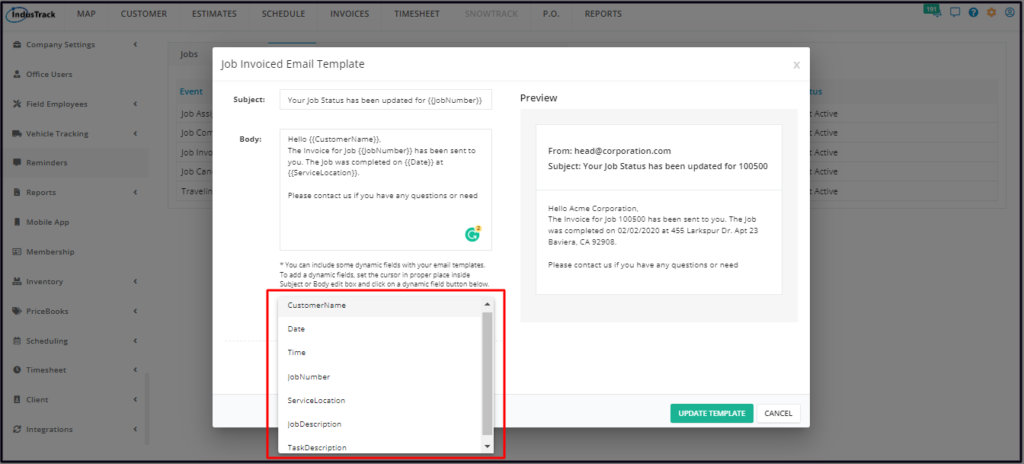
To edit or update the email Body, change the text or key in a new or revised message on the field. The Preview will auto-update as you go along.
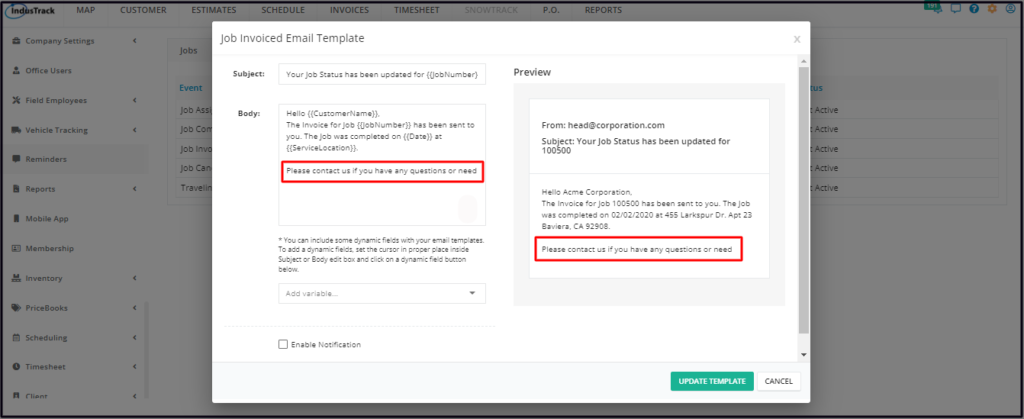
To add dynamic fields, set the cursor in the proper place inside the Subject or Body edit box and select a dynamic field from the Add Variable drop-down list. Be careful not to edit/change any letter or character of the dynamic fields as these will not work.
Once done, Update the Template.