Creating Invoices from different places
Aside from creating invoices from Invoice Module, you can also create invoices from different places.
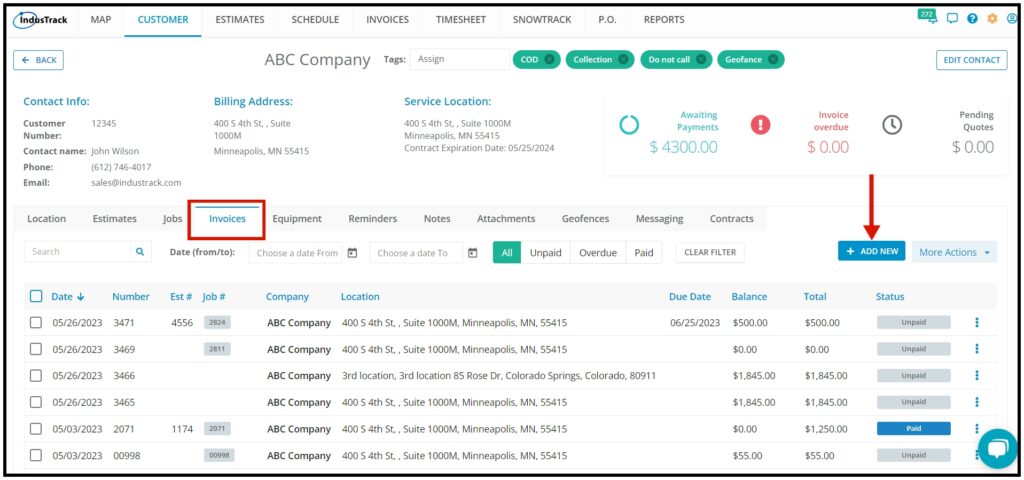
Create an Invoice from the Customer Page
Go to the Customer Module, and select a Customer you would like to create an invoice.
Under the customer page, create an invoice from the Invoice Tab.
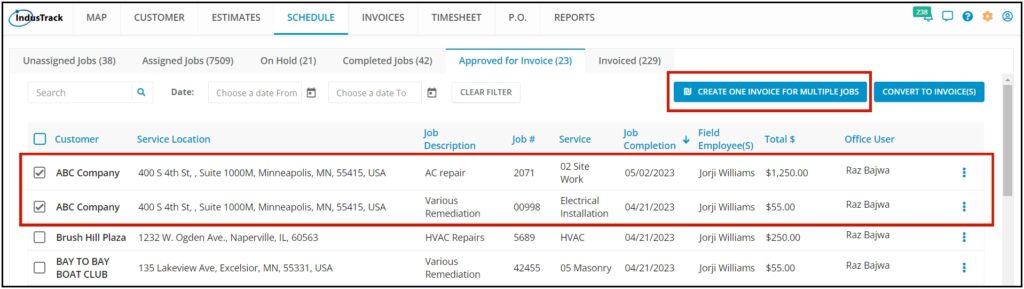
Create an Invoice from a Completed Job/s
From the Completed Jobs Queue, you will be able to convert completed jobs to invoices.
- Convert an approved job into an Invoice.
- Convert One Invoice for Multiple Jobs – Convert multiple jobs from the same customer into one Invoice.
- Convert multiple jobs from different customers into separate invoices.
To do that go to the Scheduling Module, and click on Actions> Jobs Queue. Under the Completed Jobs column mark the selected Job for Approval and from the Approved for Invoice column you can then Convert the Job to Invoice.
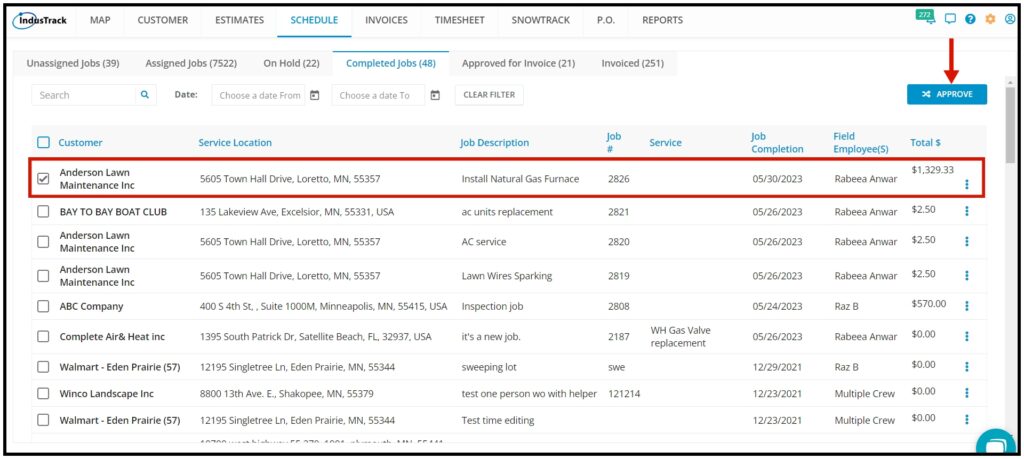
Convert the Completed Job to Invoice.
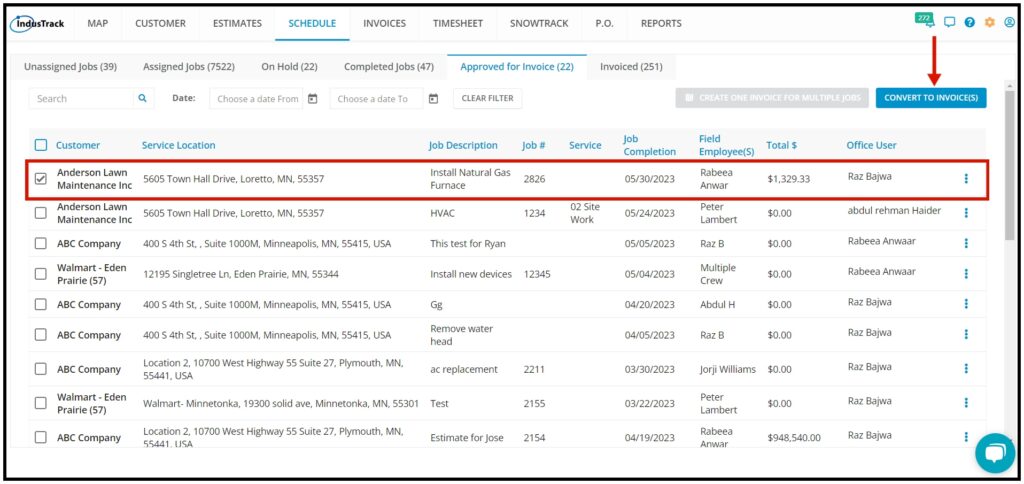
If there are multiple jobs from the same customer, you have the option to create one invoice for those multiple jobs as long as it is from the same customer. To do that, Put check marks on the jobs > click on CREATE ONE INVOICE FOR MULTIPLE JOBS.
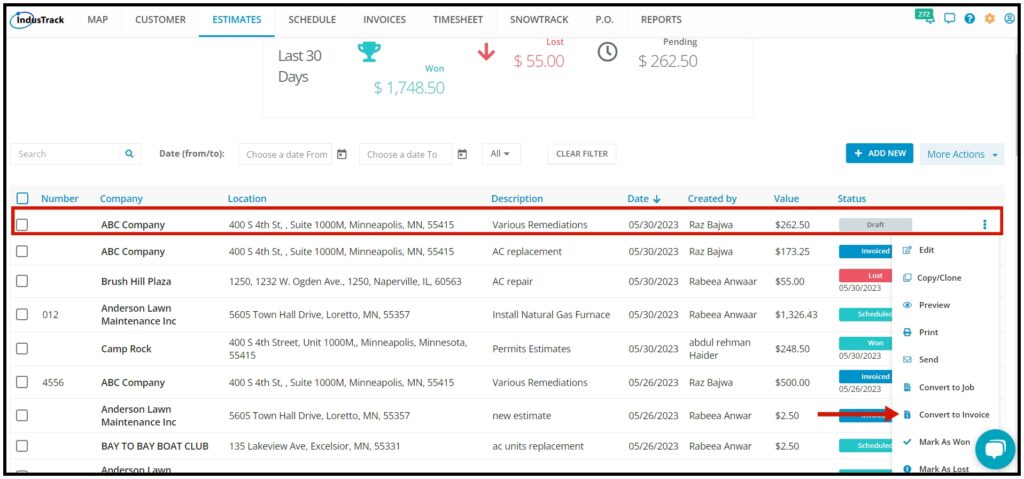
Creating Invoice from the Estimate Module
From the estimate module, select an estimate you would like to convert into an Invoice.
Once you find that Estimate, on the three-dot select Convert to Invoice.
After you have converted the estimate into an invoice, the estimate Status will change to Invoiced, and in the Invoice Module you will see the invoice we just converted in the list.
Note that if the Convert to Invoice option is grayed out, that means that the estimate has been converted to Invoice already.