
Mobile Invoice
Access Invoice page
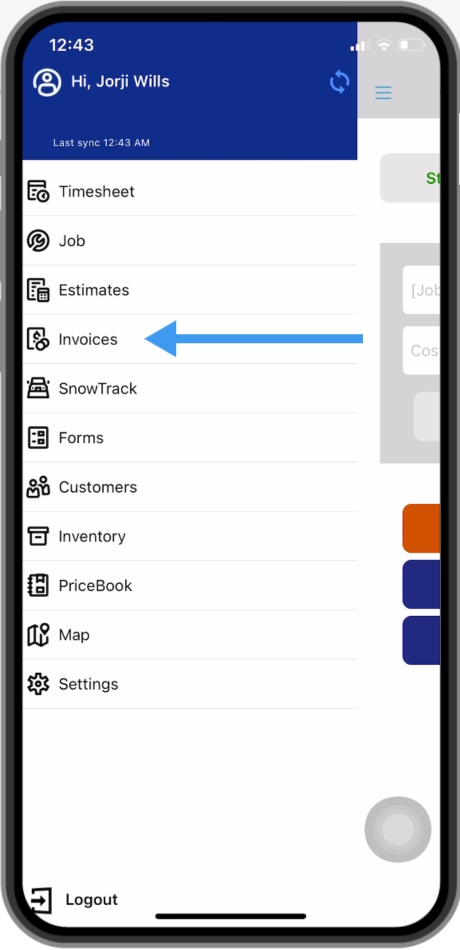
To access the Invoice Page, Tap the three horizontal bars on the upper left and look for Invoices.
Create New Invoice
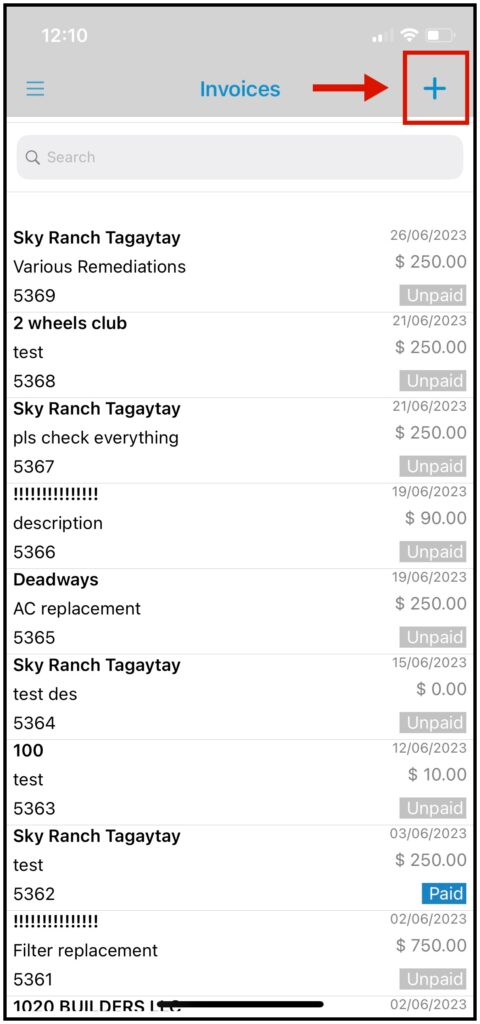
Here on the Invoice Page, you will see the list of invoices along with their status. To create a new one, click on the PLUS button at the top right.
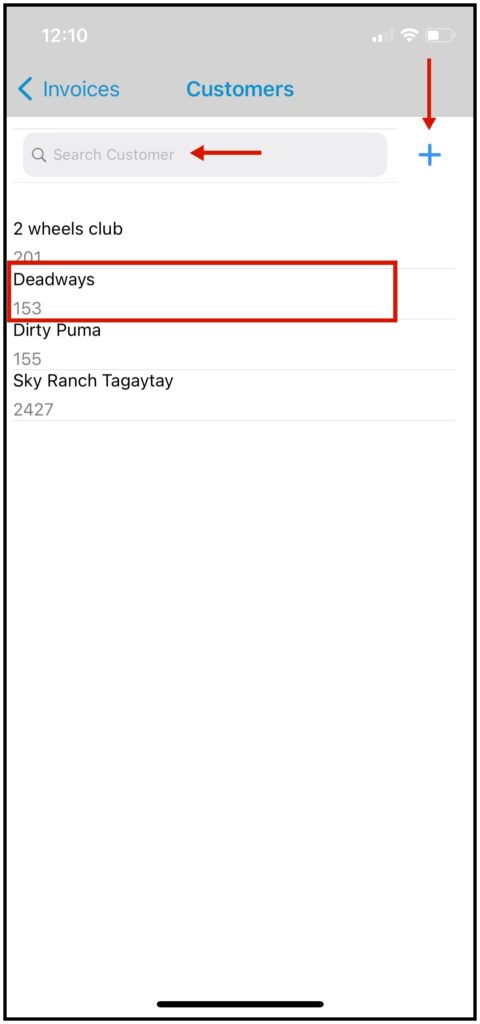
If you are creating an invoice for a new customer, tap on the plus icon to create a new customer.
After tapping the + or Add, you will be directed to a list of existing customers. Select the existing customer from the list or use the search bar.
If you are creating an invoice for a new customer, tap on the plus icon to create a new customer
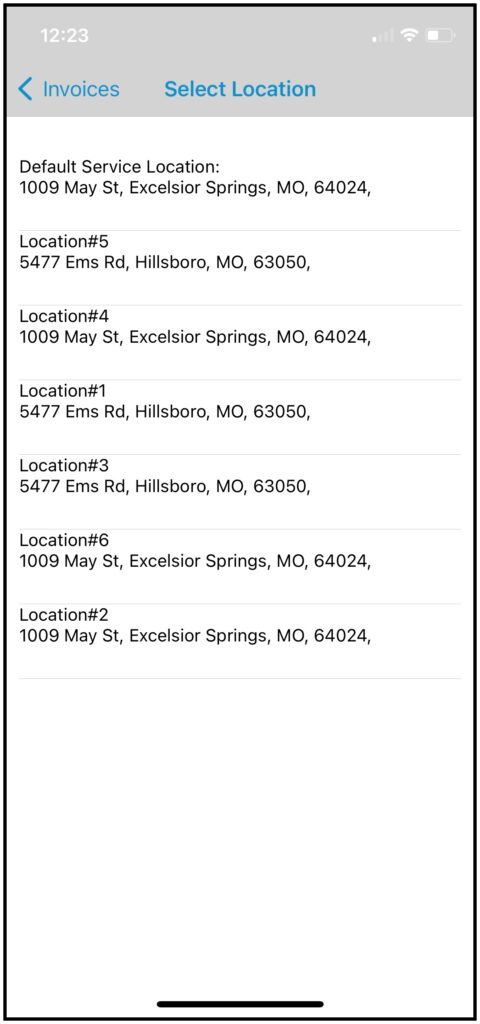
After selecting a customer, if the customer has multiple service locations it will redirect you to the list of all service locations. Select one and it will proceed.
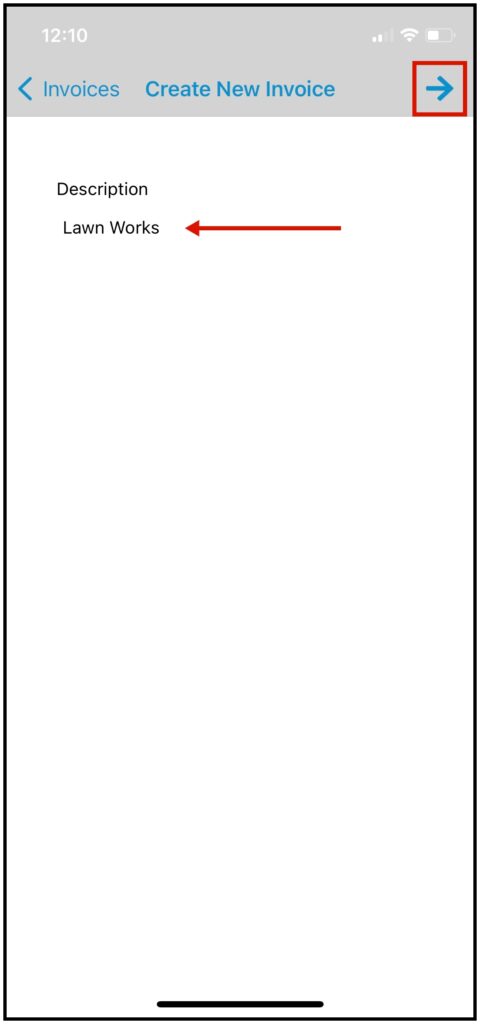
You have now started an empty invoice for that customer. You need to add a description for the invoice in order to proceed. After adding a description click done and click on the arrow icon on the top right corner.
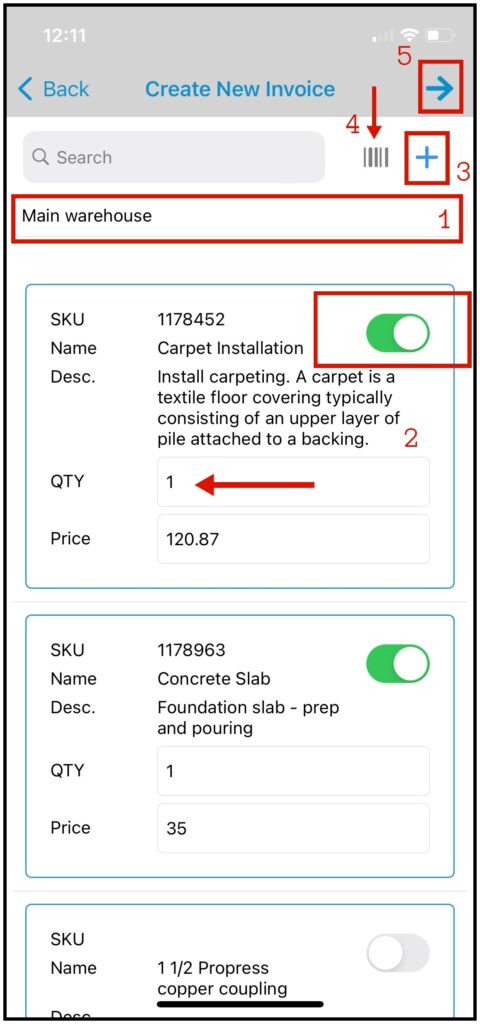
Add Items to the Invoice
- Select which warehouse you wanted to get the item from.
- Search or select the items by tapping on the slider bar on the right side of that item. The QTY or the quantity of the item can also be changed.
- If the Item is new and it’s not on the list, tap on the plus icon to create a new item.
- If that item has a barcode, SCAN it by tapping Scan at the top right of the screen.
- Once you have selected the items that you need, tap the arrow button at the top right of the screen.
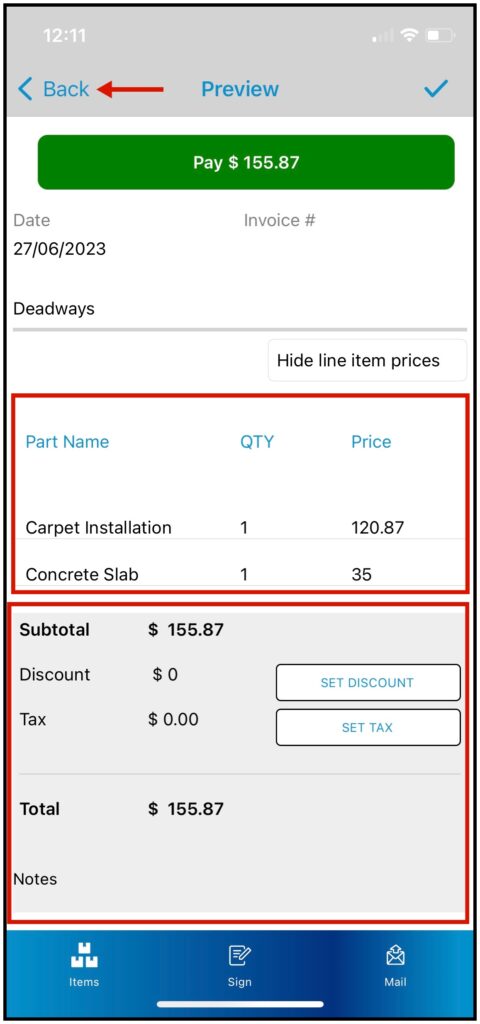
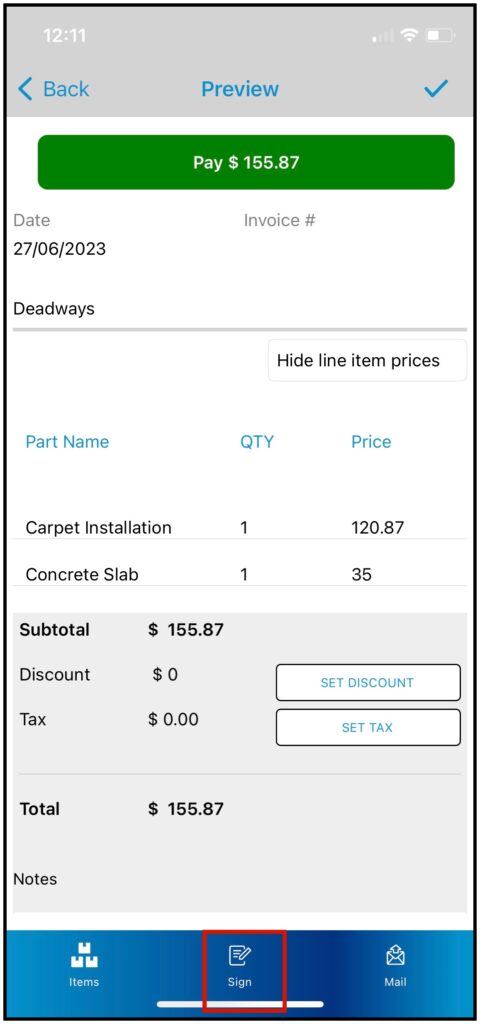
Invoice Preview
Once the required items have been selected, you’ll be directed to the Invoice Preview screen with the details of the part and prices.
If you need to add more items, just tap the back button to edit the Invoice.
Add tax or discount, it will give you the option to add tax or discount in percentage value or monetary value.
Notes – Type in Notes for Customer.
Save the Invoice by clicking on the check icon on the top right.
Pay Invoice – This will give you the option to pay the invoice via Cash, Credit Card, or Check.
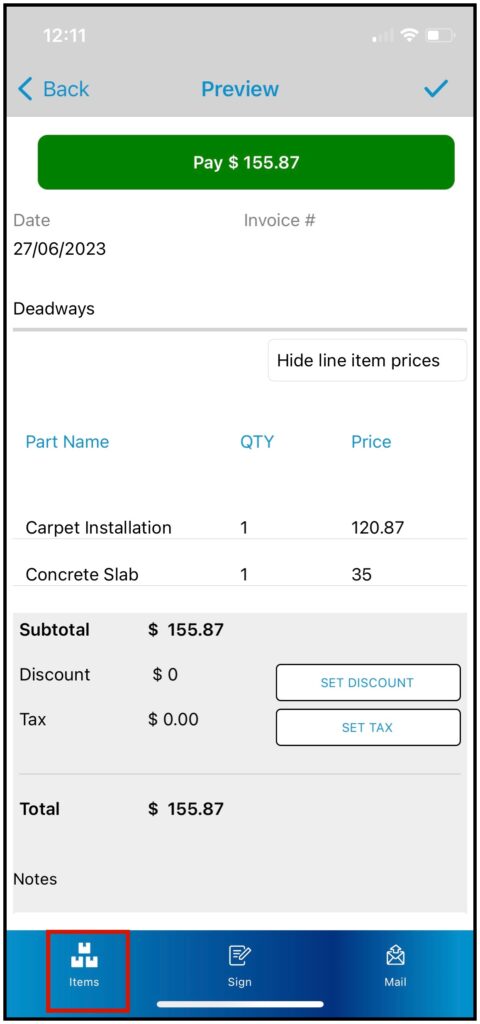
Items Tab
Tap on the items Tab to add or edit more items to the Invoice.
Signature Page
Here is where you can have the customer put their signature.
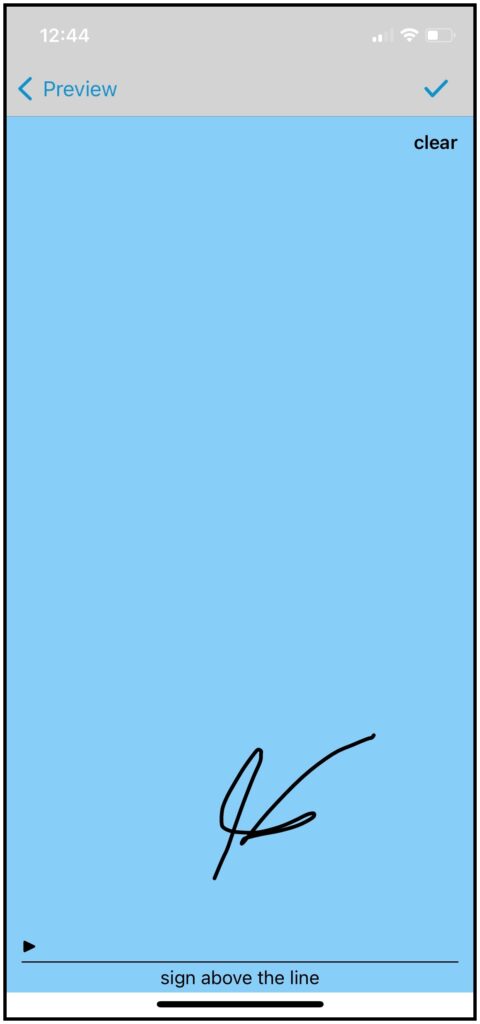
Signature Page
Tap Clear if they need to remove the signature. Hit Save to finalize the signature.
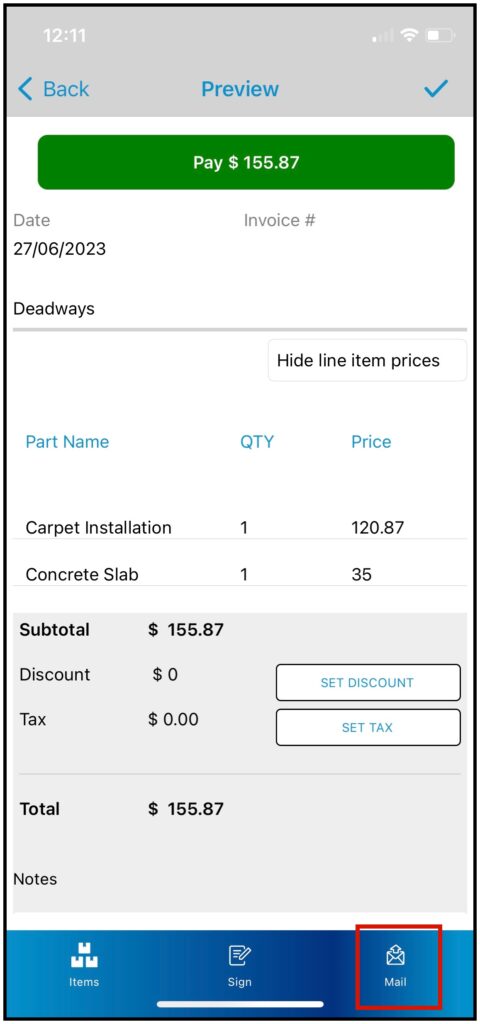
Mail Invoice
Tap on the envelope icon to Mail the invoice.
After tapping on the envelope icon, it will generate an invoice PDF. You can edit the email body and send it to the customer.
Hit the Check icon on the top right to save the Invoice.
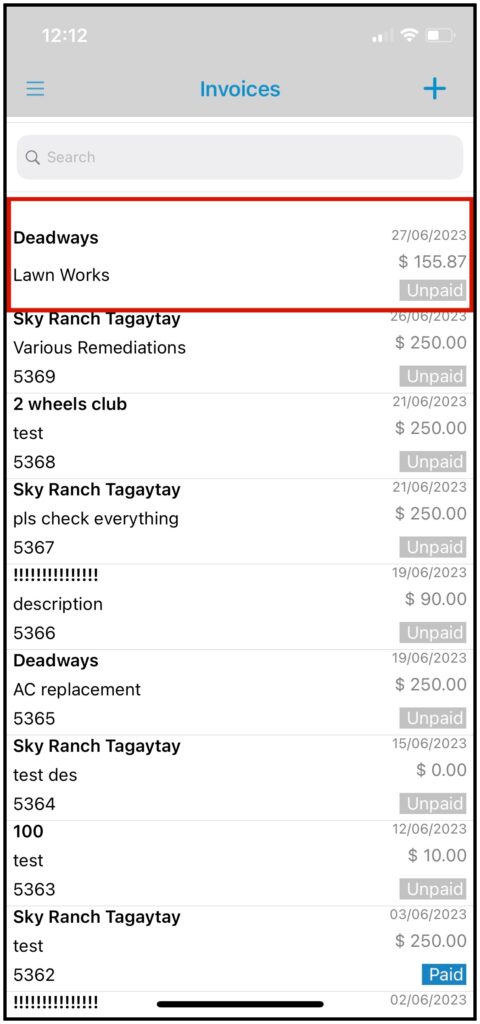
Save Invoice
After we save the invoice, the invoice will be seen in the Invoice List.
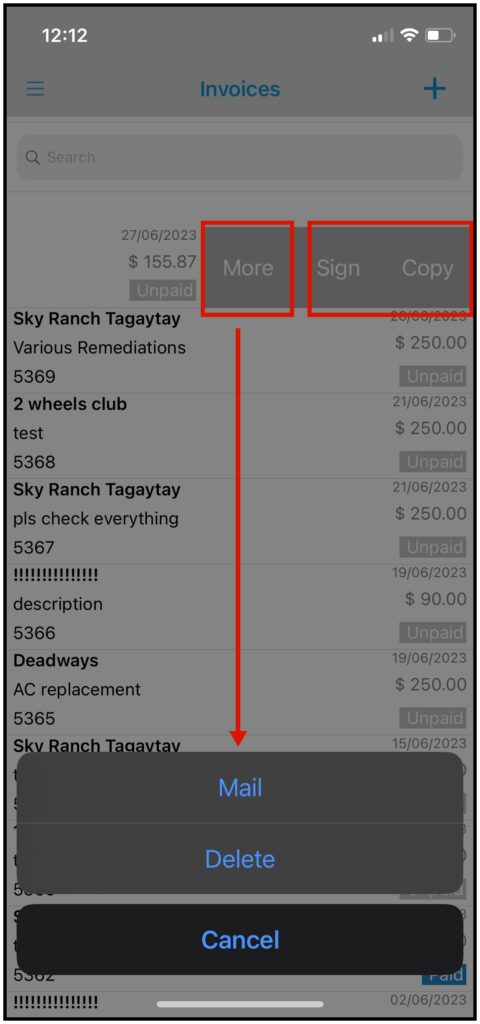
More Options
On the Invoice list, select an invoice and swipe left to view more options.
From the Invoice List, you will also have the option to have the Invoice Signed.
Copy – Invoice information will be copied and you will be prompted to select a customer to whom the estimate will be assigned.
More Option – There are two choices when clicking on more options, this will allow you to mail the invoice from the List or delete the invoice selected.