
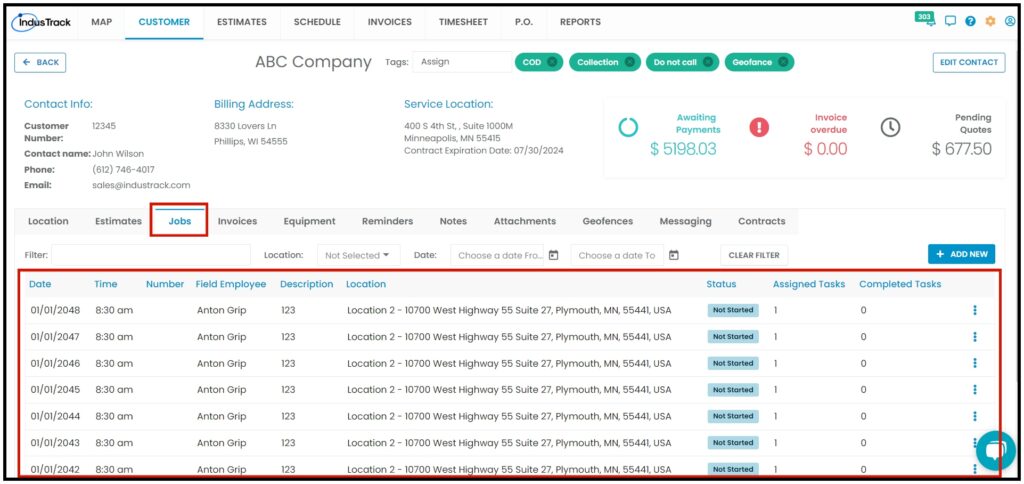
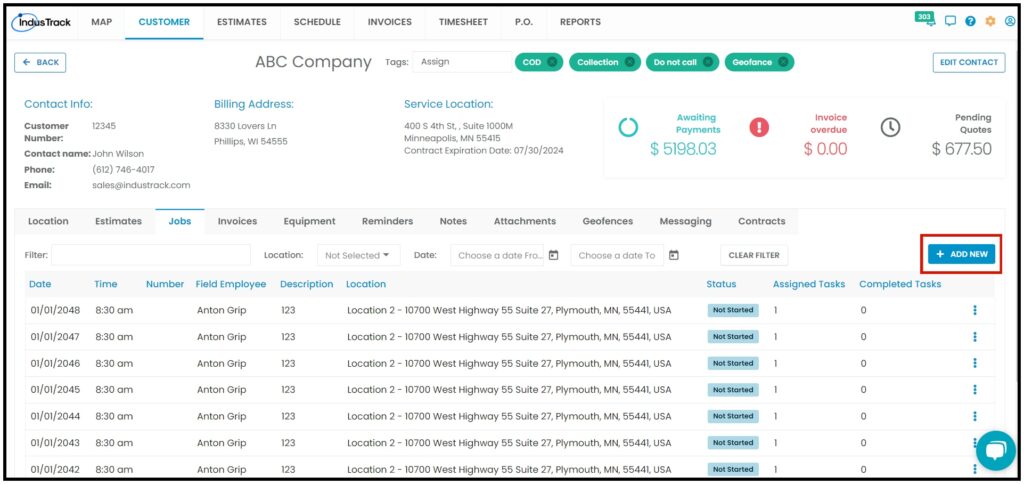
Customer Profile: Manage Jobs
Under the Jobs tab of the Customer Profile, you will find a listing of all the Jobs that have been scheduled for the customer.
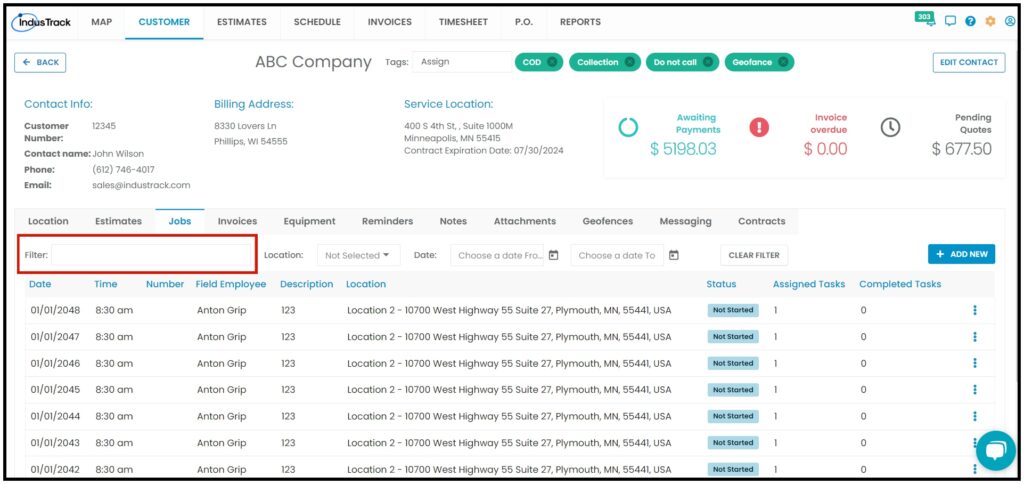
Search for a specific job by using the Search box. You can search for the field employee assigned to the job.
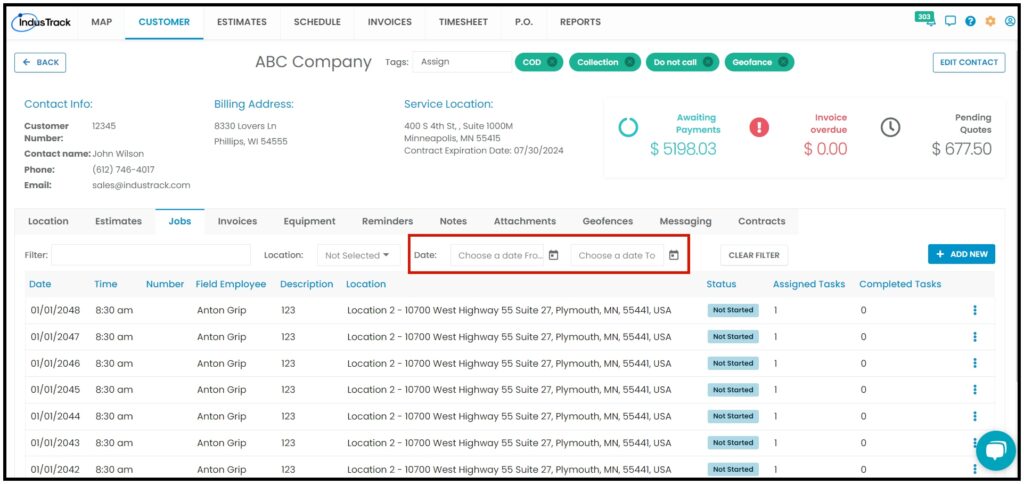
You can also select the job schedule dates or periods that you want to view.
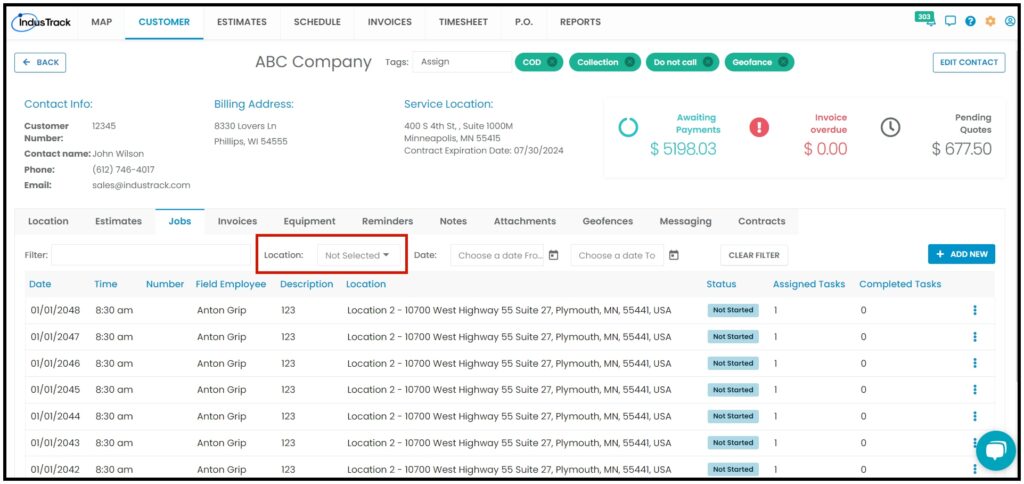
If the Customer has multiple locations, select in the Location filter which location the job was dispatched to.
Aside from the customer details, the list includes the date and time when the job was created, the field employee assigned, and the task details. The job status is also reflected in the listing. This may either be not started, started, paused, complete, hold, or declined.
Schedule a New Job from the Customer Profile
You can also schedule a new job for the customer from here. Click the Add New button.
The create a new job will come up. Since the job is being prepared from the customer’s page, the customer name and location will already be given. If there is more than one service location, select the correct one. Schedule the job.

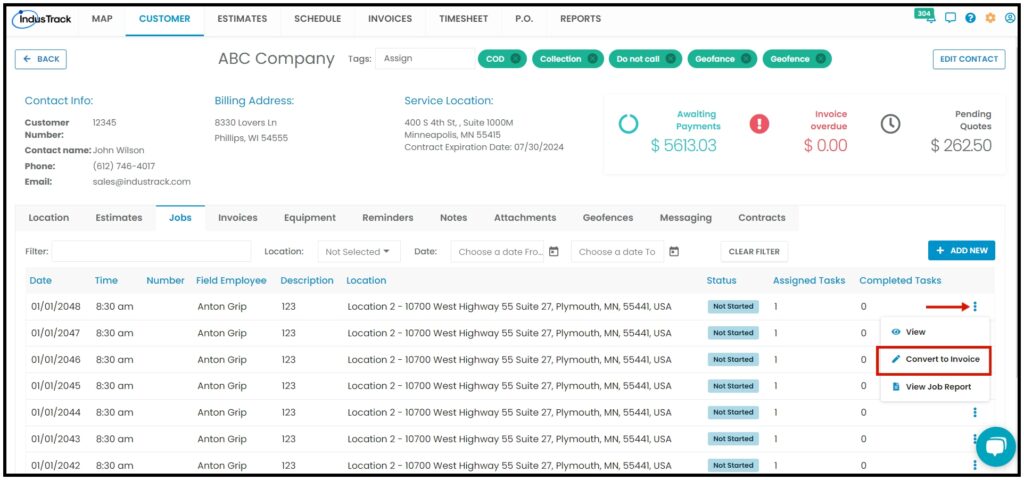
Manage the Scheduled Jobs
From here, you can also access the jobs that have been created for the customer. From the list, find the specific job and click on the Three-dot to View, Convert the job into an Invoice, or View the Job Report.
By Clicking on View, the Job Edit page will come up. You can now review and/or update the job.

Convert a Job
You can also convert the job to an Invoice. Click on the Convert to Invoice.
The add new invoice window will pop up, add the necessary parts you wanted to add, and then click on save. The invoice will be saved and added to the invoices list.
Go to the Schedule module for a detailed discussion of Jobs. The process is the same whether the feature is accessed from the customer’s address book or the Schedule module.