
Dispatched Jobs
The IndusTrack Mobile Application for Scheduling Jobs for Field Employees.
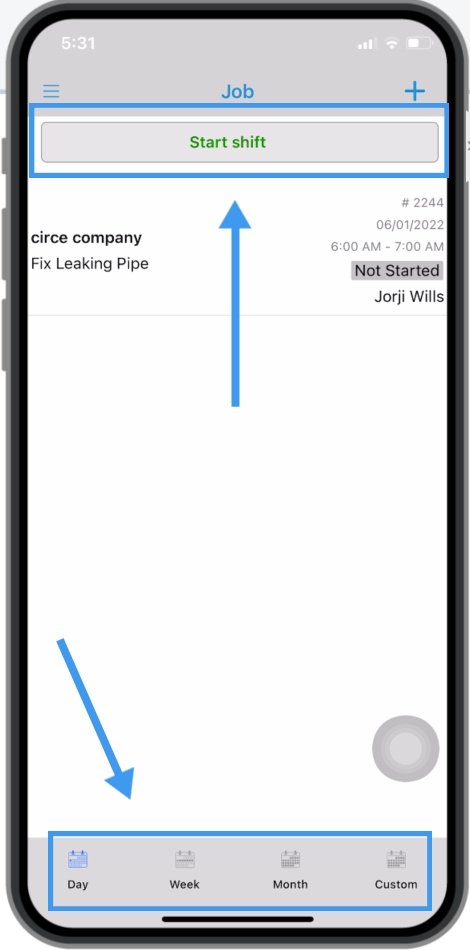
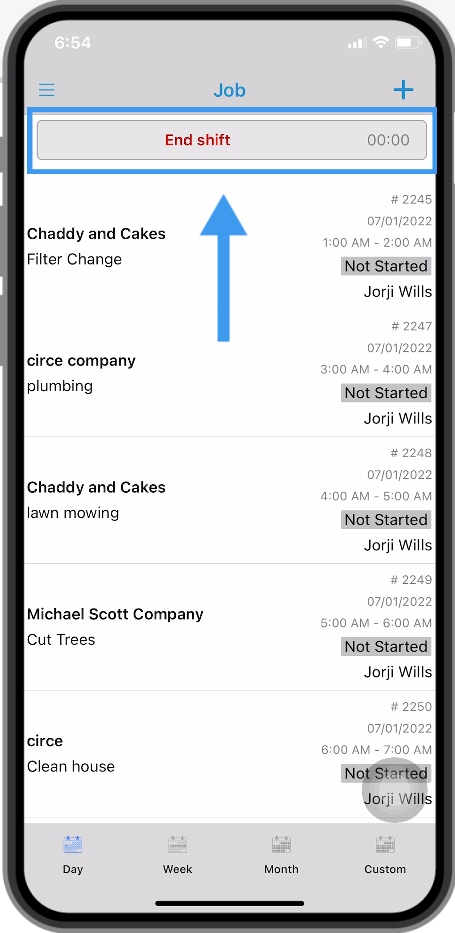
Start your Shift
Inside the Jobs page, you will see Four tabs namely Day, Week, Month, and Custom which will show you the list of Jobs on the currently selected tab.
Tap the Start Shift button to clock in and select a Job listed below.
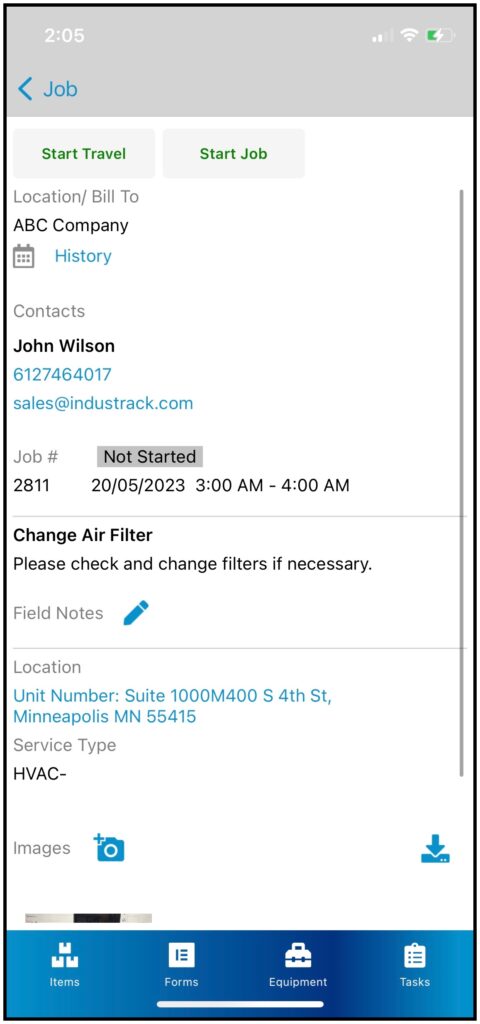
After selecting the job, it will take you to the job details page. All the basic information about the job will be provided such as contact information, crew members, etc.

Job Notes / Details
You can review the job details. Office Notes are available if the office user who dispatches the job has an important note for the field employee. The office note cannot be edited.
Field Notes is where the field employee can add notes when in the field, office users will be able to see the field note.
Images- once you open a job and there are already images attached to it, the office user who dispatched the job has attached it.
Crew members – you will be able to see all the crew members assigned to this job.

Start Travel
When you are ready to travel on the job, tap on the Start Travel button. If you tap the Address on the job details, Google Maps will open up and route you to the destination.
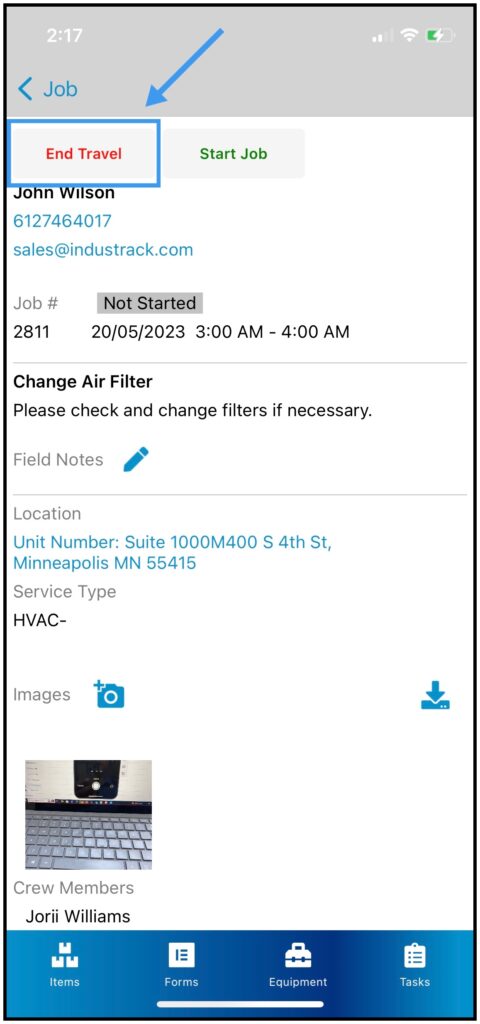
End Travel
Once you have arrived, you need to tap the End Travel.
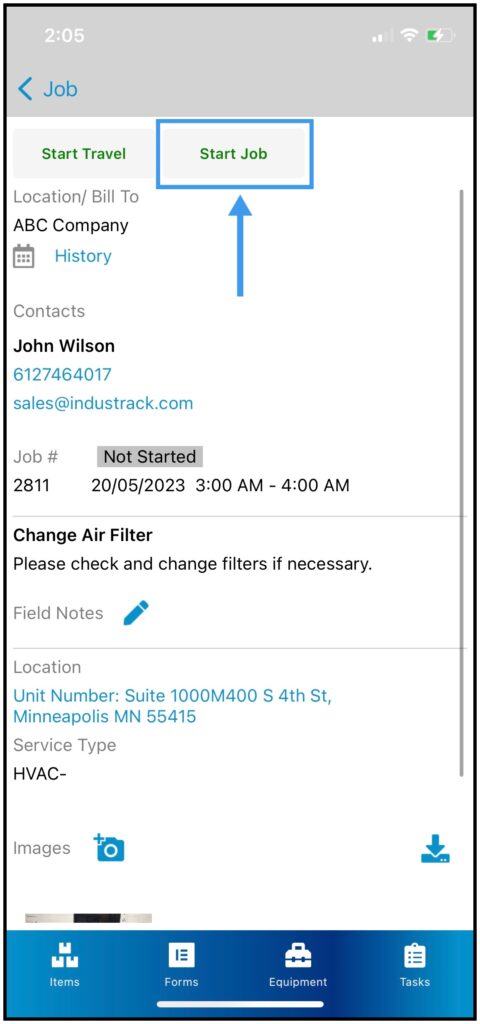
Start the Job
Inside the Details Tab hit the Start Job button when you are to start the job.
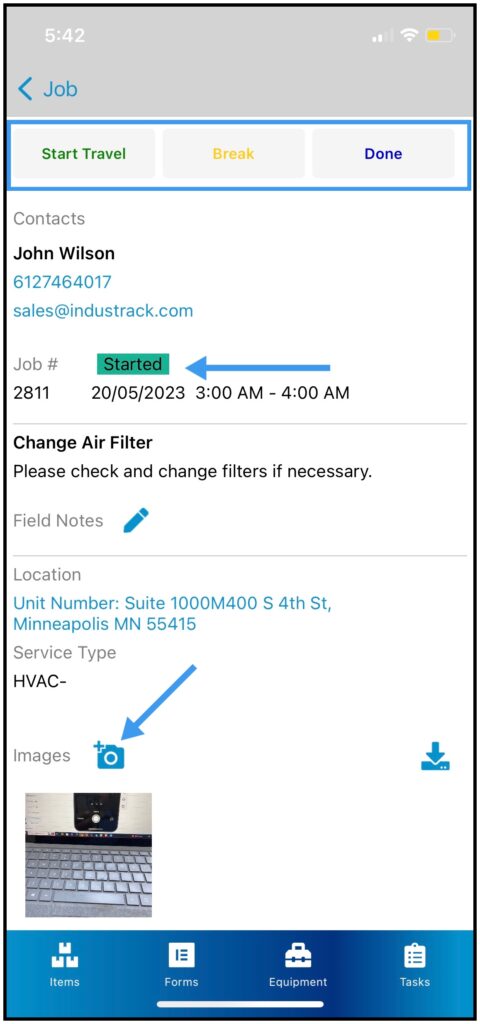
Once you are on the job, beside the Job # the Job Status will change accordingly.
Once you started the Job, notice that the Break Button popped up.
The Job status changed to Started highlighted in green.
If you need to take a break just tap on the break button and the Job Status will be changed to Paused highlighted in yellow.
Camera Icon – click on the camera icon to attach Photos you took at the job. You will also see here all photos the office user attached to the job
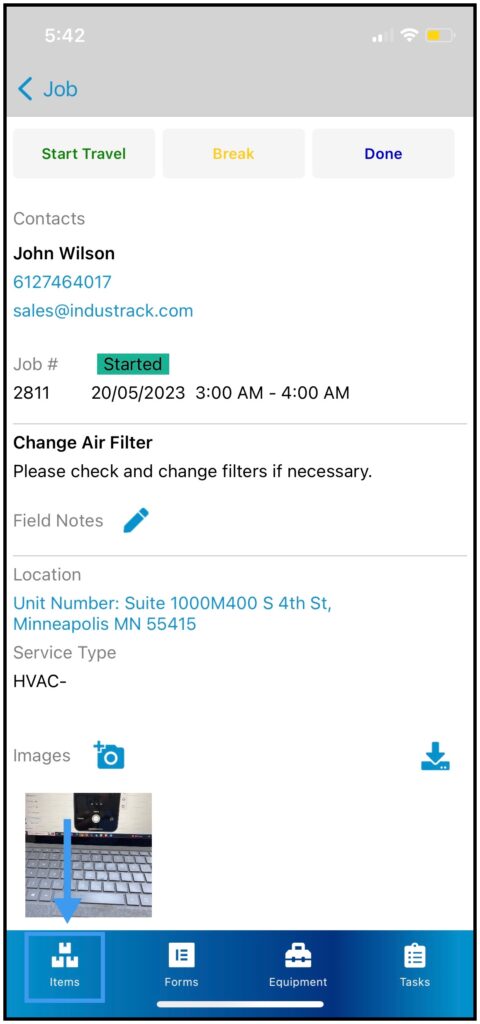
Items
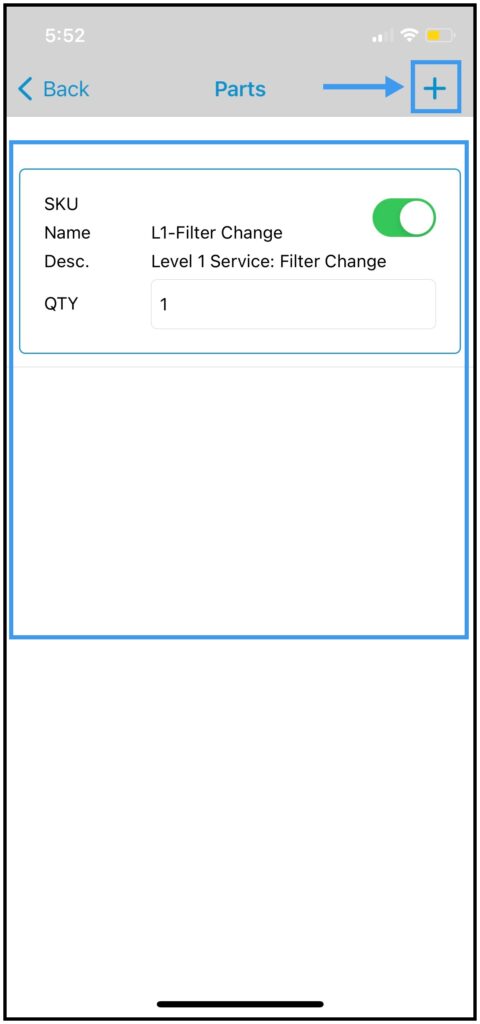
In the Items Tab, if the office user attached items or inventory parts to the job you will be able to see here all inventory items such as inventory part, non-inventory parts, services, and equipment that is attached to this job.
Items
Plus Icon – For instance, the office user forgot to attach certain items to the job. Field employees will also be able to add inventory items here.
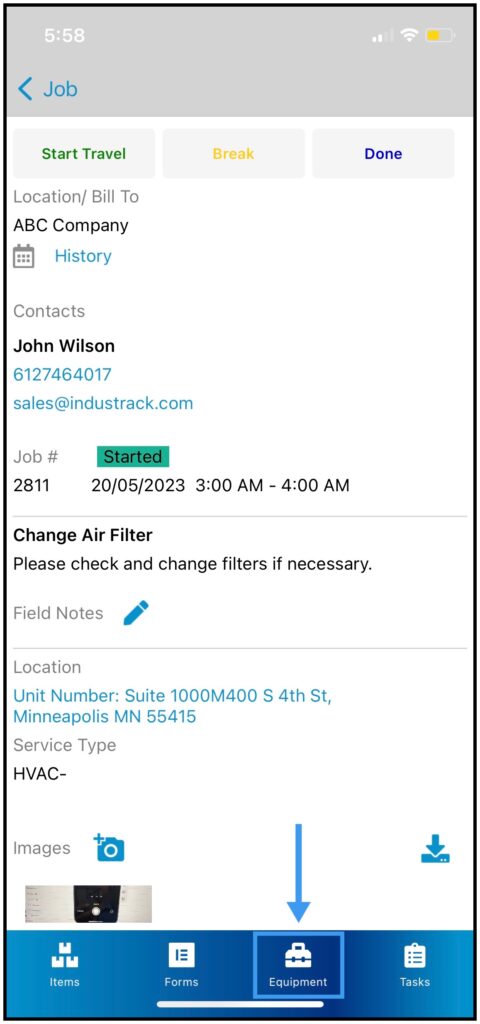
Existing Customer Equipment
In the Equipment tab, you will be able to see here all of the customer’s existing equipment and all of its service history.
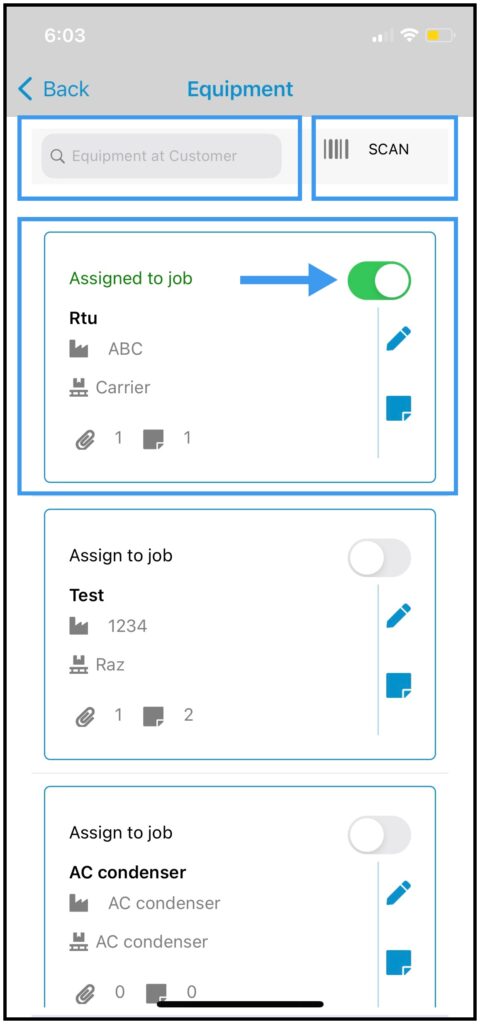
Existing Customer Equipment
Search Bar – field employees can search for a piece of customers existing equipment and assign it to the job.
Scan Existing – field employees can scan a code of equipment and it will be automatically added to the job.
Toggle Icon- assign equipment to the job by toggling on the toggle icon. If it is already toggled on that means the equipment is already assigned to the job.
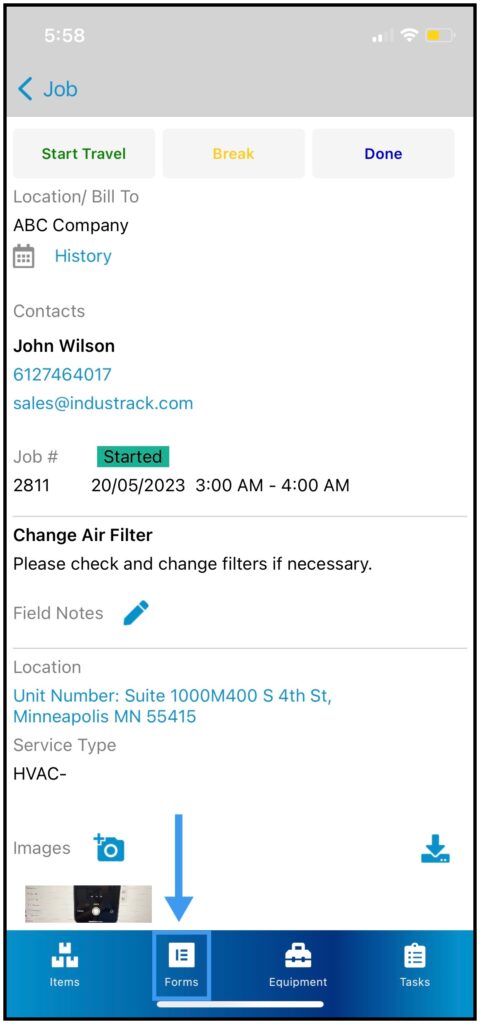
Mobile Forms
A list of pre-configured Forms that is assigned to his job will be listed here.
Field employees or customers can fill out this form.
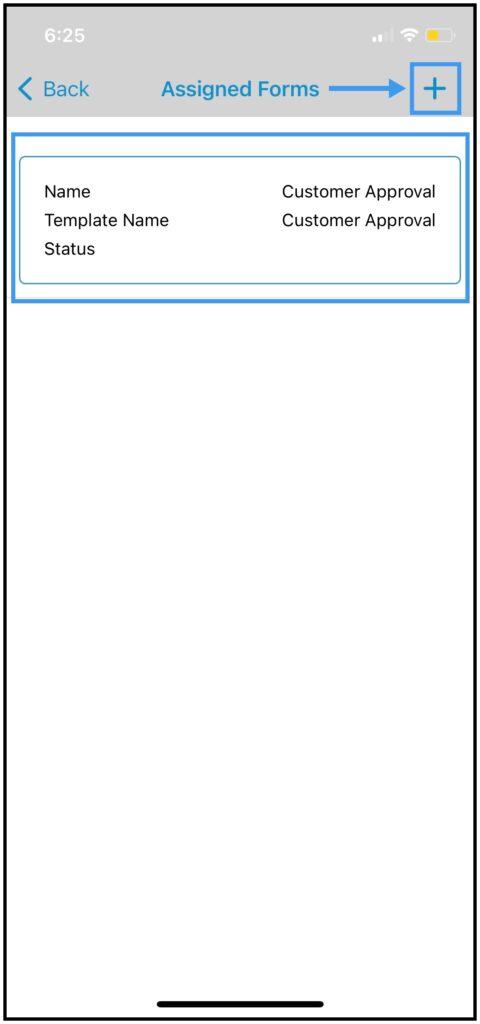
Forms List
All forms that are assigned to this job will be listed here.
Plus Icon– A list of pre-configured Forms that can be assign to the job will be listed. You can pick and fill out the form and it will be assigned to the job as well.
When the form is assigned to the job you can open it up, fill it out and you will have the option to SAVE, SUBMIT, or MAIL.
Saving the form will only save all the info that you fill it. Submiting the form will save the form and sumbit it to the office side and office users will be able to see it. Mailing the form will ask you input and email address and it will be sent out to the email you input.
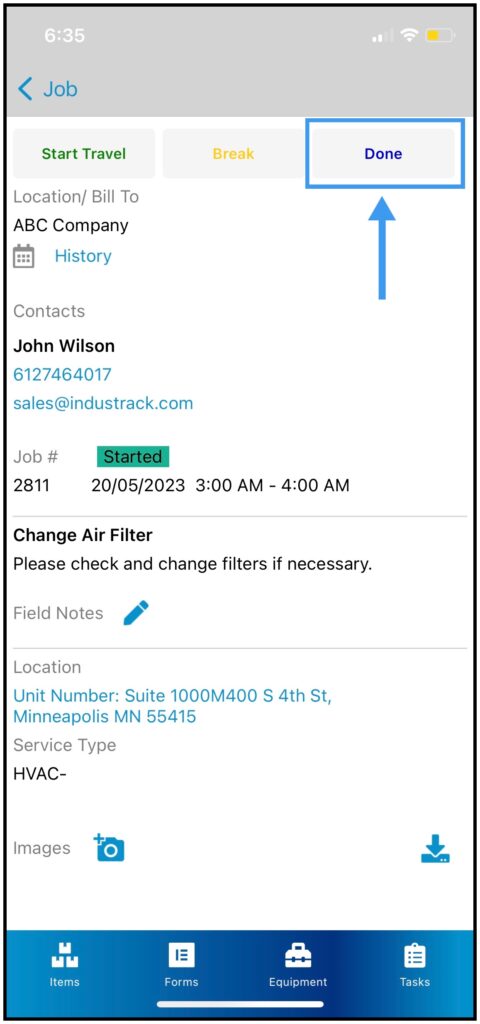
Finish the Job
Once all is settled, tap on the Done and a prompt will appear if you want to Hold or Complete the job.

Complete – will mark the job as finished and stop clocking your time for that specific job.
Create Reminder Task – This will allow techs to update the office staff to view the follow-up task needed for the job.
Hold – this will put the status of the job on hold for a reason.
Convert to Invoice – Will mark the job completed and convert the job into an invoice.
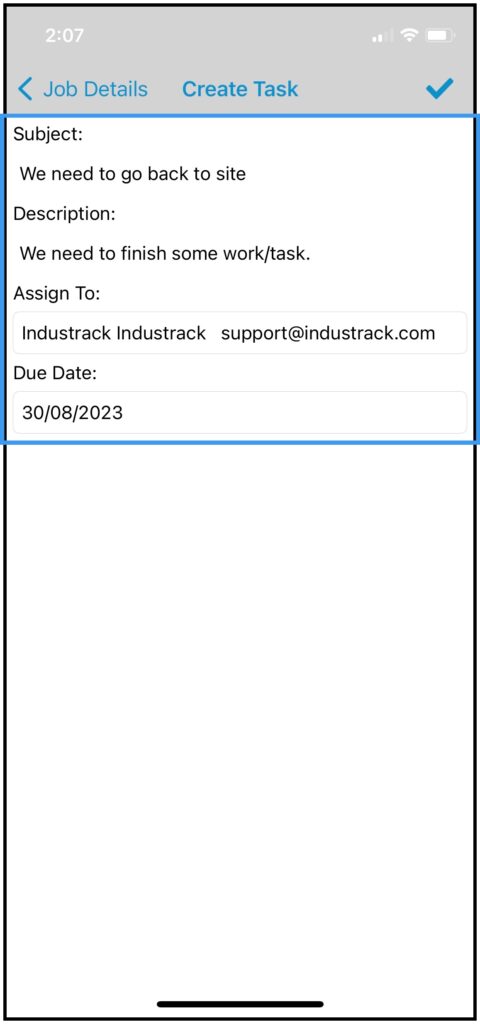
Create Reminder Task
If you decide to create a reminder task, give the task subject and description.
Assign the task to an office user and add a due date so that once you create it, it will notify the office user you’ve selected. The notification will show in the Reminders and Notification Bell under the Task Tab.
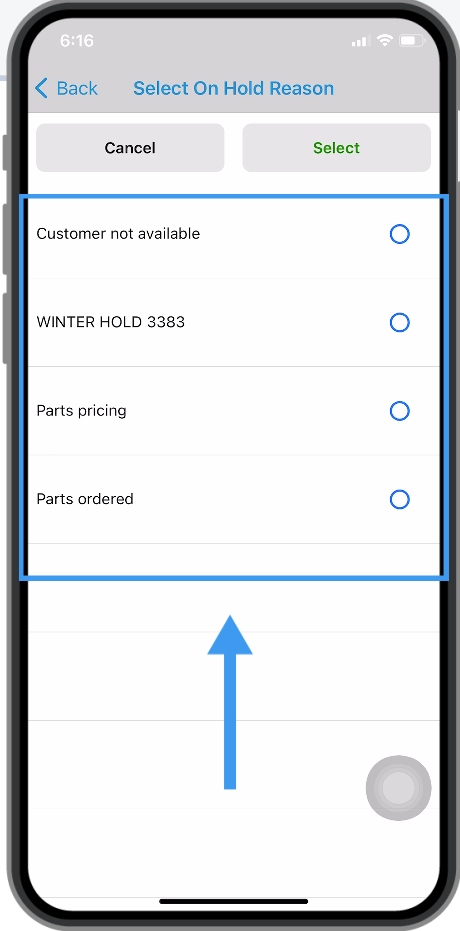
Job ON HOLD
Once you have decided to put the job on hold, you will be given an option for the reason why it was put on hold.
Pick a reason and tap Select.
After you put the job on hold, the Status of the Job will change to HOLD.
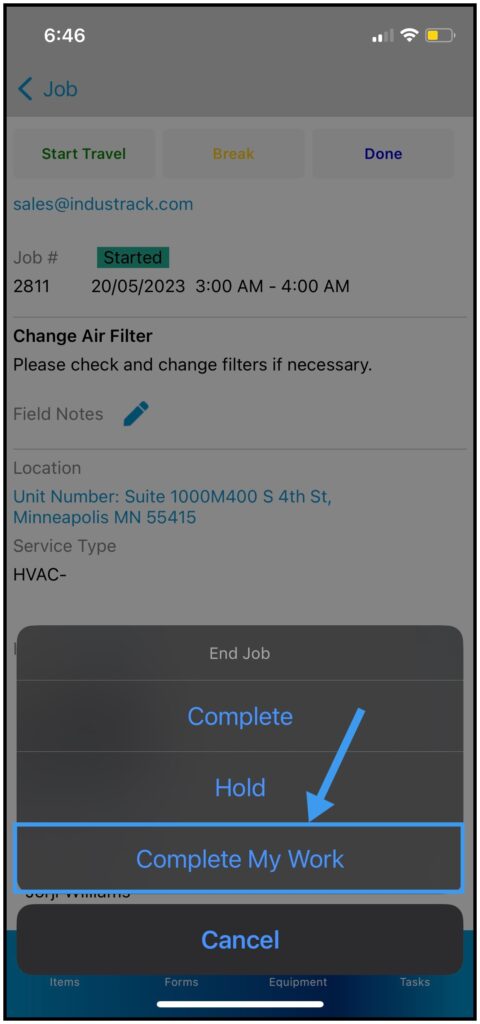
How to Complete a Job if it is assigned to multiple Field Employees
If you are one of the field techs assigned to the job, to complete the job for your self only after you click on the Done button an additional option Complete My Work in the prompt will be added.
Complete My Work – by selecting complete my work, this will only complete your time entries for this job. The other field employee assign to this job will still be able to work on this job and complete it on his own.
Getting a Signature after Job is Completed
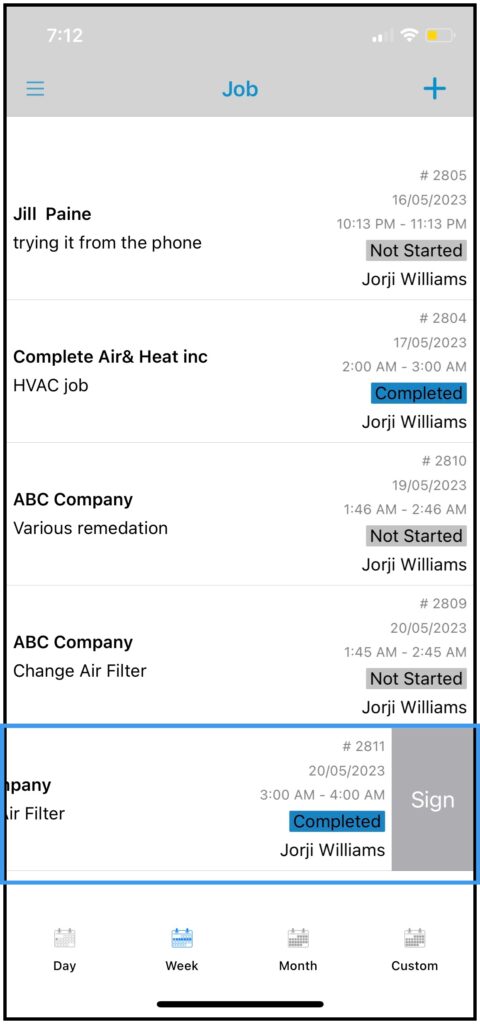
If you are using an IOS device, swipe right on the Completed Job to get a signature.
If using an Andriod device, click and hold the Job and click on Sign.
After clicking on Sign, a signature pad will pop up. Put your signature or have the customer sign it and click save.
End your Shift
After a hard day’s work hit the End Shift button. Data will be automatically sent and synced to the office as long as you have a network connection or Wi-Fi.