
Inventory Report
Inventory refers to all the items, goods, merchandise, and materials held by a business for selling in the market to earn a profit.
In this report, you can find a summary of all the inventory the business has on hand at a given time.
The inventory report is a physical or electronic document with numbers representing products you’re able to sell now, inventory you are ordering, or inventory you need for internal business use.
To access Timesheet Report, click on the REPORTS Module> on the left-hand side and click on Timesheet.
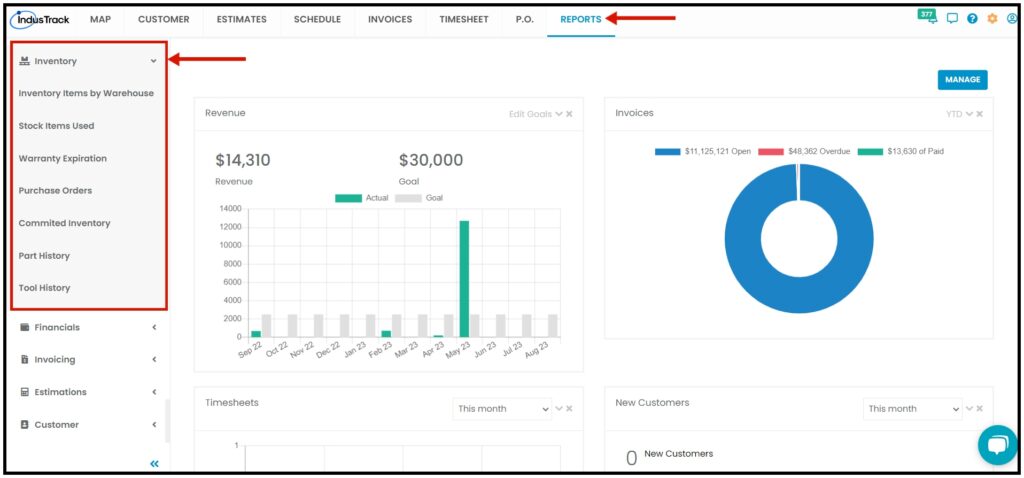
A drop-down option will show its subcategories for the reports you want to see:
- Inventory Items by Warehouse
- Stock Items Used
- Warranty Expiration
- Purchase Orders
- Committed Inventory
- Part History
- Tool History
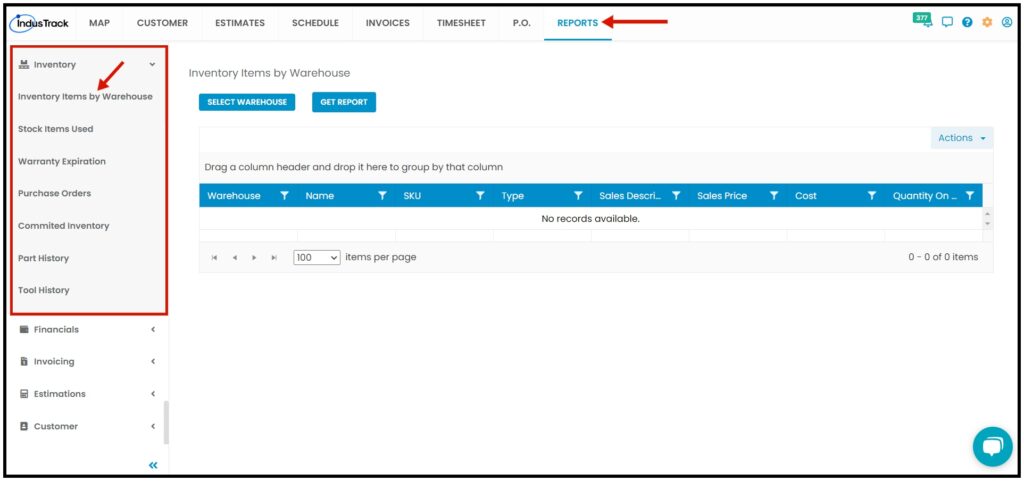
Inventory Items By Warehouse Report
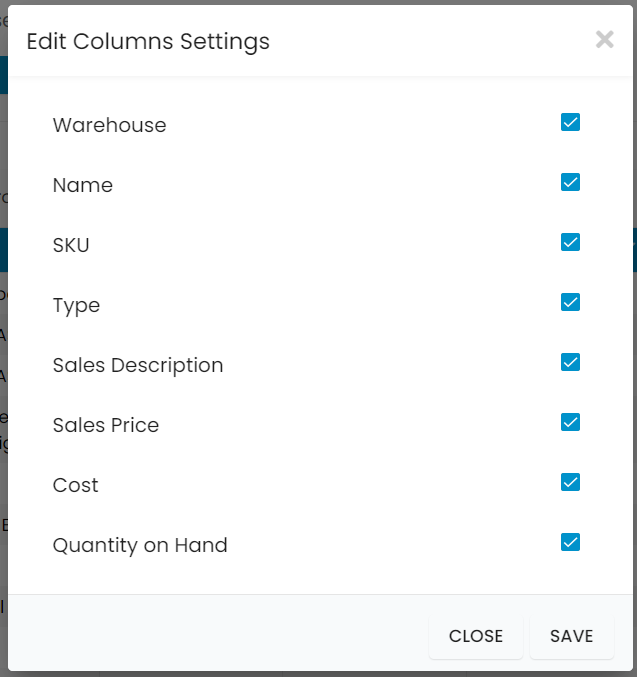
- You can search from which warehouse you want to get the inventory report.
- Warehouse
- Name
- SKU
- Type
- Sales Description
- Sales Price
- Cost
- Quantity on Hand
To view Inventory Items By Warehouse Report, go to Reports Menu on the top>Click Inventory> on the drop-down click Inventory Items By Warehouse Report.
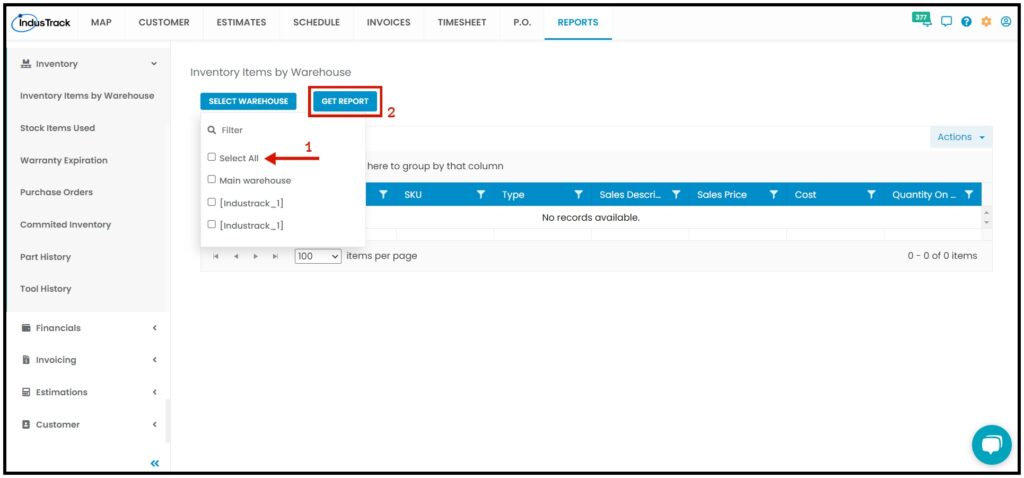
Getting the Inventory Items by Warehouse Report:
You can filter the report by the following:
- Warehouses
- Click on Select Warehouse
You have the option to either select one certain warehouse, multiple warehouses, or select all warehouses.
- Click on Select Warehouse
- After you select the warehouse, click on Get Report.
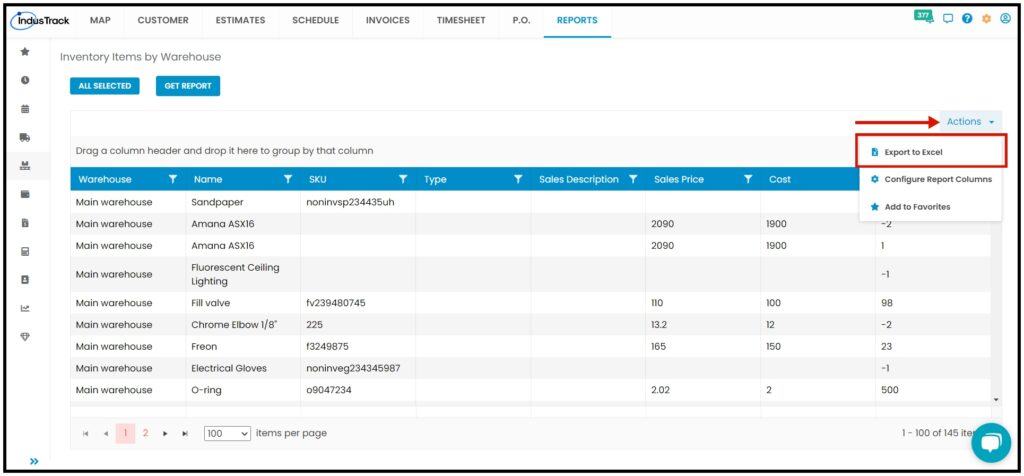
After we click on Get Report, we can now export the Inventory Items by Warehouse Report into Excel format by clicking on the Actions Button.
Actions Button
- Export to Excel
- Configure Report Columns
- Add to Favorites
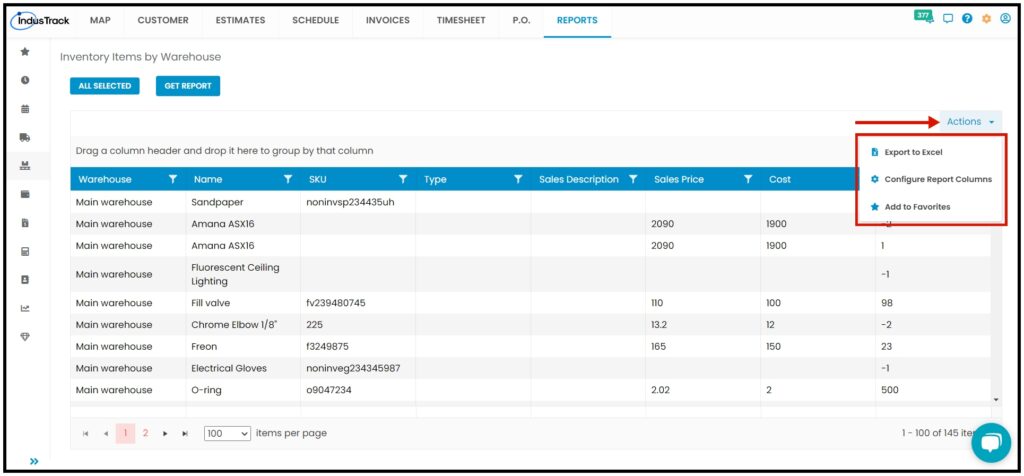
Export Report
- Click on Export to Excel to download the report to your computer. Either way, you can completely see the details in the report.
Configure Report Columns
Enable or disable the columns on this report if you want to see them or not. When disabling the column/s, once you generate this report that specific column will be removed.
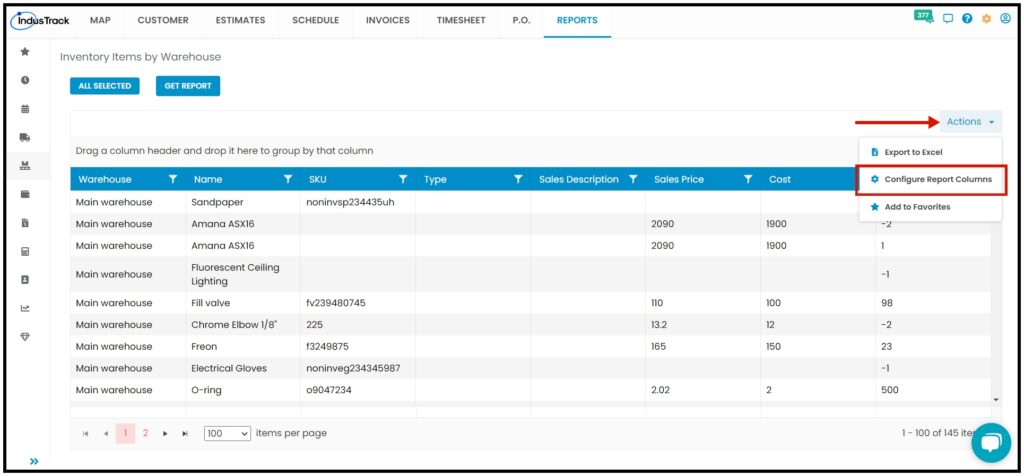
Uncheck columns you don’t want to see in the Report. Click SAVE after configuring.
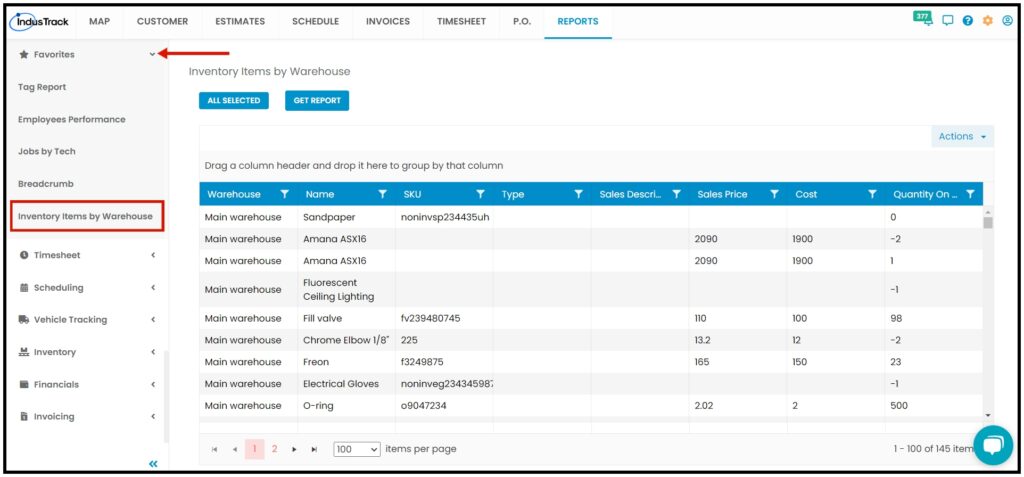
Add to Favorites
If you are frequently using this Report, you can select and Add it to Favorites.

After you add a Report to Favorites, a Favorite Tab will be added at the top right of the left panel. All reports that are added to Favorite will be listed in the Top panel for easy access.
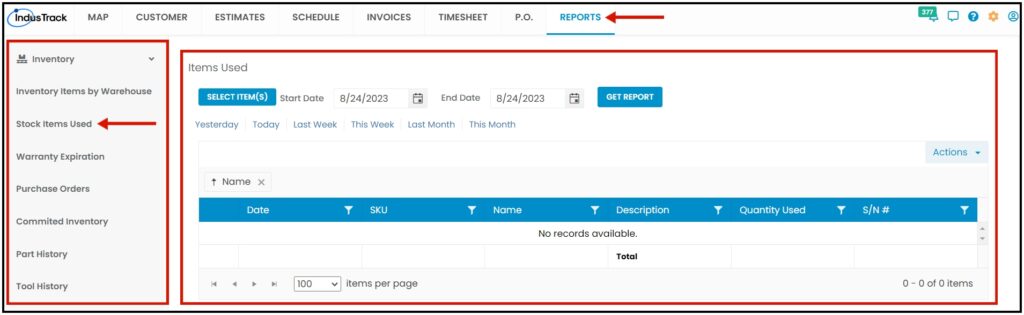
Stock Items Used
You can find in this report a summary of all the items that were used in a job on a specific period; daily, weekly, or monthly
- Date
- SKU
- Name
- Description
- Quantity Used
- S/N #
To view the Stock Items Used Report, go to Reports Menu on the top>Click Inventory> on the drop-down click Stock Items Used.
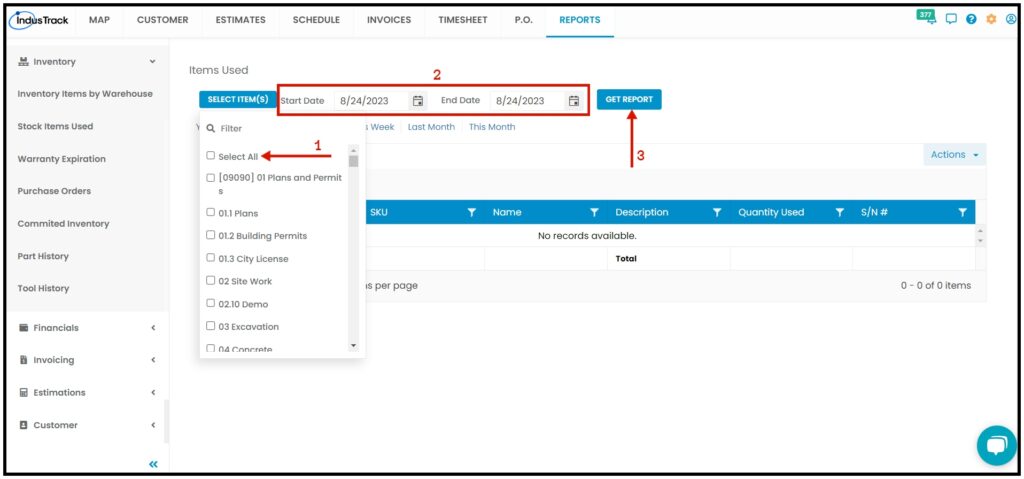
Generate Stock Items Used Report
You can filter the report by the following:
- Items –Name/s of the Item.
- Click on Select Item/s
- You have the option to either select one item, multiple items, or select all items.
- Date/s – specific date of the report
- Select the start date and end date
- After you select the item/s and the start and end date, click Get Report.
After we click on Get Report, we can now export the Stock Items Used Report into Excel or PDF format by clicking on the Actions Button and selecting Export to PDF or Export to Excel.
Click on export to Excel or export to PDF to download the report to your computer. Either way, you can completely see the details in the report.

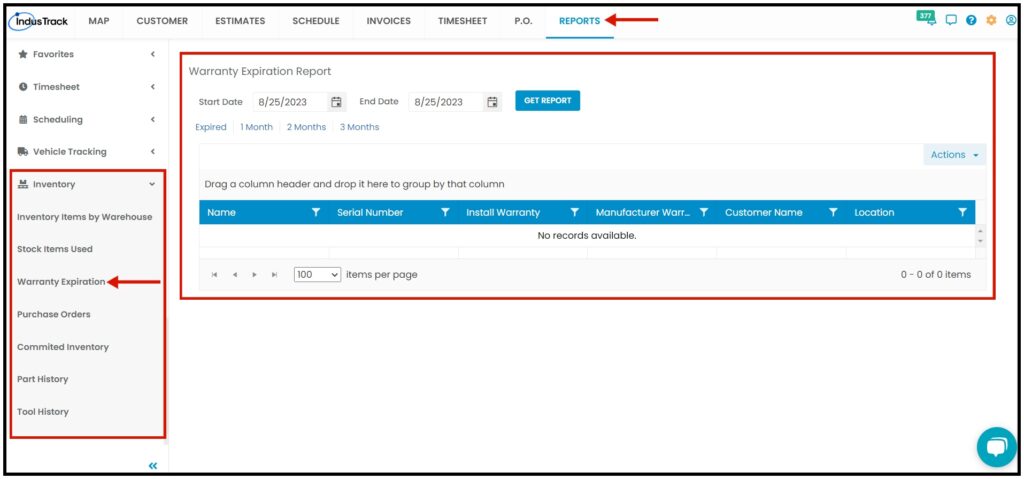
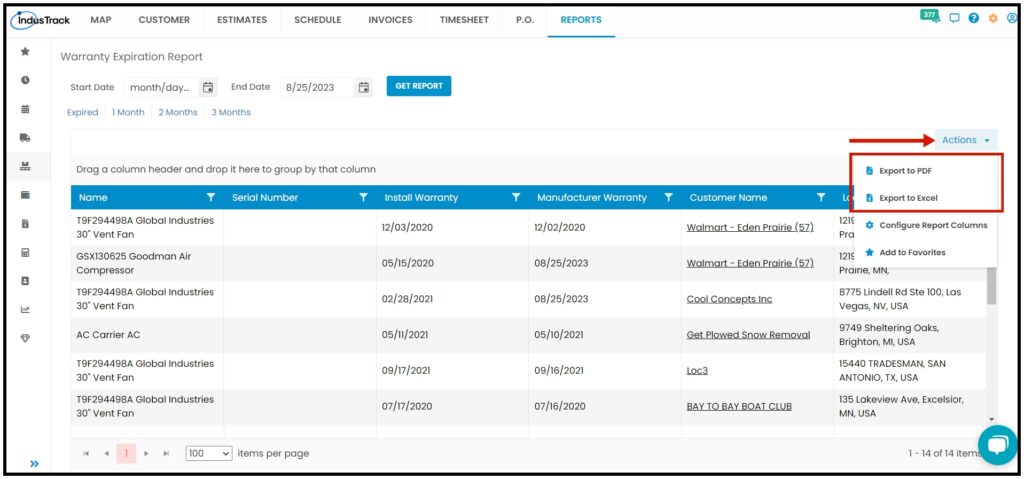
Warranty Expiration
In this report, you will be able to generate all the expired customer-owned equipment for a specific period.
- Name
- Serial Number
- Install Warranty
- Manufacturer Warranty
- Customer Name
- Location
To view the Warranty Expiration Report, go to Reports Menu on the top>Click Inventory> on the drop-down click Warranty Expiration Report.
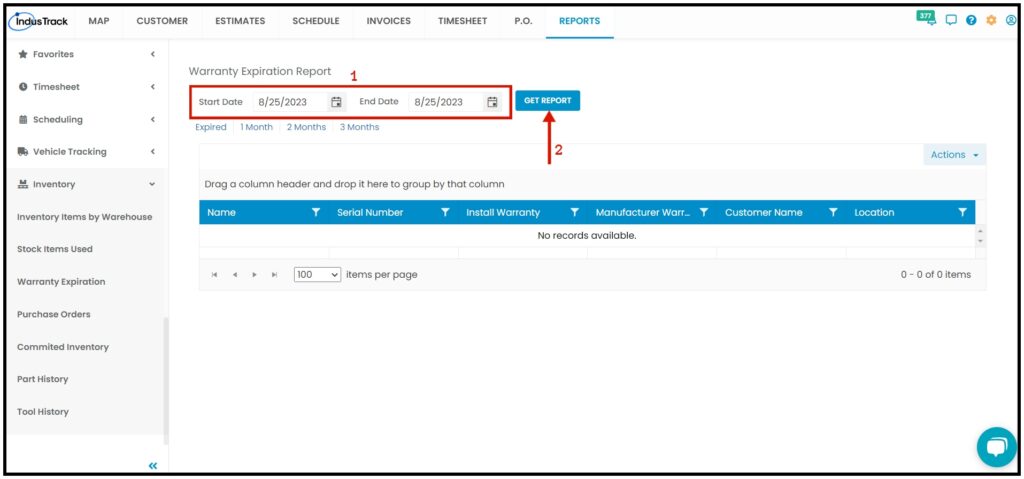
Generate Warranty Expiration Report
You can filter the report by the following:
- Dates – specific date of the report
- Select the start date and end date
- After you select the start and end date, click on Get Report.
After we click on Get Report, we can now export the Warranty Expiration Report into Excel or PDF format by clicking on the Actions Button and selecting Export to PDF or Export to Excel.
Click on export to Excel or export to PDF to download the report to your computer. Either way, you can completely see the details in the report.
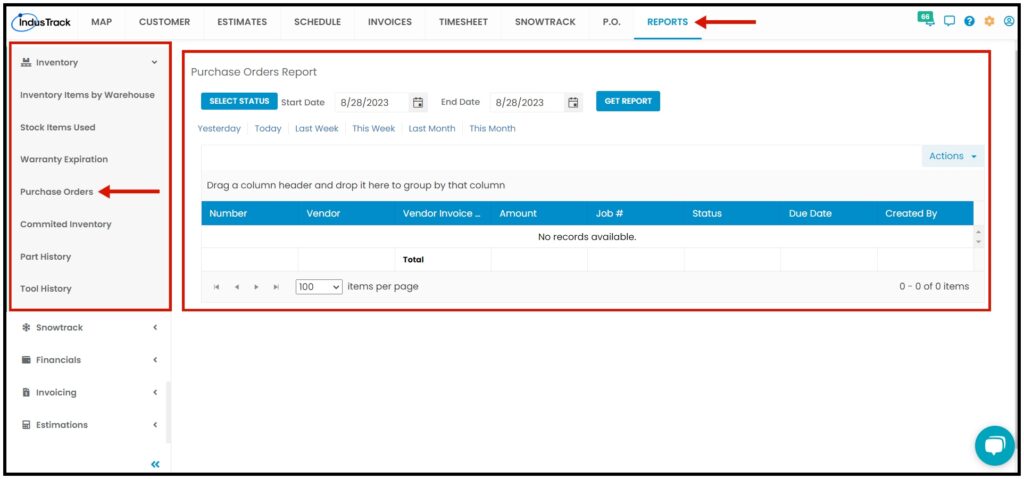
Purchase Orders Report
In this report, you will be able to generate all the Purchase Orders created with all information like the job the Purchase Order is associated with, the Purchase Order Status, etc.
- Number
- Vendor
- Vendor Invoice Number
- Amount
- Job #
- Status
- Due Date
- Created By
To view the Purchase Orders Report, go to Reports Menu on the top>Click Inventory> on the drop-down click Purchase Orders Report.
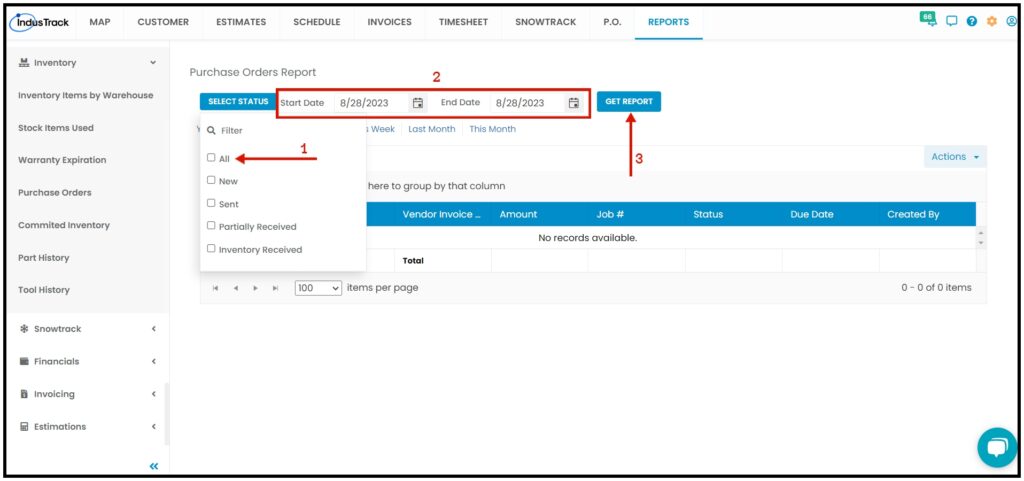
Generate Purchase Orders Report
You can filter the report by the following:
- Status- All, New, Sent, Partially Received, and Inventory Received.
- Select each of the statuses or you can select All.
- Dates – specific date of the report
- Select the start date and end date
- After you select the start and end date, click on Get Report.
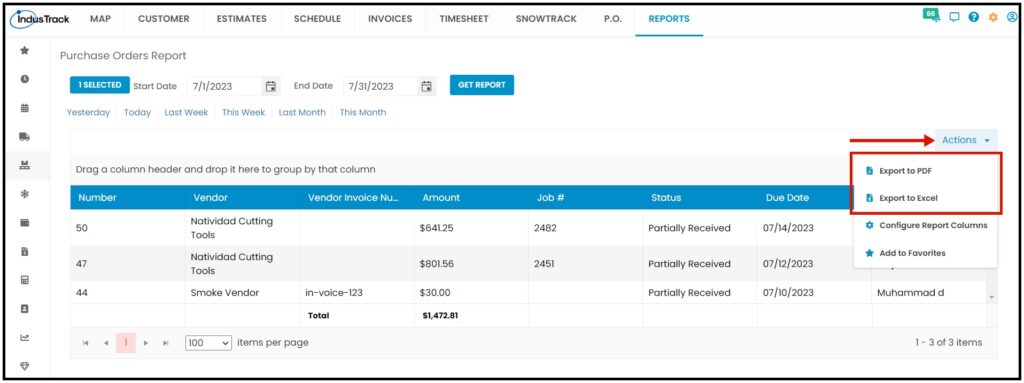
After we click on Get Report, we can now export the Purchase Orders Report into Excel or PDF format by clicking on the Actions Button and selecting Export to PDF or Export to Excel.
Click on export to Excel or export to PDF to download the report to your computer. Either way, you can completely see the details in the report.
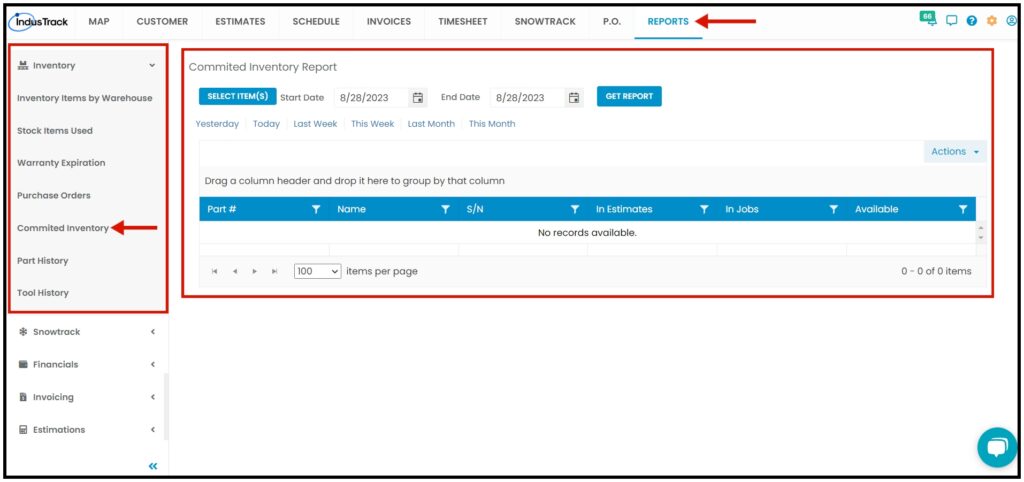
Committed Inventory Report
In this report, you will be able to generate all inventory items that have been committed for jobs and estimates and the quantity used with all of the detailed info for a specific period.
- Part #
- Name
- S/N
- In Estimates
- In Jobs
- Available
To view the Committed Inventory Report, go to Reports Menu on the top>Click Inventory> on the drop-down click Committed Inventory Report.
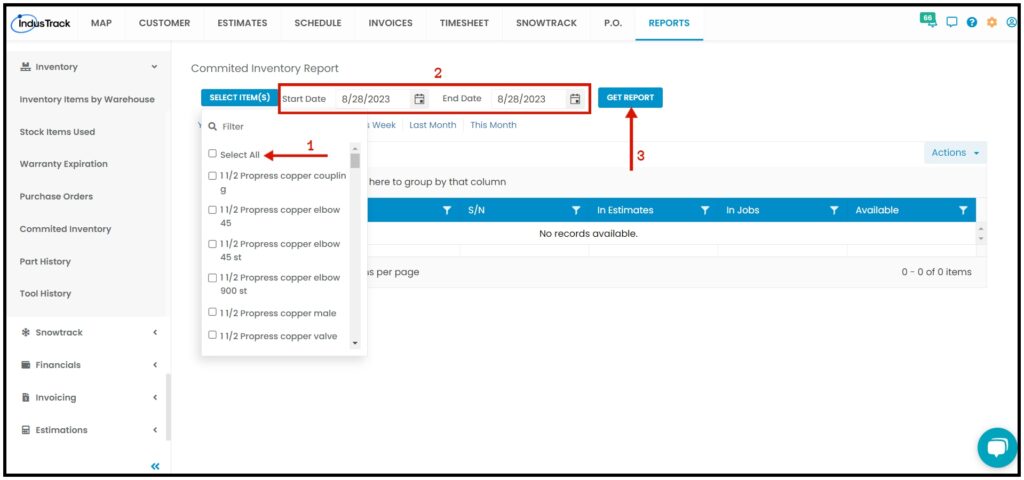
Generate Committed Inventory Report
You can filter the report by the following:
- Items- Name of the Inventory Item/s.
- Select one, multiple, or select all items.
- Dates – specific date of the report
- Select the start date and end date
- After you select the start and end date, click on Get Report.
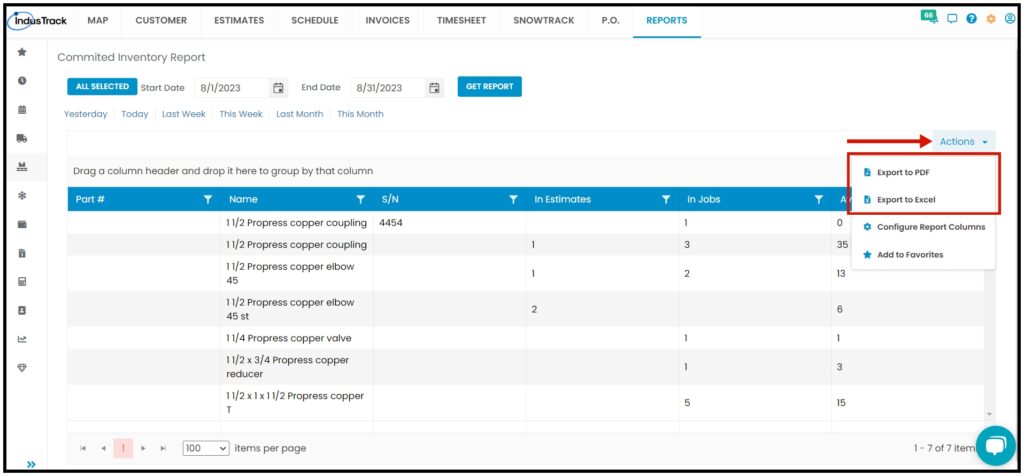
After we click on Get Report, we can now export the Committed Inventory Report into Excel or PDF format by clicking on the Actions Button and selecting Export to PDF or Export to Excel.
Click on export to Excel or export to PDF to download the report to your computer. Either way, you can completely see the details in the report.
0 Comments