
Inventory Items
Inventory items are products or goods purchased by the company that are meant for resale or to be charged to the account of the customers.
Set Up a New Inventory Item
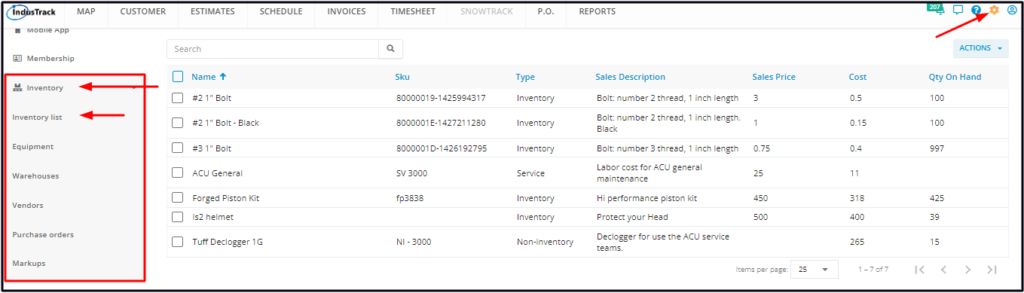
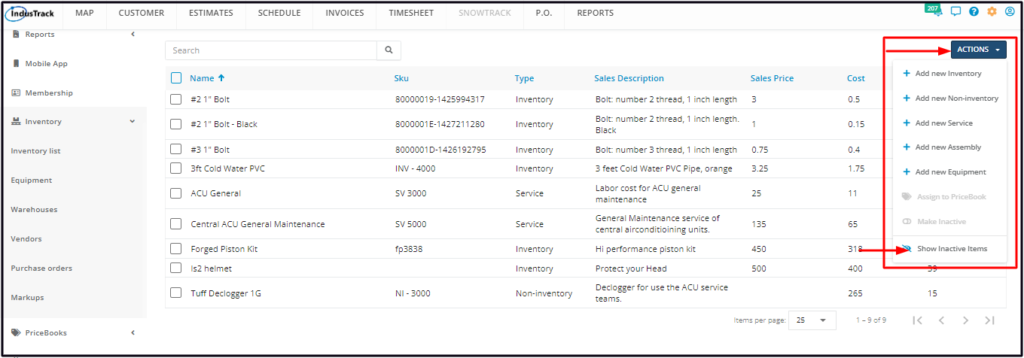
To add and manage your inventory items, go to Settings > Inventory > Inventory List.
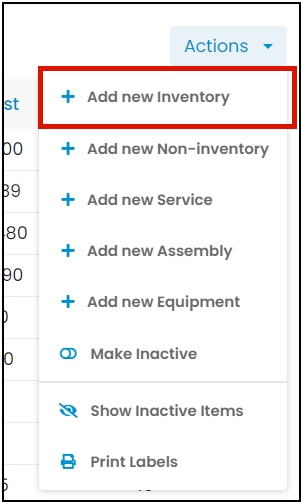
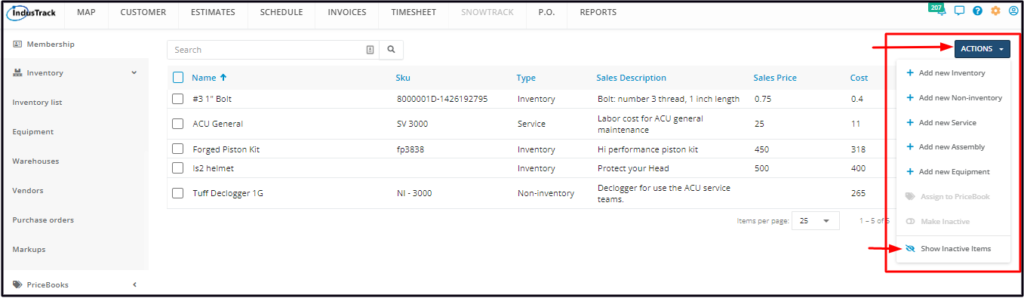
Click on the Actions button and select + Add new Inventory.
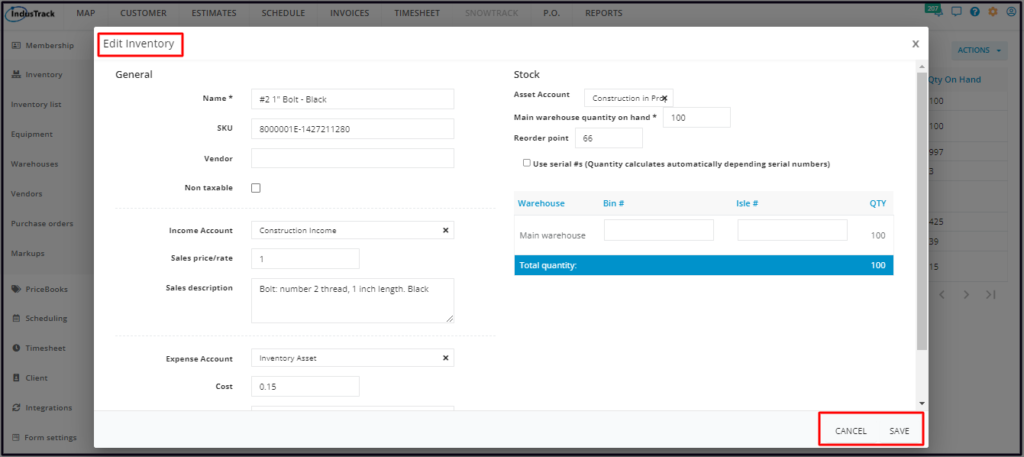
Fill in the item details on the Add Inventory window. Fields with (*) are required.
General Details
Name*
- Key in the name of the inventory item.
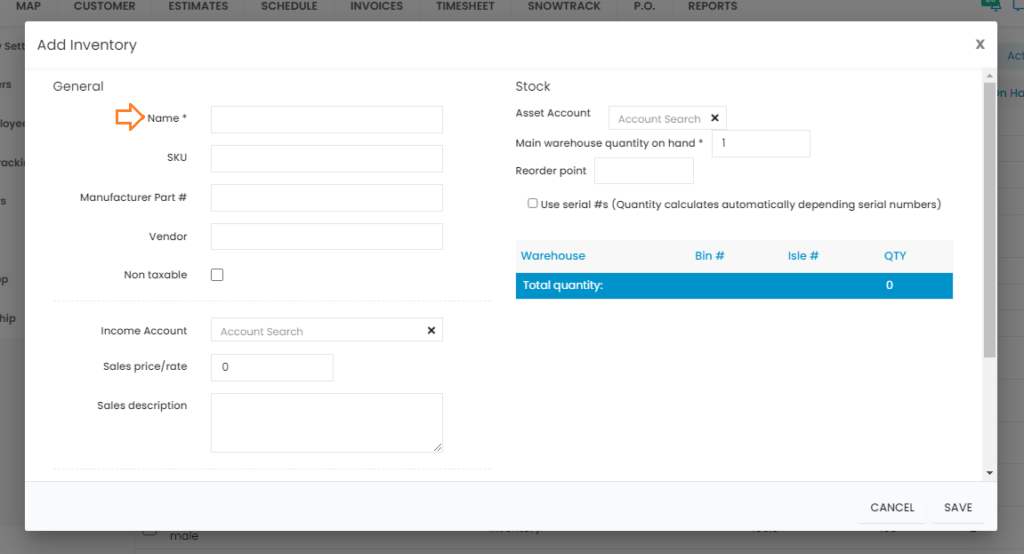
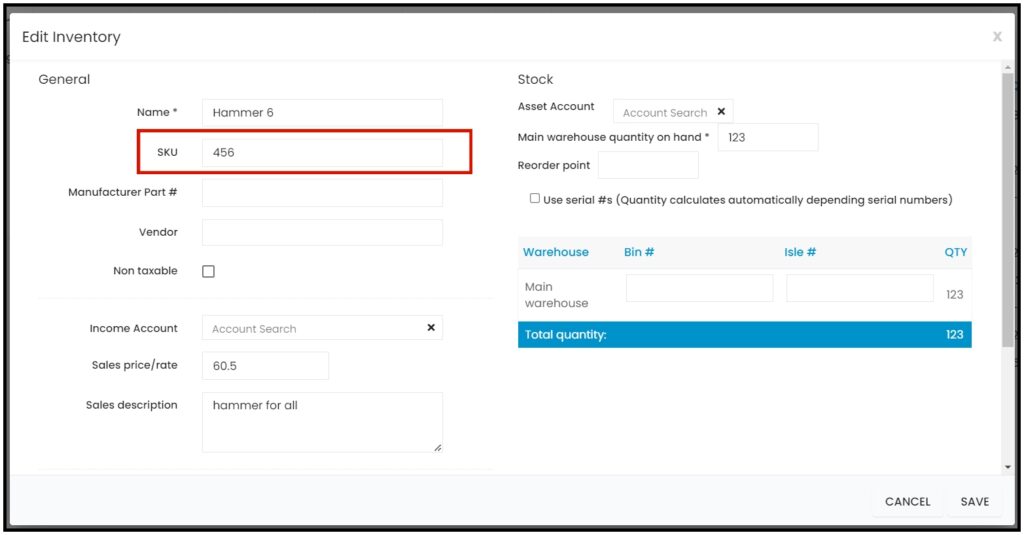
SKU
- Key in the item’s assigned product code.
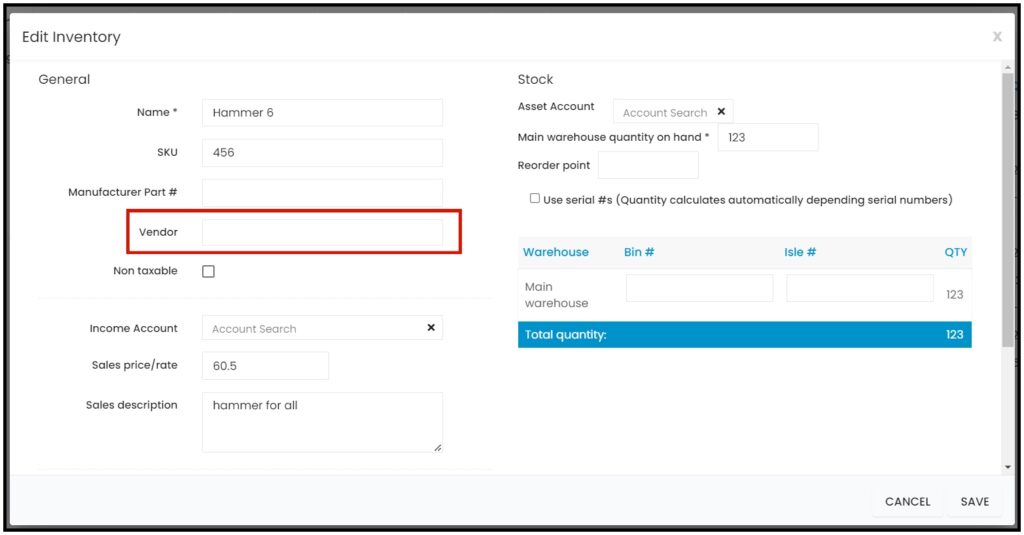
Vendor
- Select the supplier from the drop-down list.
- If the supplier is not on the list, key in the name. This will be added to the vendor list when the item is saved.
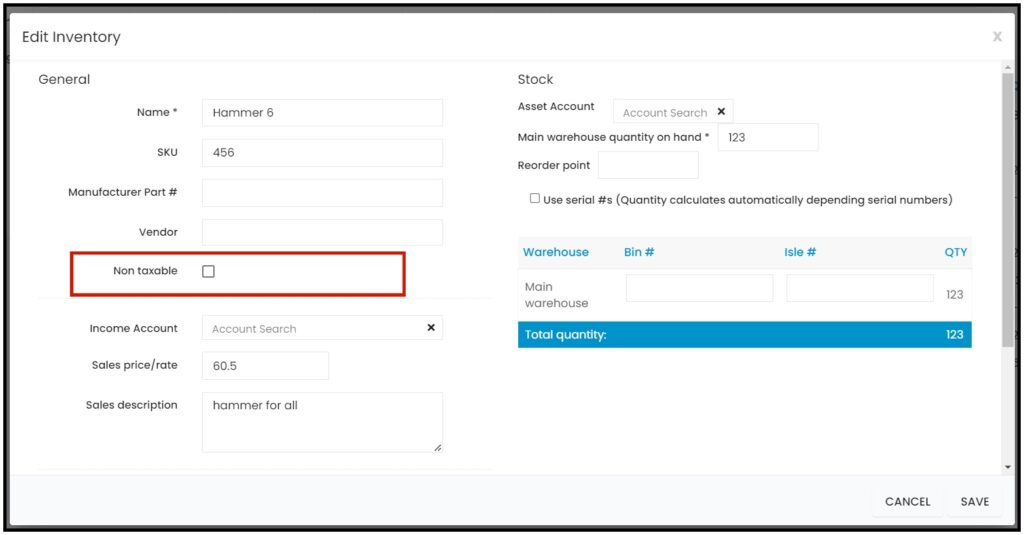
Non taxable
- If the item is not taxable, tick the checkbox. But if it is, leave the checkbox empty.
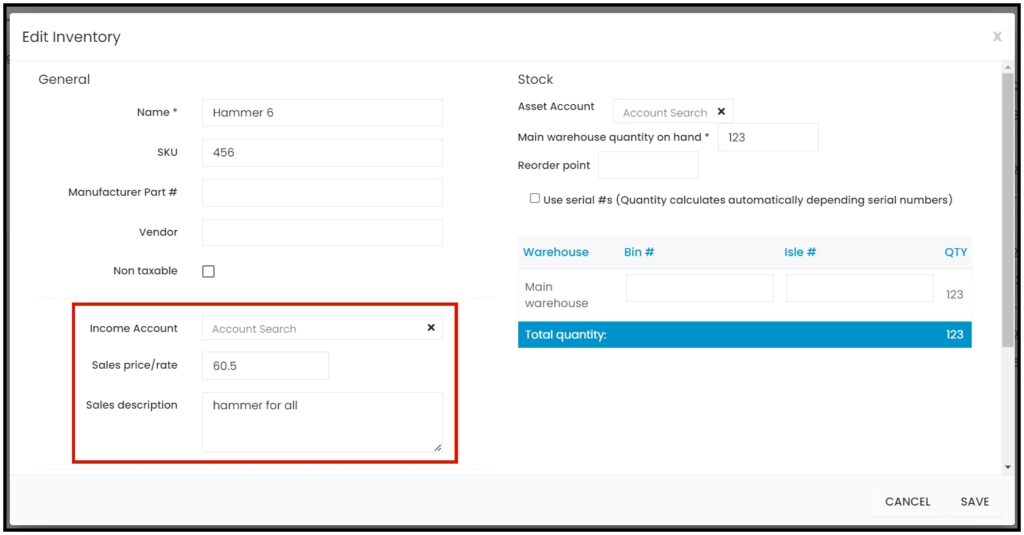
Income Account
- Select the corresponding income statement account from the dropdown list.
- Scroll down the list to find the correct account name. OR
- Key in the account name on the search field to quickly find the correct one.
- If the account name is not on the list, key in on the field. This will be added to the list when the item is saved.
Sales price/rate
- Key in the selling price of a single unit of the item.
Sales Description
- Key in a short description of the item.
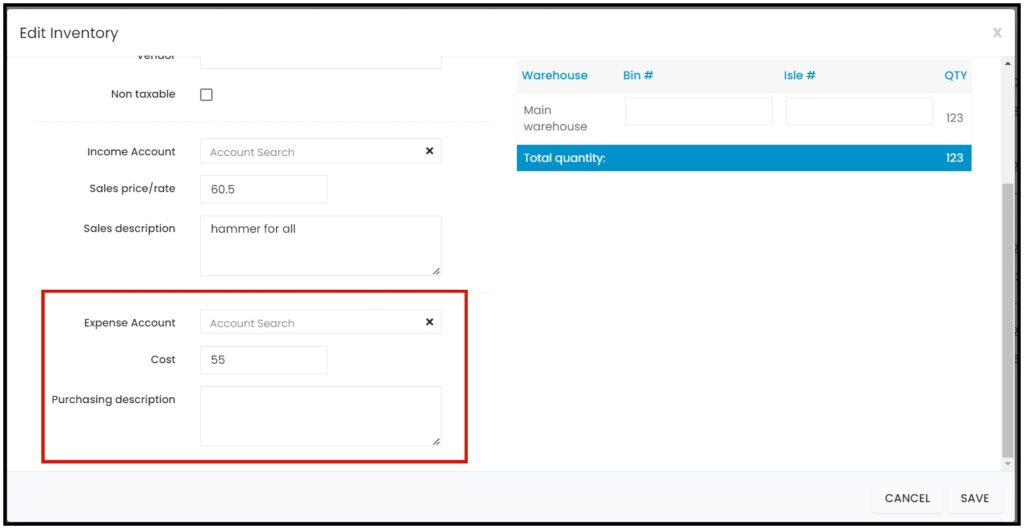
Expense Account
- Select the corresponding expense account from the dropdown list.
- Scroll down the list to find the correct account name. OR
- Key in the account name on the search field to quickly find the correct one.
- If the account name is not on the list, key in on the field. This will be added to the list when the item is saved.
Cost
- Key in the acquisition cost of a single unit of the product.
Purchasing Description
- Key in any special purchasing notes, if any, such as required order lead time.
Stock Details
Asset Account
- Select the corresponding asset account from the dropdown list.
- Scroll down the list to find the correct account name. OR
- Key in the account name on the search field to quickly find the correct one.
- If the account name is not on the list, key in on the field. This will be added to the list when the item is saved.
Main warehouse quantity on hand *
- Key in the stocks on hand. This will now be your beginning inventory at the Main Warehouse.
- The Inventory can also be monitored using serial numbers. See the section Use serial #s below to learn how this works.
- This is a required field so if there is no quantity on hand, use 0.
- Once the item is saved and the stock location information is already available, or if applicable, open the item details in edit mode and enter the Bin # and/or Isle #.
Reorder Point
- Set the minimum quantity for reordering.
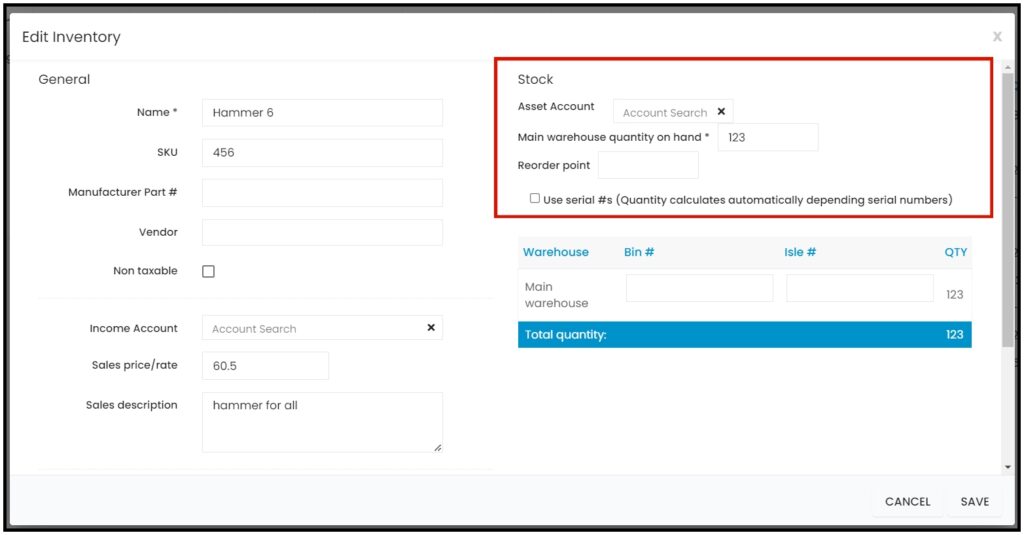
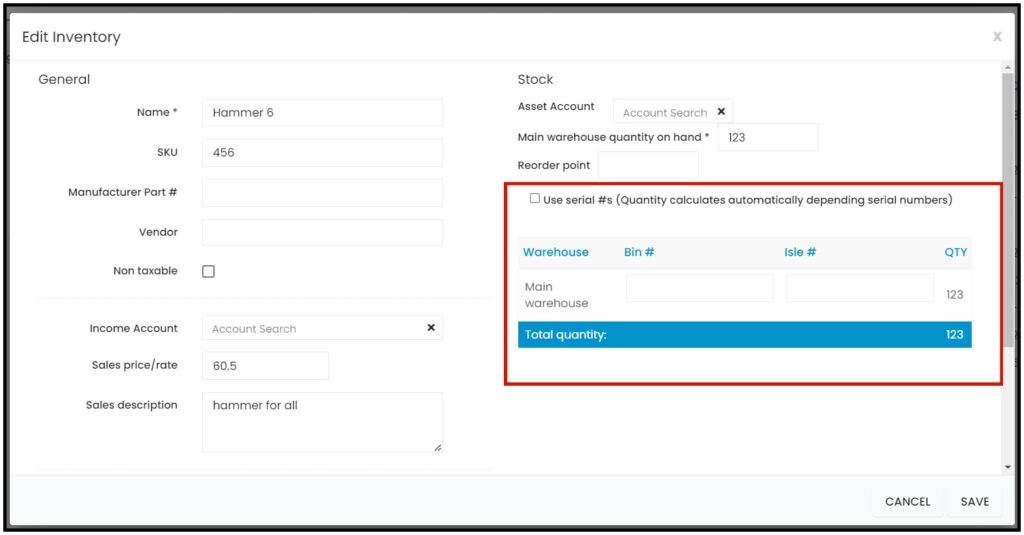
Use serial #s
- With this option, the item’s quantity on hand calculates automatically depending on serial numbers. There will be no need to enter a value on the Main warehouse quantity on hand *.
- Leave the checkbox unticked, if this option is not to be used.
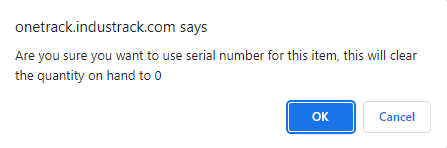
To enable this option, tick the checkbox. A warning window will come up. Click the OK button to continue and Cancel to abandon the action.
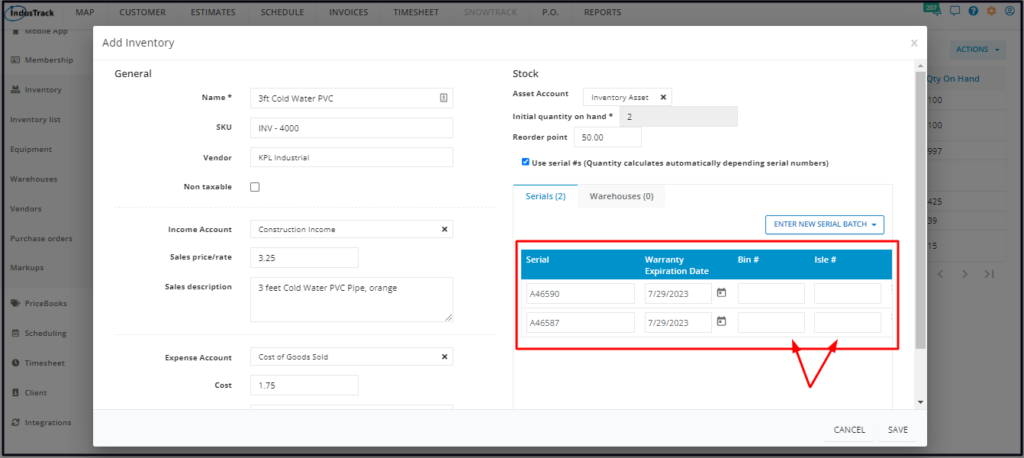
- The field for entering the serial numbers will come up. On the Serials tab, click the Enter New Serial Batch button.
- Set the expiration date of the items. Use the date picker or key in the date on the field.
- Key in the serial number or numbers of the item(s) at the Main Warehouse.
- For multiple batches, enter the expiration dates and/or serial numbers separately.
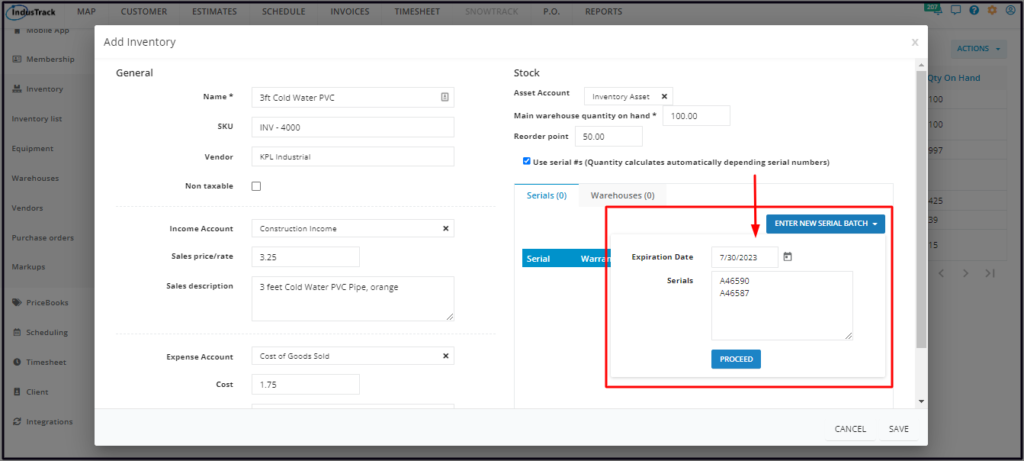
- Save the serial number(s) by clicking the Proceed button.
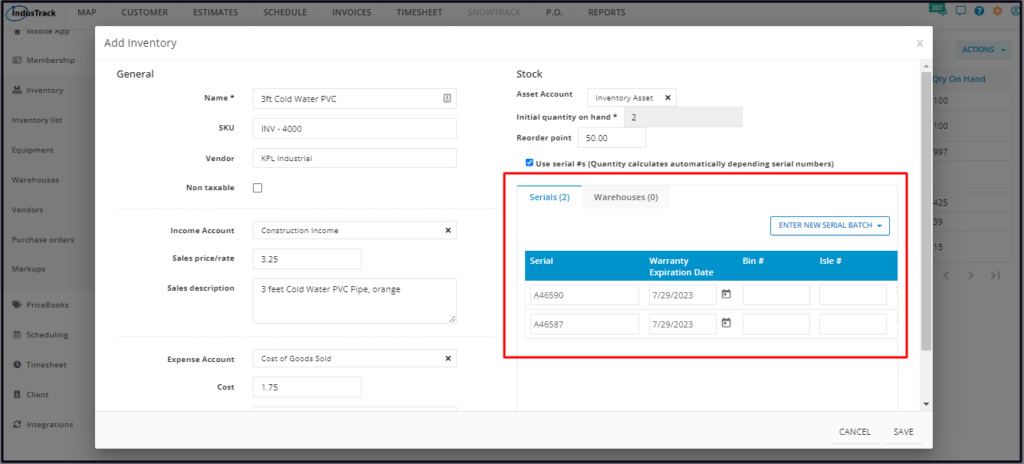
- If the stock location information is already available, or if applicable, enter the Bin # and/or Isle #.
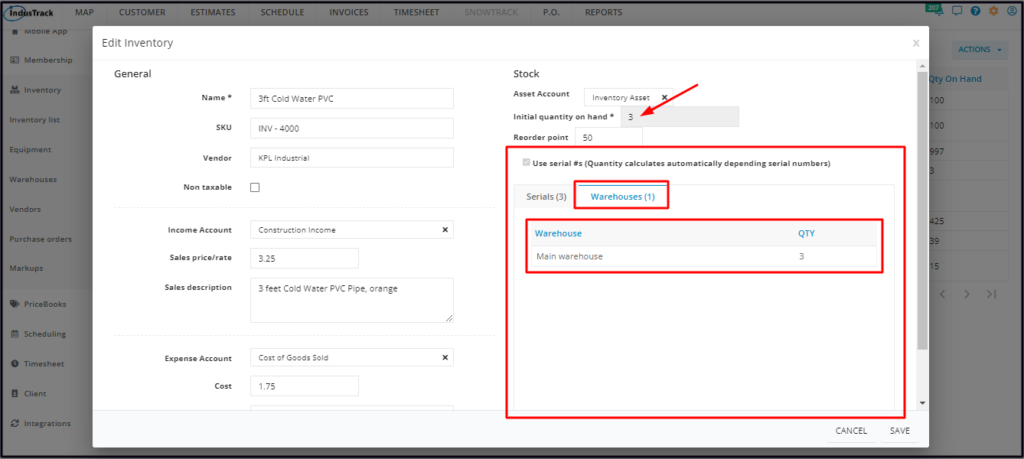
- Once the item is saved, the total inventory at the Main Warehouse will be recorded in the Warehouses tab.
- The Main warehouse quantity on hand * will also be replaced with Initial quantity on hand.
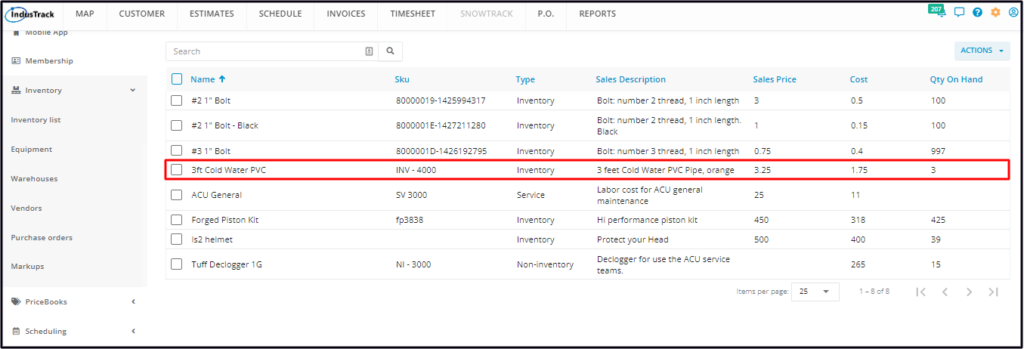
Save the new inventory item. This will be added to the Inventory List.
Update the Details of an Inventory Item
Updating of inventory is limited to Office Users who have editing permissions.
Find the inventory item to be updated from the list. Click on the item and the information will open in edit mode.
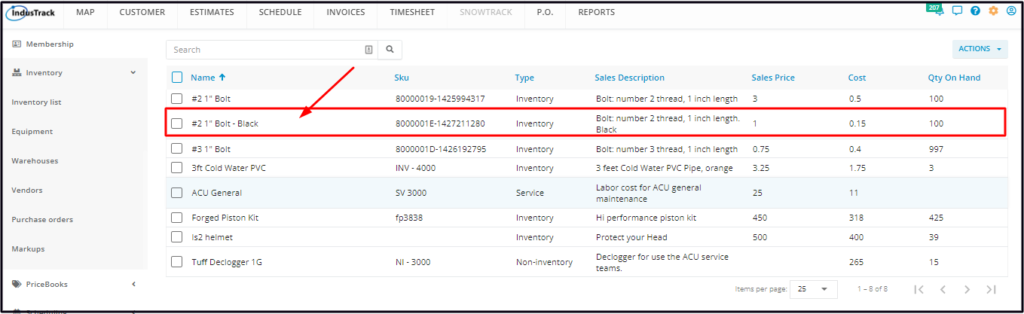
Edit/Update as may be needed. Once done, Save the changes.
- Inactive inventory items are not editable. These will have to be reactivated first.
Deactivate an Inventory Item
Deactivate an inventory item if this will no longer be held in inventory. This is an option to take instead of deleting the item which could cause errors.
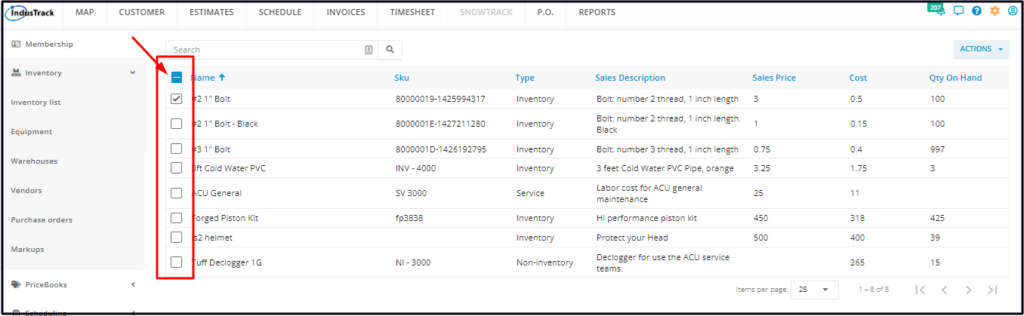
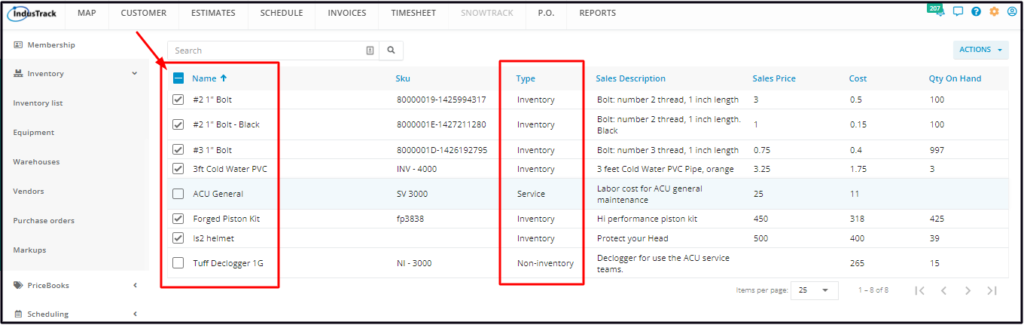
Find the item to be deactivated from the list and tick the checkbox to its left.
Click the Actions button and select Make Inactive.
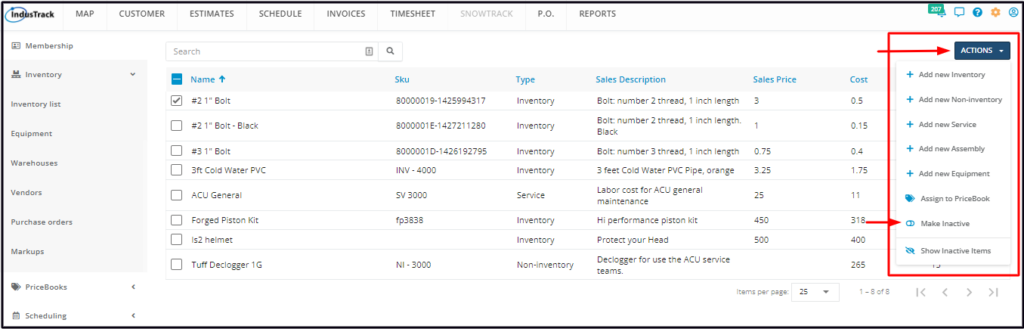
- To deactivate multiple inventory items, tick the checkboxes to the left of all. If all items will be deactivated, just tick the checkbox of the Name header. Just note that the list includes the other types of inventory. And then go to the Actions button and select Make Inactive.
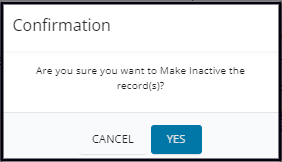
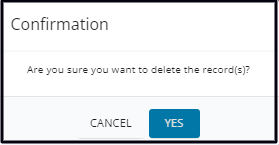
A warning window will come up. Click the Yes button to continue with the deactivation and Cancel to abandon the action.
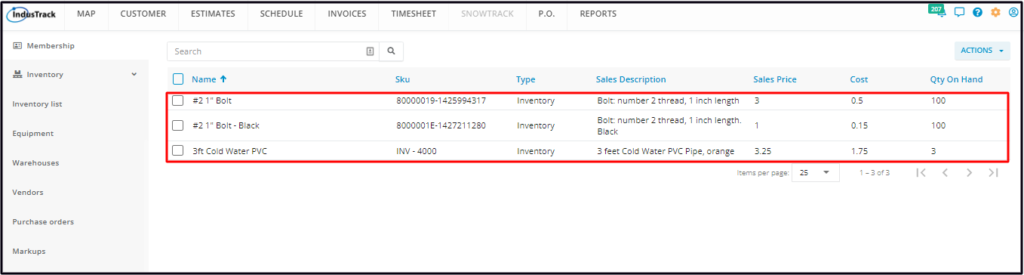
The item will be removed from the Active List and moved to the Inactive List.

Reactivate a Deactivated Inventory Item
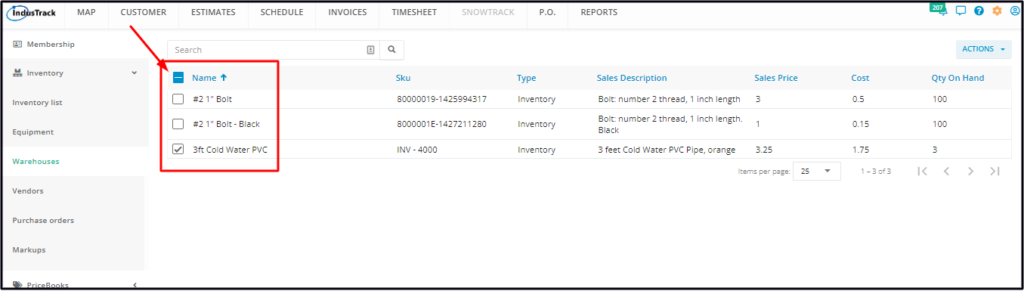
Go to the Inactive Inventory List
Find the inventory item to be reactivated from the list and tick the checkbox to its left.
Click the Actions button and select Make Active.
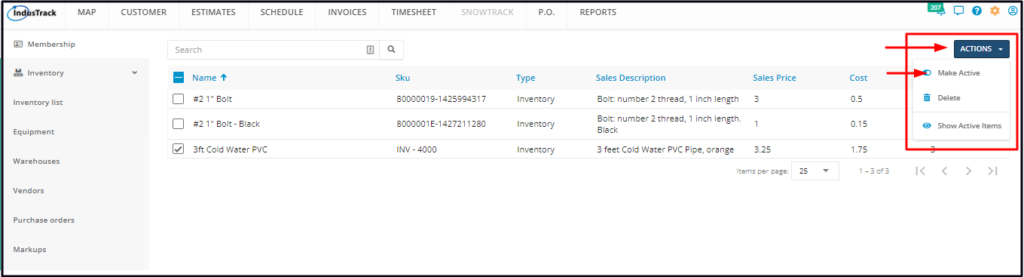
- To reactivate multiple inventory items, tick the checkboxes to the left of all. If all items will be reactivated, just tick the checkbox of the Name header. Just note that the list includes the other types of inventory.
- Go to the Actions button and select Make Active.
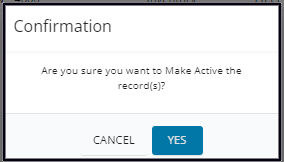
A warning window will come up. Click the Yes button to continue with the reactivation and Cancel to abandon the action.
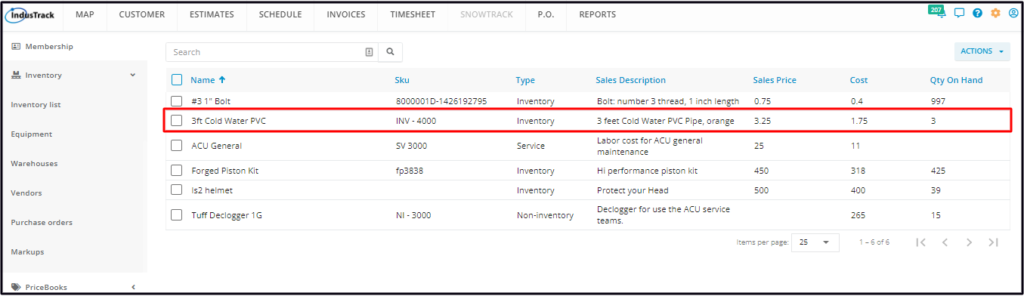
The item will be removed from the Inactive List and moved to the Active List.

Update the inventory as may be needed.
Delete an Inventory Item
Delete an Inventory Item that is no longer in use or was created in error. It is wise to exercise caution when using this function. Deleting an inventory item may have an effect on other functions, settings or data. This action can not be undone.
If the item has an active status, deactivate this first. An active inventory item can not be deleted.
Move to the Inactive Inventory table.
Find the Inventory item to be deleted from the list, and tick the checkbox to its left.
- To delete multiple inventory items, tick the checkboxes to the left of all. If all items will be deleted, just tick the checkbox of the Name header. Just note that the list includes the other types of inventory.

Go to the Actions button and select Delete.
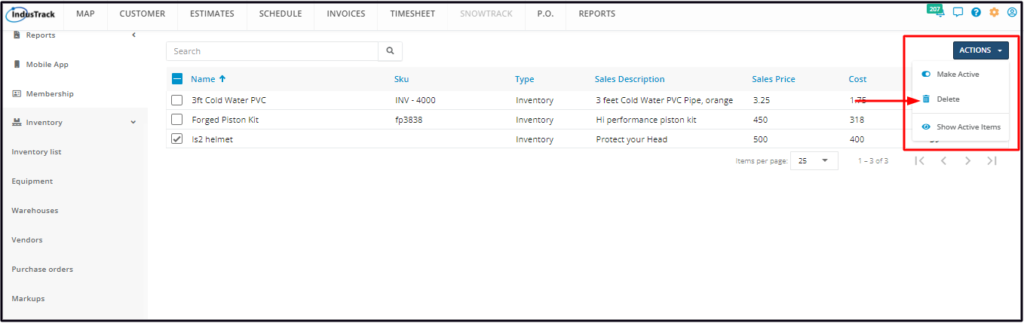
A warning window will come up. Click the Yes button to continue with the deletion and Cancel to abandon the action.
The inventory item will be removed from the Inactive Inventory list.