
Add and Manage Office Users
Create, view, edit, activate, and delete office user profiles from the Office Users page.
Office Users are able to access and work on your account’s Settings Section and different modules depending on the permissions they are given. A Super Admin is needed to create Office Users. Depending on the permissions given others may edit or view these profiles. It is also possible other users may not have access.
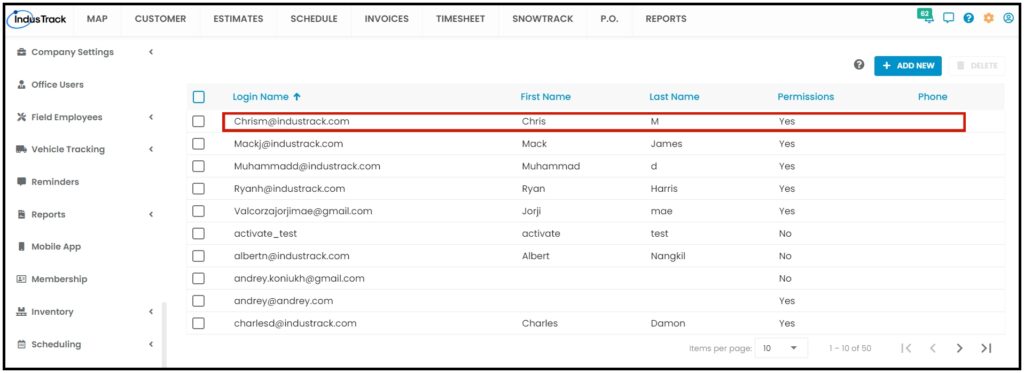
To access the Office Users page, go to Settings > Office Users.
Create an Office User
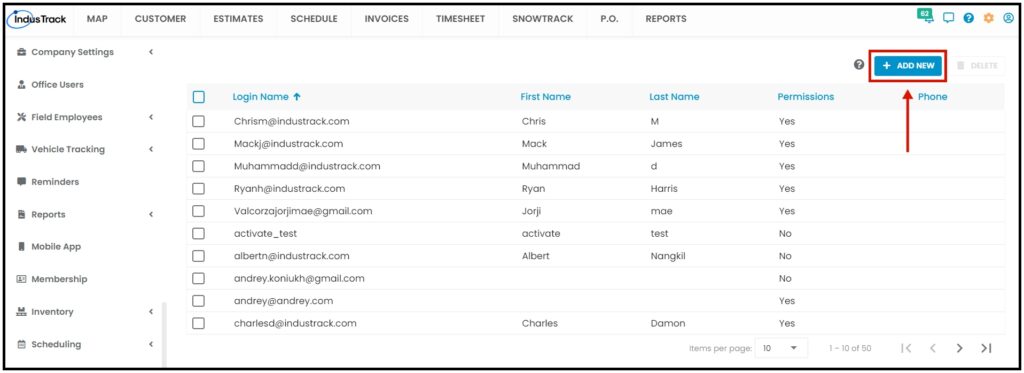
From the Office Users page, go to the + Add New button.
From the Add Office User page, create the user’s profile at the General tab, assign their permissions at the Permissions tab, and set up an email integration at the Email tab.
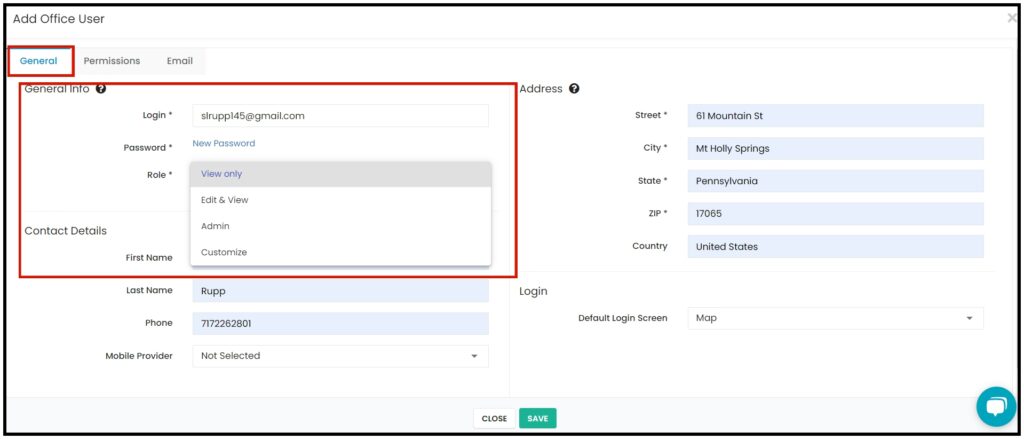
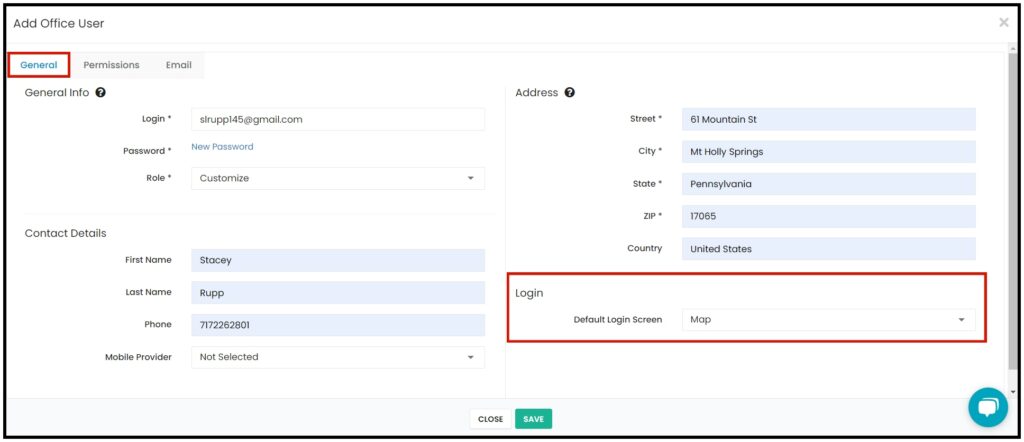
1. Go to the General tab, and fill in the fields to create the office user’s profile. Fields with (*) are required.
- General Info
- Login * – Enter the user’s email address
- Password * – Assign a password for the user
- Role – Assign a role for the user:
- View Only – Office user will only be able to view and cannot make changes or edit anything.
- Edit and View – Will be able to make edits on the modules enabled and view them.
- Admin – The office user will have Admin access and will be able to make edits on Settings.
- Customize– Customize the user role.
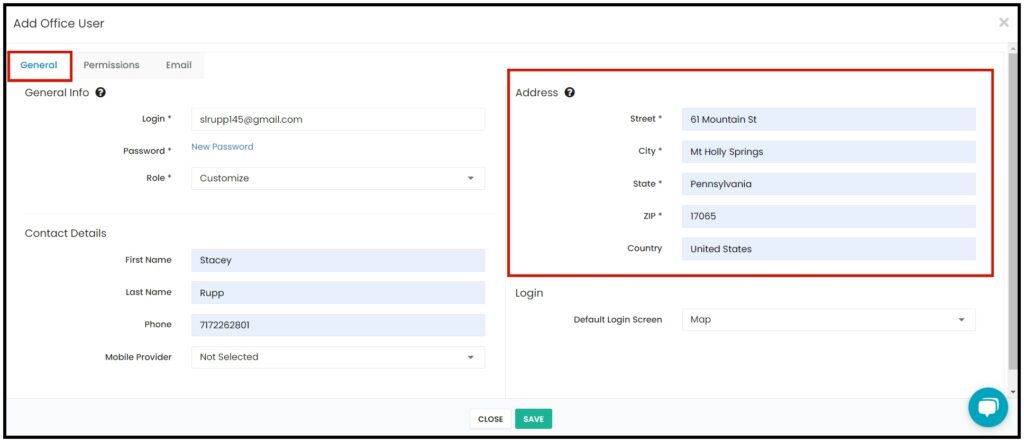
- Address *
- The company’s address defaults for all users. If there is a need, edit the fields – for example, if the office user works from a satellite office.
- Contact Details
- First Name
- Last Name
- Phone – Information must be provided for the user to receive text alerts.
- Mobile Provider – Select the applicable one from the drop-down list. The information must be provided for the user to receive text alerts.
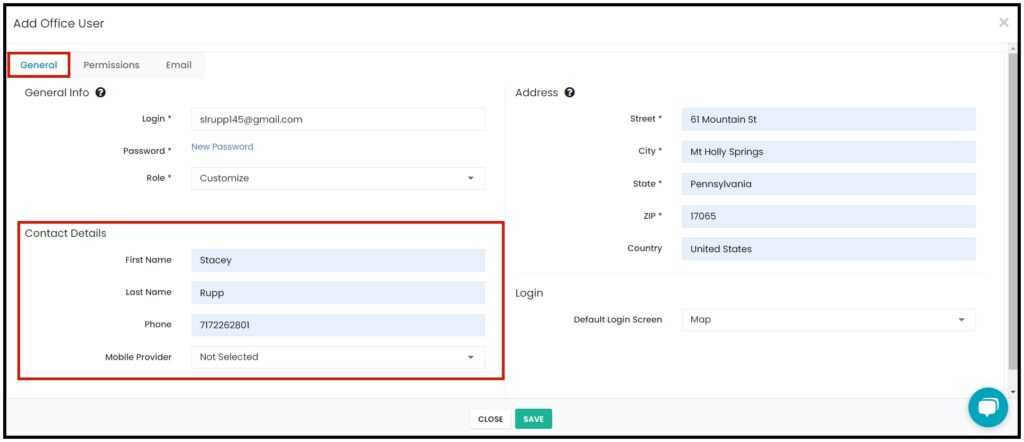
- Login
- Default Login Screen – Select which module will open upon login of the user. Select from the drop-down list of modules.
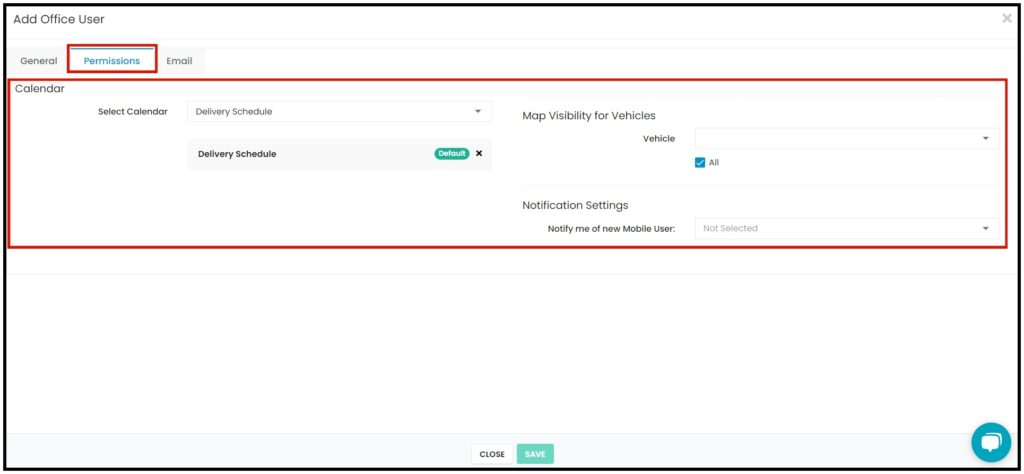
2. Assign the permissions to be given to the office user at the Permissions tab.
When the office user’s role is either View Ony, Edit & View or Admin, these are the only permissions you need to set.
- Calendar – Select which Calendar or Calendars the Office User can access.
- Map Visibility for Vehicles – Give access to which vehicles the office user can view or track on the map. You can select all vehicles that have been set up or specific ones only. A Map viewing access must be provided so that the vehicle visibility feature can be used.
- Notification Settings – Select which of the notification options the new office user will receive: Job Added, Inventory Added, Customer Added, or Equipment Added.
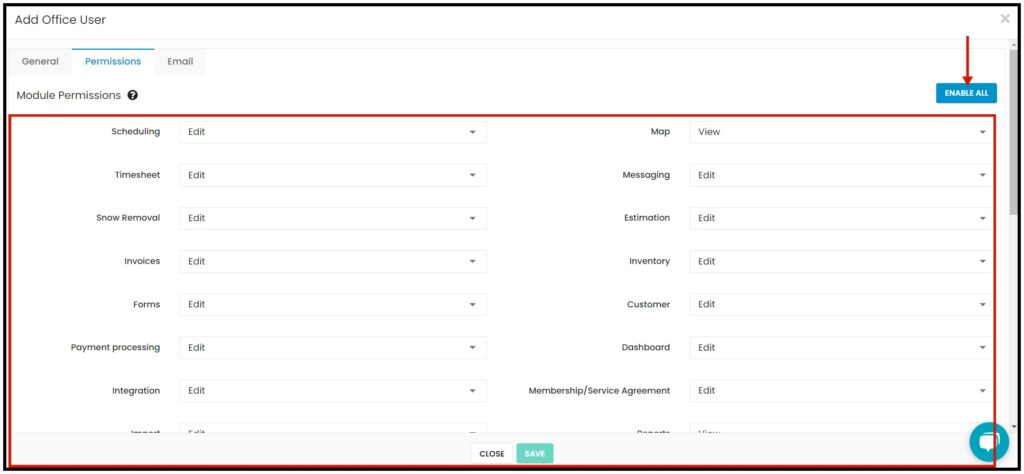
When the Office User’s Role is set to Customize, the Permission Tab will change and it will allow you to customize each Module permission.
Enable the permissions that the user will have for each of the modules. The permission to be given will either give them a viewing, editing, or no access. These access permissions are for the different modules and will not activate the settings for the module at the backend. For example, enabling the Inventory module will not automatically give access to the Inventory settings page. There are separate permissions for settings.
Permissions will have to be defined for each of the following modules or module features:
- Scheduling – Enabling this module will require that a calendar or calendars be selected. If No Access is given, the Calendar settings will not be enabled.
- Map – Permission selections for this module are View and No Access only. The map can’t be edited.
- Timesheet – Depending on the permission, it can be No Access, View or Edit which allows the Office user to make changes to the Timesheet of a Field Employee.
- Messaging – Depending on the permission, it can be No Access, View or Edit which allows the Office User to create or send a message through the OneTrack website.
- Estimation – Permission can be No Access, View or Edit which allows the Office User to manage or create an estimate.
- Invoices – Permission can be No Access, View or Edit which allows the Office User to edit and manage invoices.
- Inventory – Permission can be No Access, View or Edit which allows the Office User to edit, manage and add inventory items, non-inventory, new service, new assembly and new equipment in Settings > Inventory.
- Forms – Permission can be No Access, View or Edit which allows the Office User to edit, manage, delete and create Forms in Settings > Form Settings.
- Customer – Permission can be No Access, View or Edit which allows the Office User to add new customer and manage groups.
- Payment Processing – Permission can be No Access, View or Edit.
- Dashboard – Permission can be No Access, View or Edit which allows the Office User to access a Dashboard.
- Integration – Permission can be No Access, View or Edit which allows the Office User to set up Quickbooks, Stripe, Ring Central and Email in Settings > Integration.
- Membership/Service Agreement – Permission can be No Access, View or Edit which allows the Office User to set up and manage memberships and service agreements.
- Import – If enabled, the office user will be able to import data from other systems to Industrack.
- Reports –
- QB Integration – If enabled, the office user will be able to start an integration between Quickbooks and Industrack.
- Warehouses –
- Inventory Tracking with QR / Bar Codes –
- Customer Notification –
- Vehicle Tracking – Permission can be ON or Off which allows the Office User to view the field vehicles on the Map.
- Settings – Permission can be No Access, View, Edit or Super Admin.
- To be able to access the backend or Settings Section, permissions for the field will have to be defined. Select either No Access, View, Edit, or Super Admin. Enabling this will not automatically provide the same access to the modules. Selecting Edit will allow the user to make changes to module settings, but they will not have access to user settings. To have access to user settings, Super Admin access must be selected.
Click the Enable All button to provide View access for the Map module, Full Access for Settings, and Edit access for all the other modules.
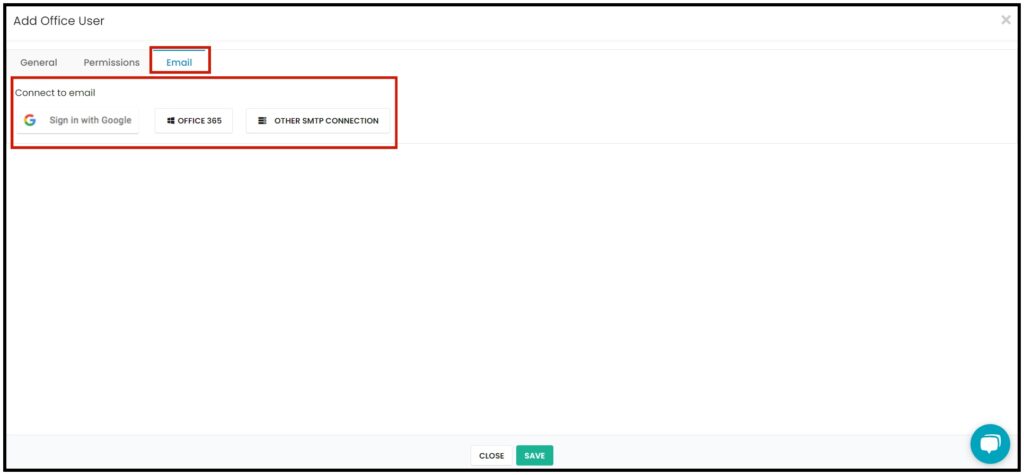
3. Set up the email integration at the Email tab.
4. Save the new Office User.
- Click the Save button at the bottom of the Add Office User window to create the new Office User. The user will be added to the office users list. By default, the office user will be created with an active status.
Update Office User Profile and Permissions
Find the Office User to be updated from the list, click anywhere on the row and the profile will open in edit mode.
Edit/Update as may be needed. Once done, Save the changes.
Delete an Office User
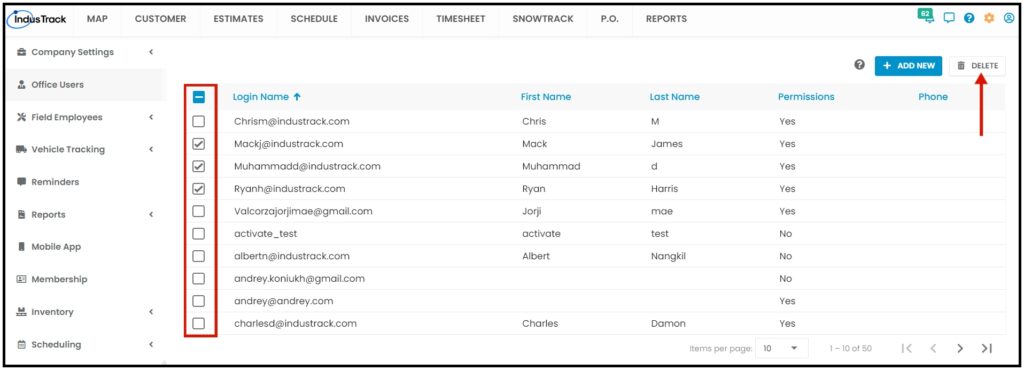
Find the Office User to be removed from the list.
Tick the checkbox to the left of the User to be removed. Click on the Delete button which will be enabled once the checkbox is ticked. To delete multiple Users, tick the checkboxes to the left of all the Users to be removed. If all Users will be deleted, just tick the checkbox of the Name header. A warning window will come up. Click the Yes button to continue with the delete and No to cancel the action. The user’s name will be removed from the list of office users.
Heads Up! Once an office user has been deleted from the system, the email used to create the account can’t be used again. So, if there is a chance that the user will become active in the future, consider deactivating them instead of deleting their account.
0 Comments