
Integrate Quickbooks Desktop to Industrack
NOTE: Prior to setting up Quickbooks Desktop Integration, please read and follow the pre-conditions https://support2.industrack.com/?lsvr_kba=set-up-quickbooks-integration.
Installation Instruction for IndusTrack QuickBooks Connector (for Single user mode). You must be on a computer that has QB installed. If you have QB installed on the server then install the QB connector on that computer. Run QuickBooks in Administrator mode during the QuickBooks Connector installation.
- Log in to OneTrack Software https://onetrack.industrack.com/login
- Once logged in go to Settings> Integrations> QuickBooks.
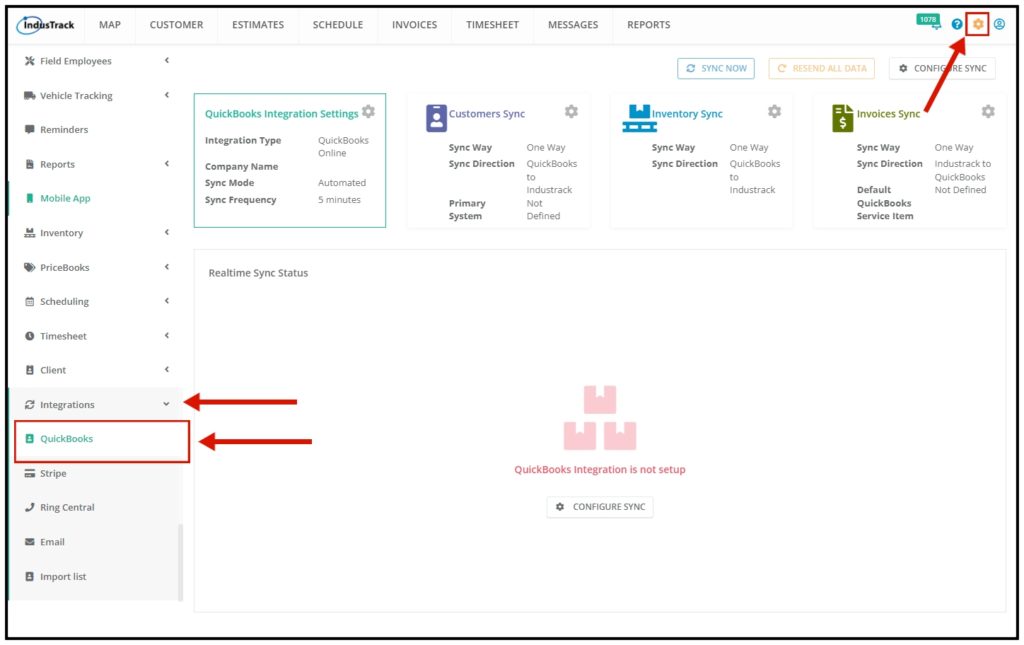
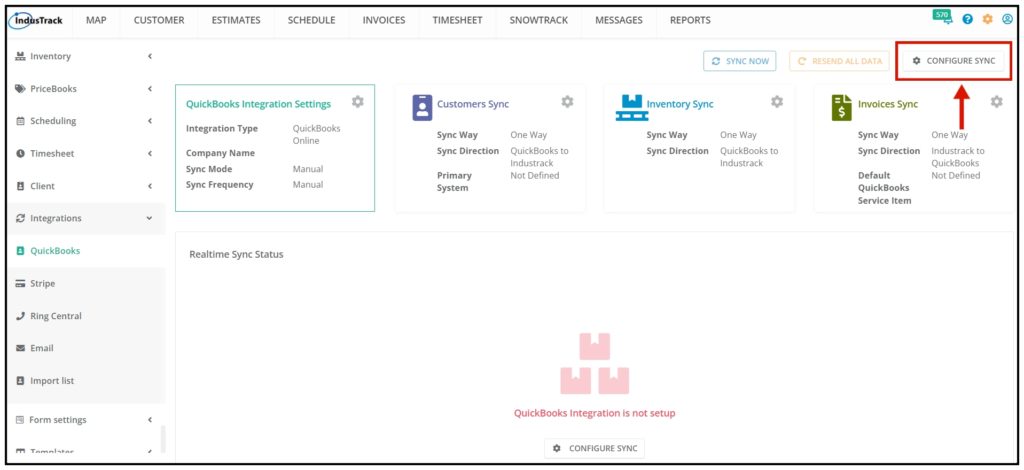
3. Click on Configure Sync to configure QuickBooks Integration.
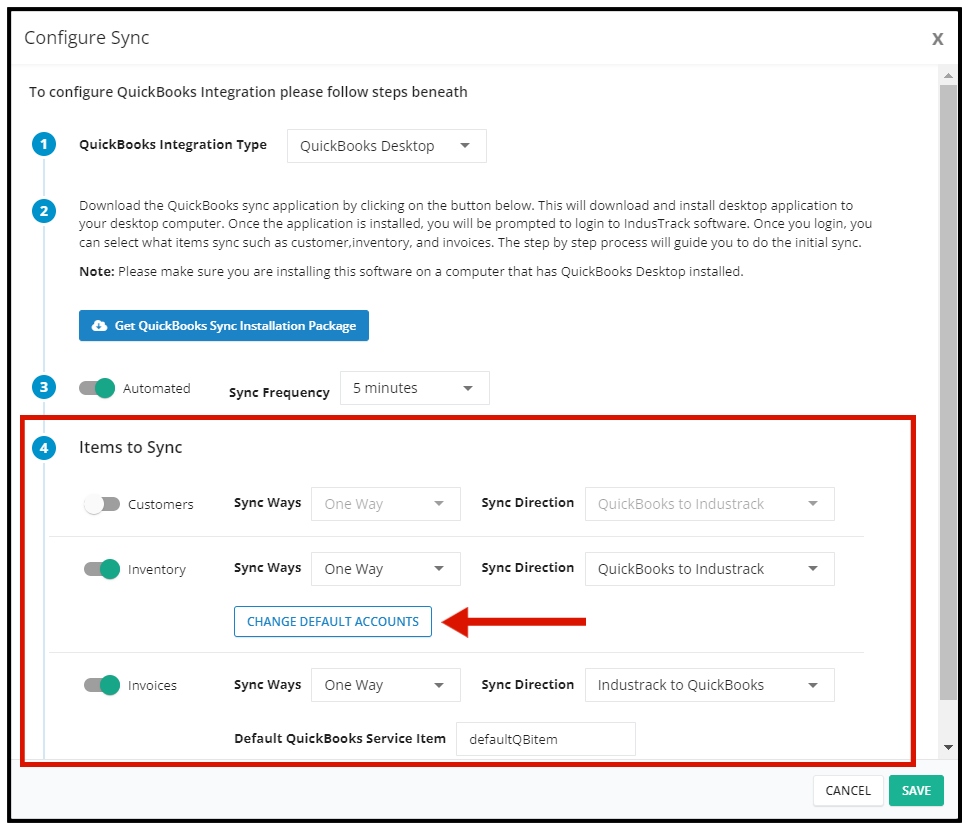
4. A Configure Sync window will pop up.
QuickBooks Integration Type: Select QuickBooks Desktop from the drop-down.
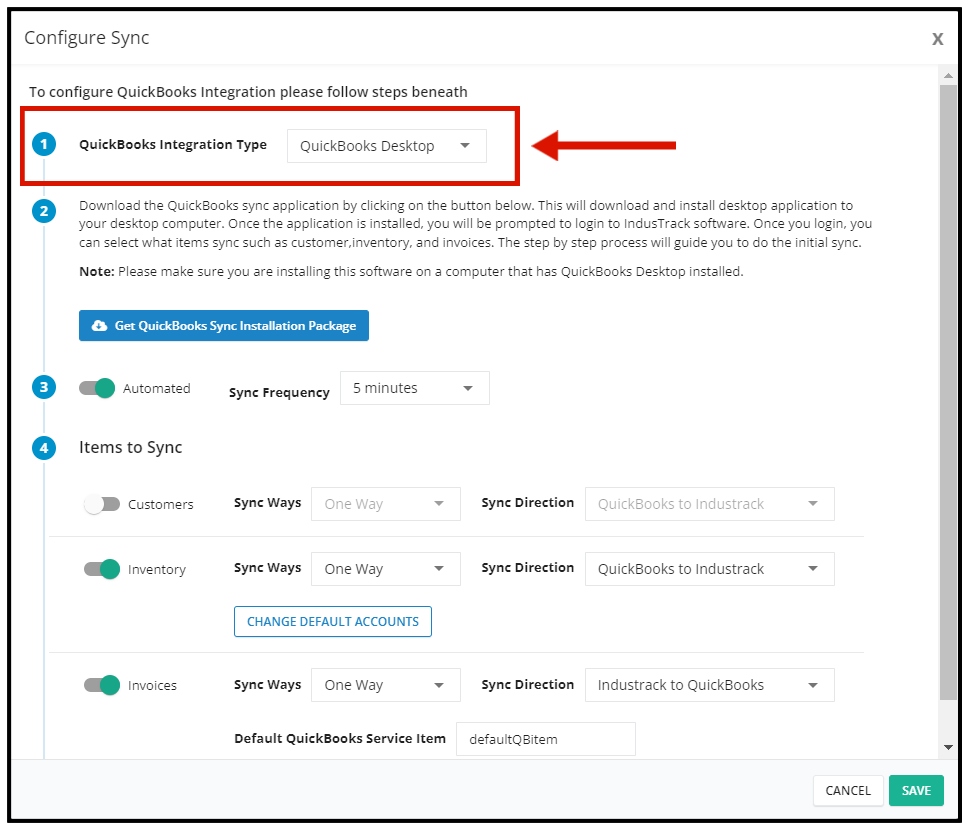
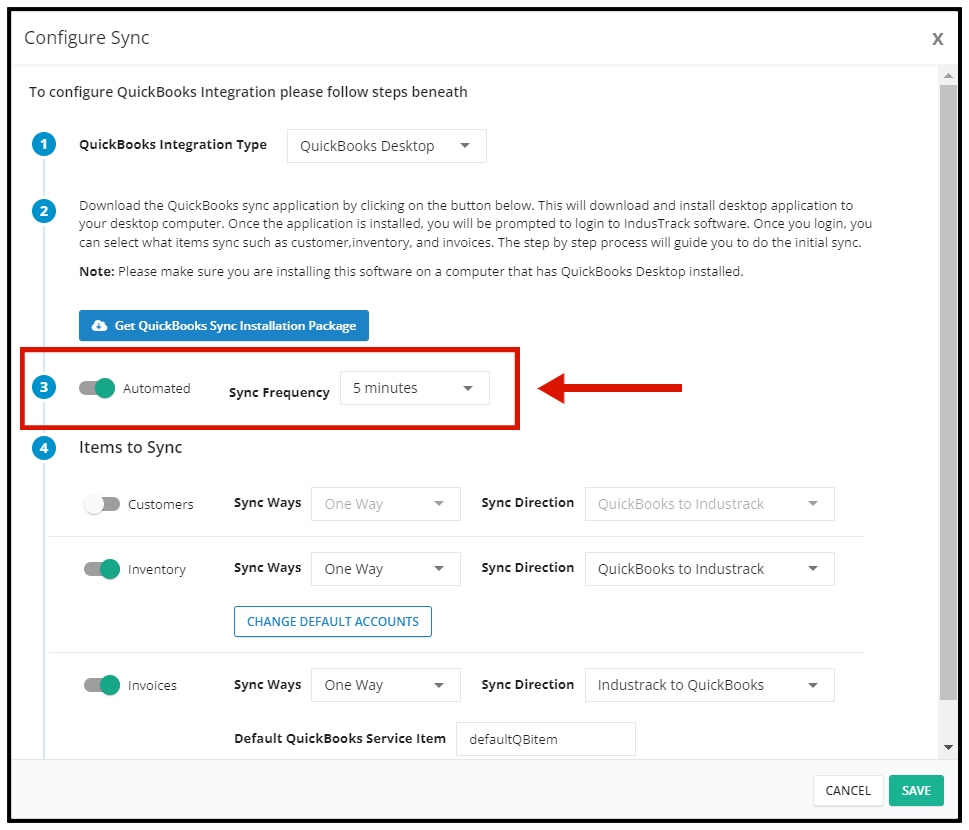
5. Enable automatic sync and set time frequency if you would like it to sync automatically. You can also disable the auto-sync and do manual sync every time. We recommend every hour to minimize taking up resources on the computer.
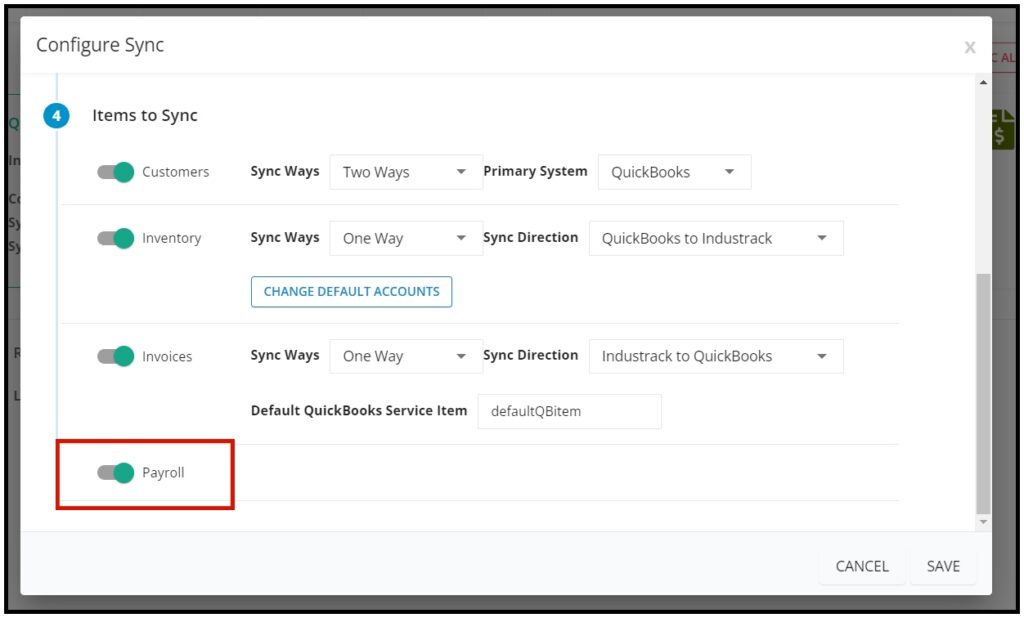
6. Items to Sync – Toggle on to enable the items you would like to sync from QuickBooks. Note that Invoices can only be synced from Industrack to QuickBooks.
- When Customer Sync is Enabled, taxes and payment terms that were set up in Quickbooks Desktop will automatically sync to Industrack. When you have taxes and payment terms set up on your Quickbooks account, we strongly advise you to let them sync to Industrack instead of setting them up to Industrack again as it would cause duplication and would lead to invoice sync errors.
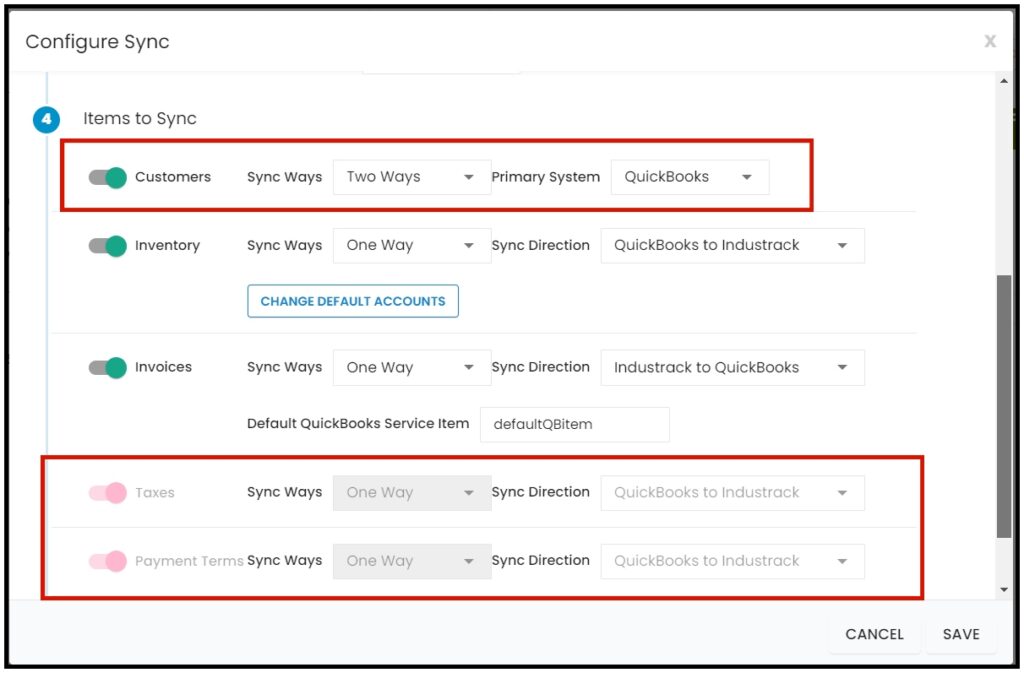
- Change Default Accounts – this will allow you to change the default incoming account and default expense account of your non-inventory items, Inventory items, and services.
7. Download the Onetrack QuickBooks Monitor Application by clicking Get QuickBooks Sync Installation Package. If you already have a previous version of QuickBooks Monitor Application, uninstall it before installing the new QuickBooks Monitor Application.

Installation Package. This will download and install the desktop application to your desktop computer. Please make sure to click on save after installing the Onetrack QuickBooks Monitor.
OneTrack Quickbooks Monitor
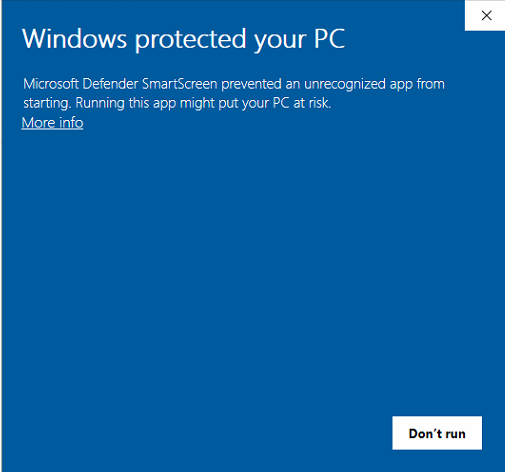
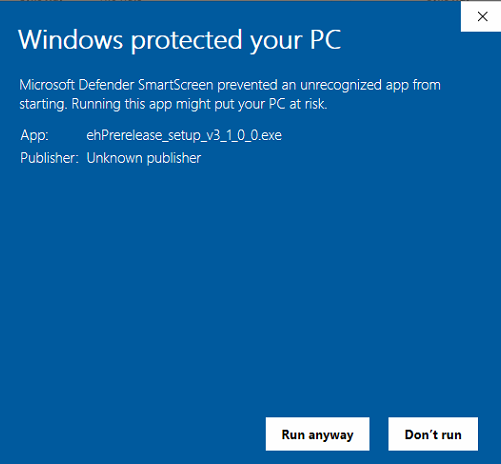
- Once the Onetrack QB Monitor is downloaded, a pop-up should show the option to run the application. If Run Application doesn’t show click on “More Info”.
Click Run Anyway.
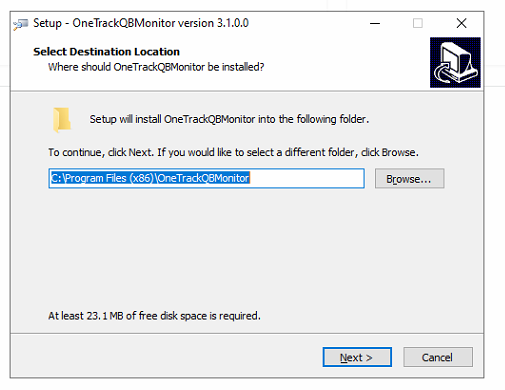
2. After running the Application, you will need to select which folder you would like the app to be installed. Then click on Next.
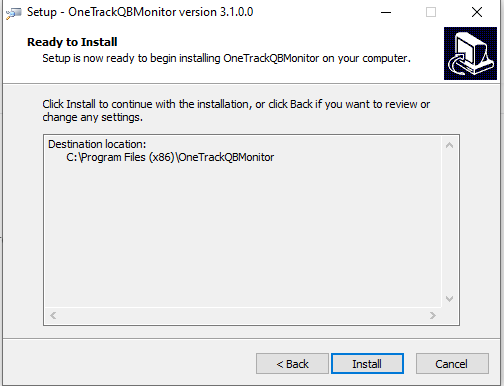
Click Install.
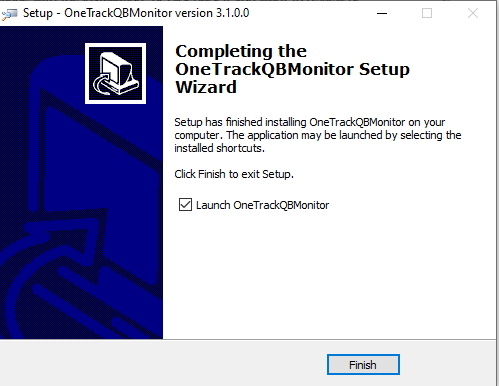
3. Make sure to toggle on the box Launch OneTrackerQBMonitor and click Finish.
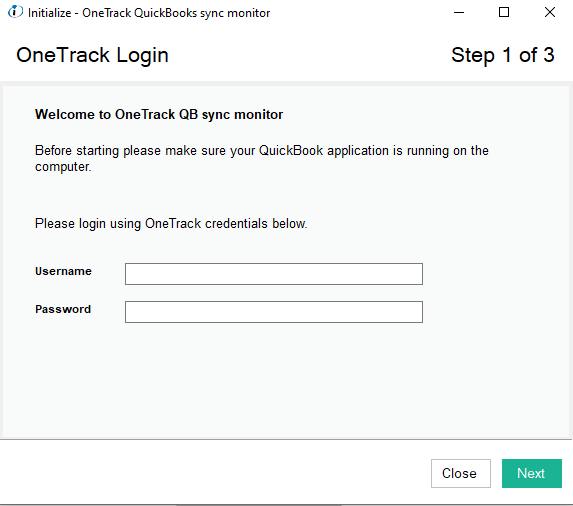
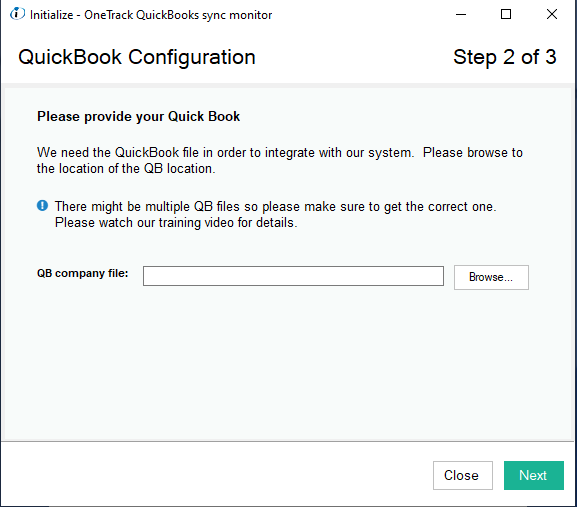
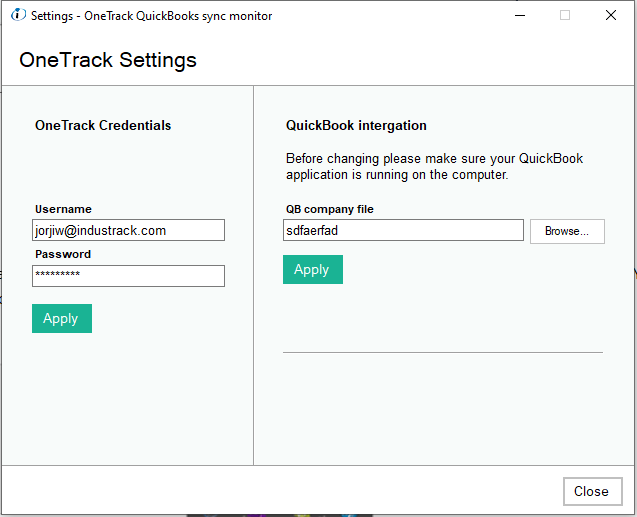
4. Once Installed, you will be prompted to log in to Industrack. Use the office user credentials for the account you used to set up the sync for logging in. Then Click Next .
5. Browse to, or paste the file path to, your QuickBooks company File. Quickbooks need to be running in the background, logged in with administrator privileges. Please make sure to connect the correct QuickBooks company file. The default location for a QuickBooks Desktop company files is C:\Users\Public\Public Documents\Intuit\QuickBooks\Company Files and C:\ProgramData\Sage\Accounts\ for Sage. From either of these locations, you should be able to choose the version/year of the application your file is using.
Click Next
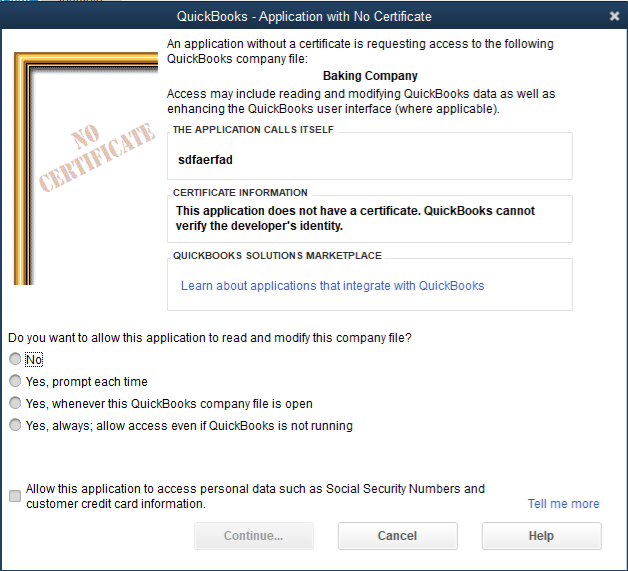
6. If you encounter an Application with No Certificate when browsing the QuickBooks company file in step 2 please follow the steps below:
- Select Yes, always; allow access even if QuickBooks is not running. This will allow the sync to happen even if QuickBooks is not open on your computer.
Click Continue.
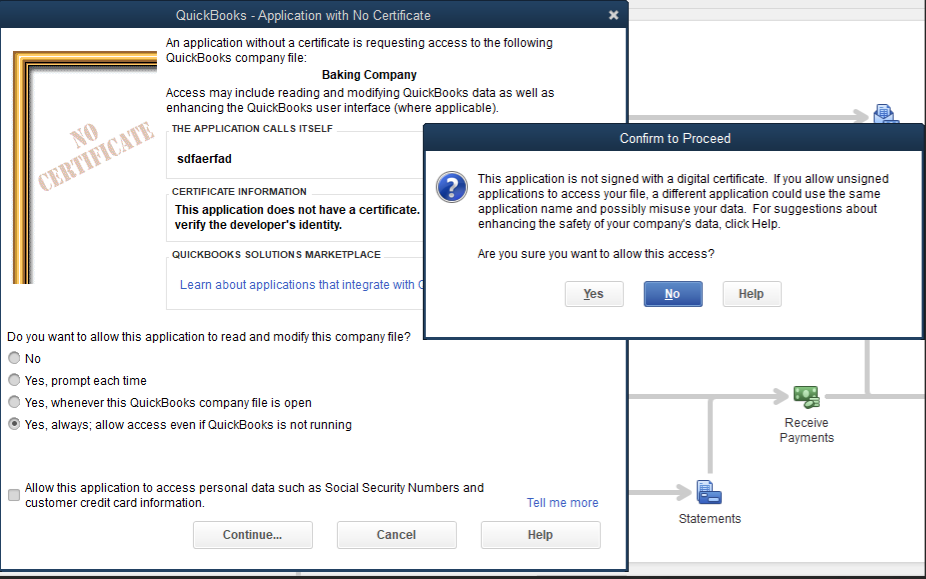
On the confirm to Proceed pop up, select yes.
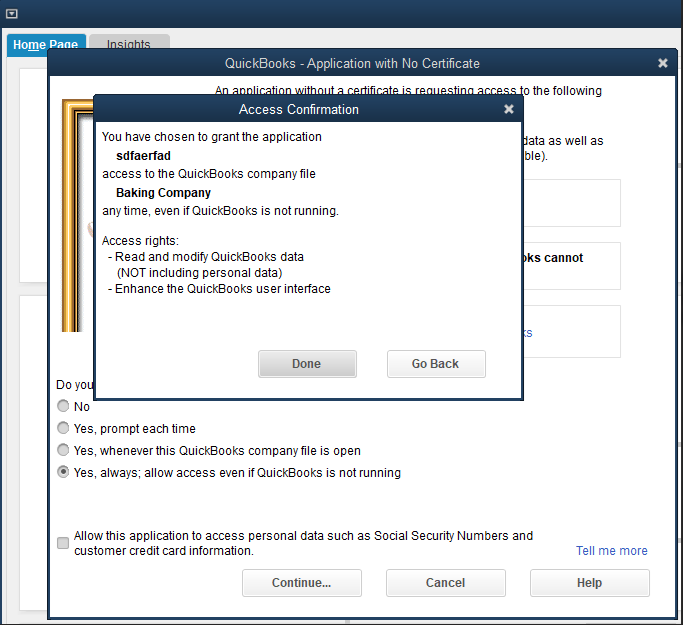
7. Click on Done.
8. Click the apply button on both the right-hand side and close. The two systems will start syncing. Depending upon the number of records, the initial sync could take a long time.
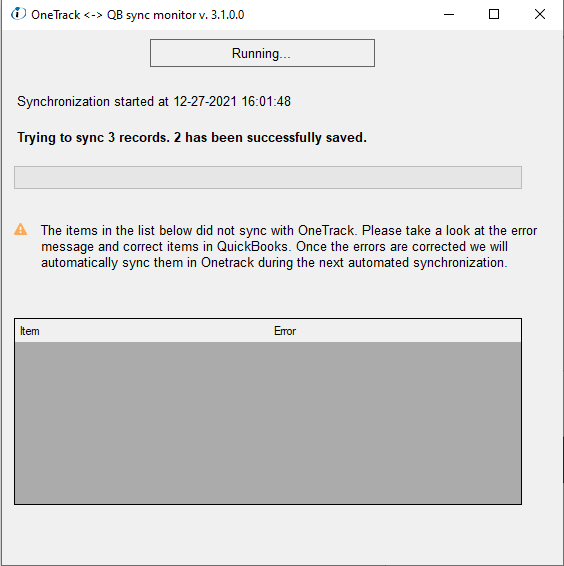
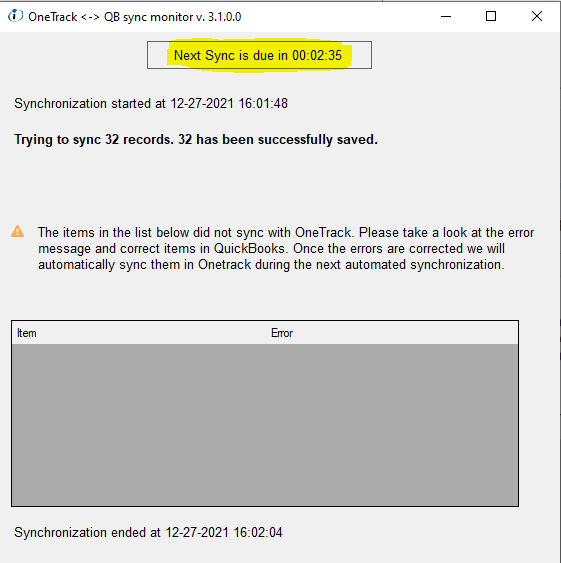
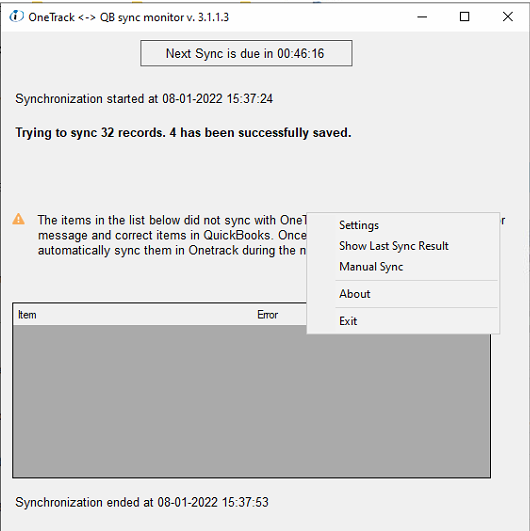
9. After the initial sync is completed, there will be a countdown until the next sync if auto-sync is enabled. You will also see any records that didn’t sync successfully in the window below.
If the synching does not automatically start, a manual sync can be performed.
To perform a manual sync, find the OneTrack QB Monitor in your system tray (the little up chevron on the right-hand side of the taskbar along the bottom of your screen. Click on the connector and right-click on the inside of the connector.
If you do not set up automatic syncing, this is how you will sync every time.

<—— This is what the Onetrack QB Monitor App should look like in the task bar.
* Note that when you click on EXIT the sync will stop.
*If there is an instance where you need to uninstall the OneTrackerQBMonitor, make sure that the app is not running in the background for it to be uninstalled successfully.
Instructions on how to sync Invoices from Industrack to QuickBooks
To Sync invoices from IndusTrack to QuickBooks:
1. Go to the Invoices Module
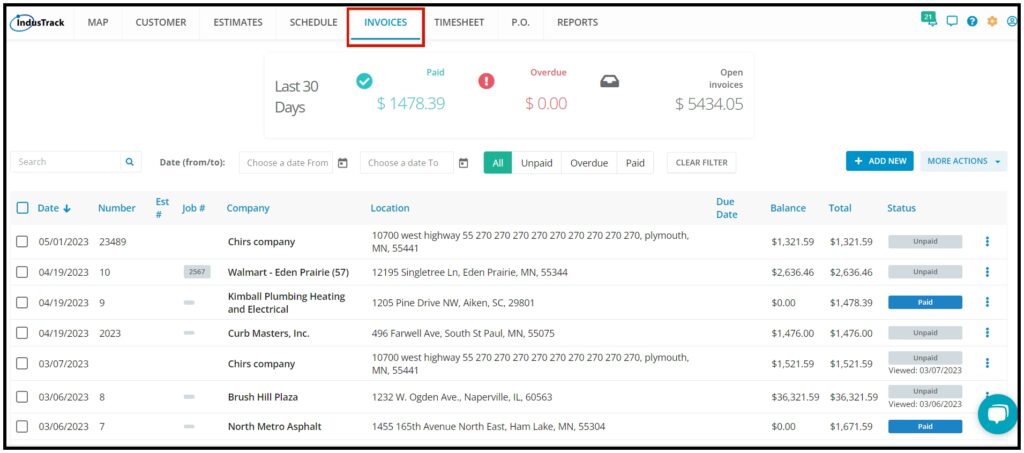
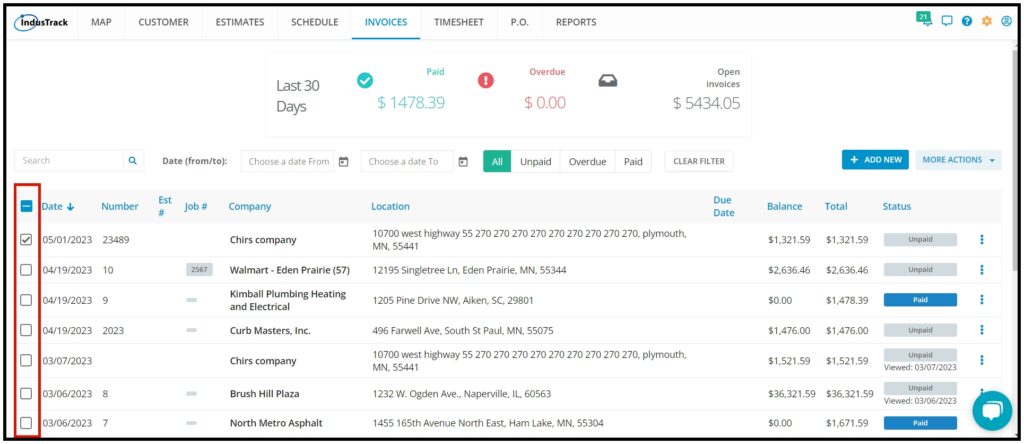
2. Check the boxes to mark the invoices of choice. Note that you can select multiple invoices for syncing.
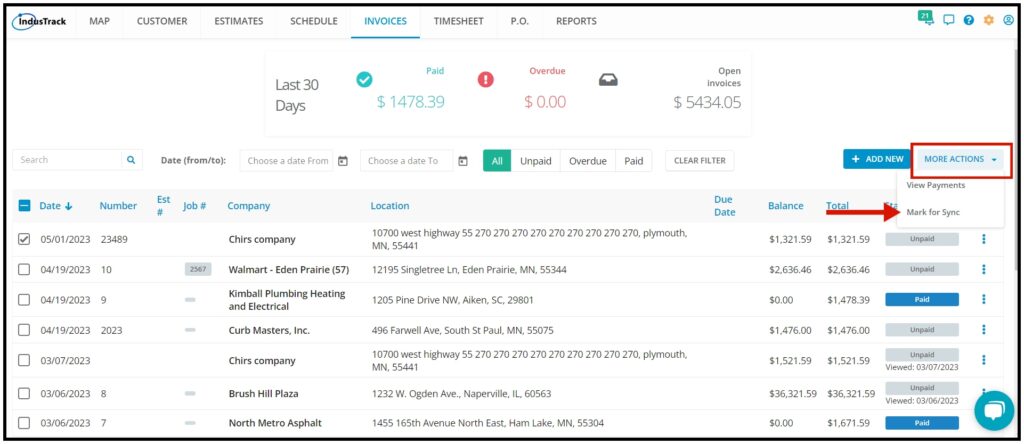
3. Then click more actions and select Mark for Sync from the dropdown.
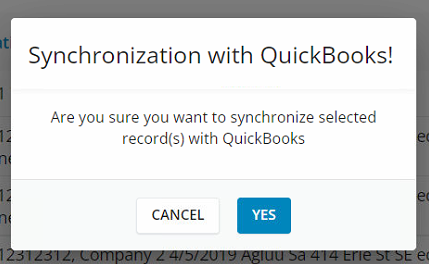
4. After clicking on Mark for Sync, a pop-up will come up and will ask to confirm if you want to sync selected invoices with Quickbooks. Click YES
5. After clicking on YES, the Status of the Invoice will change to Ready for Sync. If you set the sync frequency for 5 minutes the invoices will reflect on Quickbooks after no more than five minutes, or you can do a manual sync to sync the invoices immediately.

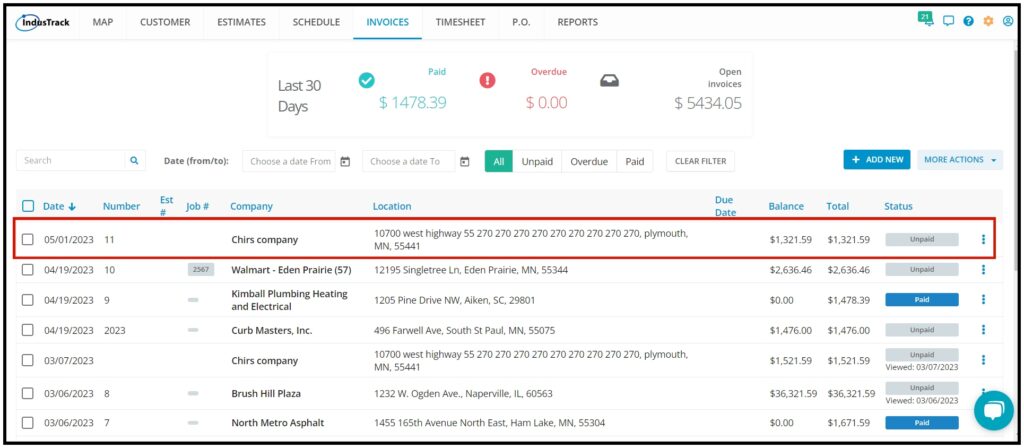
6. Once the Invoice has been synced to Quickbooks the Invoice number in Industrack will change and match the invoice number in Quickbooks. The Invoice status in Industrack will also change to Unpaid.
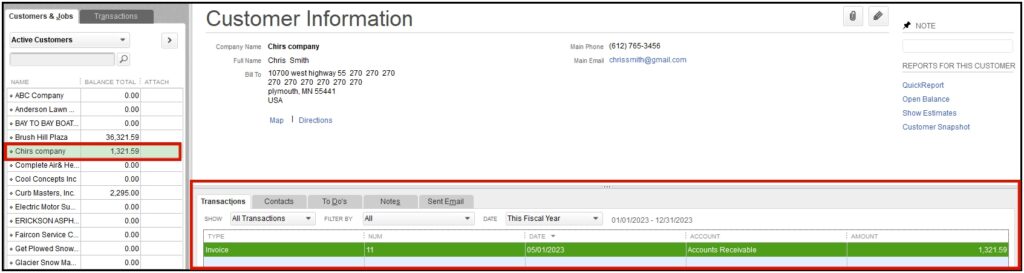
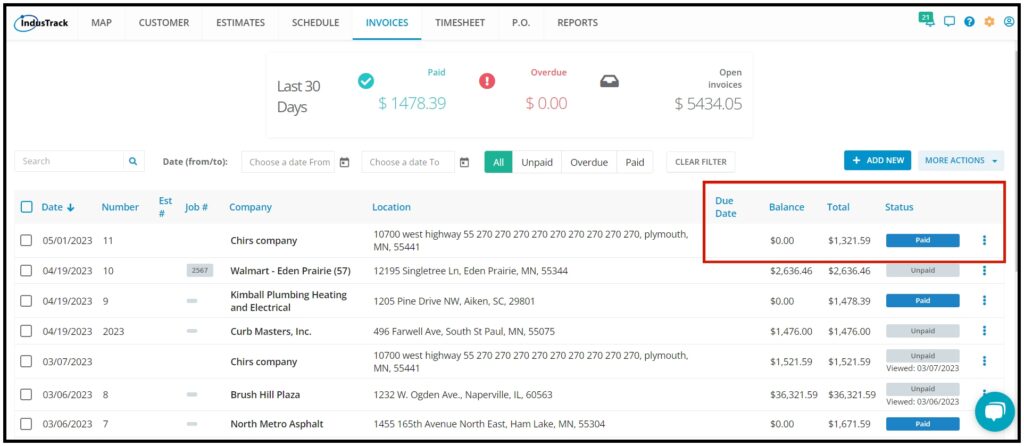
7. After you receive the payment for the Invoice in Quickbooks, the Invoice status in Industrack will change to PAID once the next sync cycle is finished or after manual sync.
Please note that the invoices with $0 value won’t get synced to QuickBooks.
IMPORTANT NOTE:
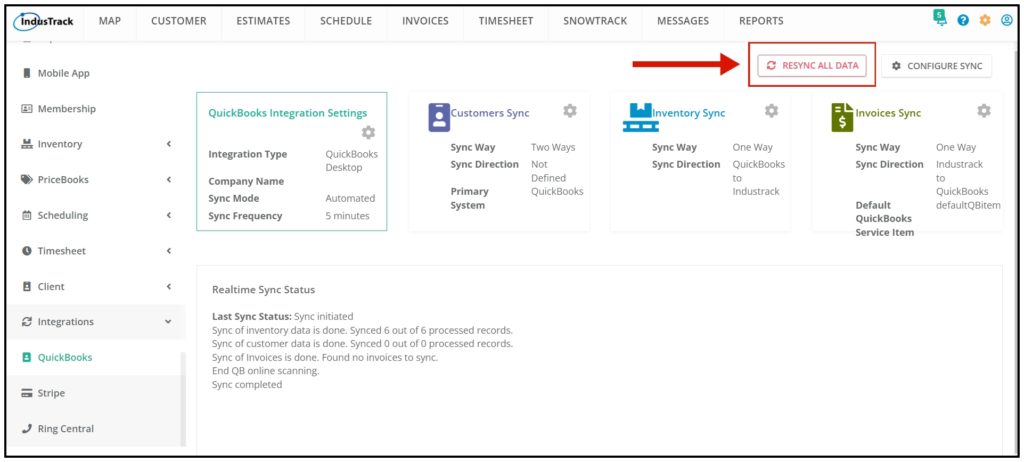
Please note that RESYNC ALL DATA will resync ALL information between QuickBooks and Industrack. This will force the sync to resend and override all data between QuickBooks and Industrack, which could result in some data being overwritten. We recommend consulting Industrack first before hitting RESYNC ALL DATA.
Payroll Sync
To sync timesheet entries from Industrack to Quickbooks Desktop, please follow the steps below:
- In the settings click on Integrations> Quickbooks> Configure Sync> Enable Payroll
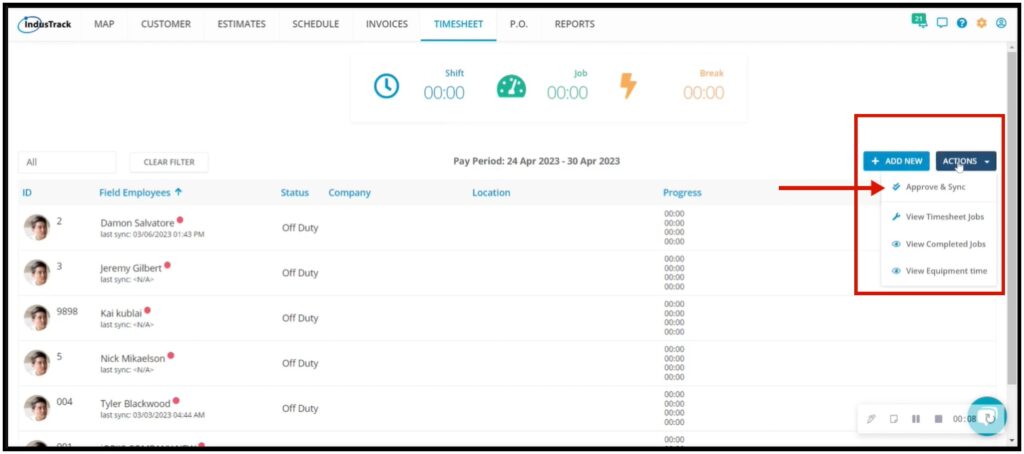
2. Go to the Timesheet Module> ACTIONS> select Approve and Sync.
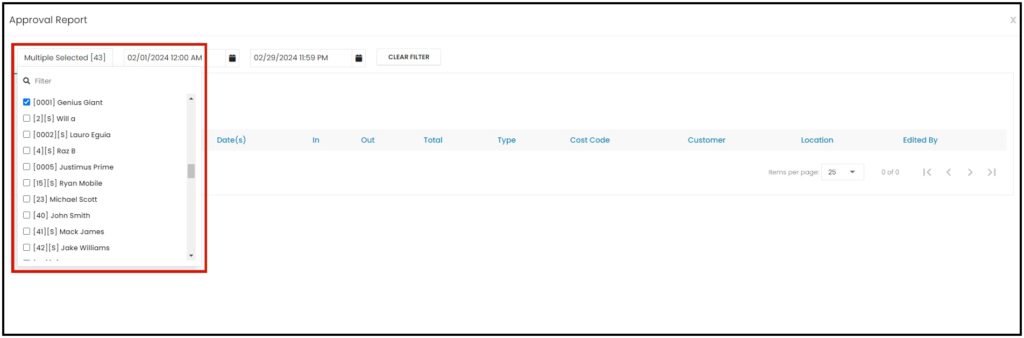
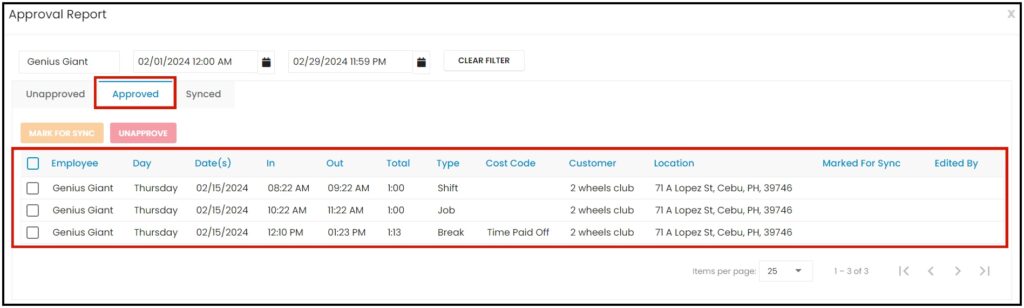
3. In the Approval Report, Select which employee’s timesheet entries you wanted to sync to Quickbooks.
4. After selecting an employee, you should be able to see all the employees’ timesheet entries. Mark all the entries that you want to sync to Quickbooks with a check and then click APPROVE.
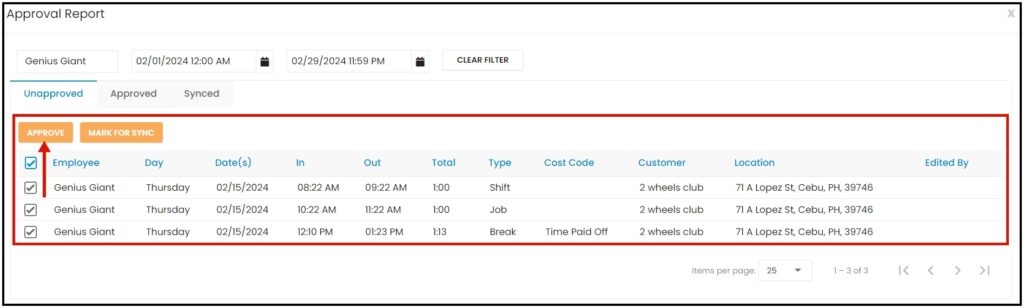
5. After marking all the entries as APPROVED, the time entries will be queued in the Approved Column.
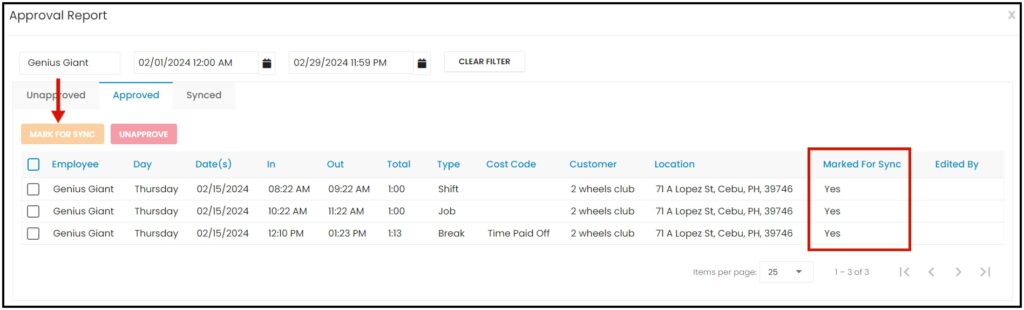
6. In the Approved Column mark all the entries that you want to sync to Quickbooks with a check on the left-hand side and click MARK FOR SYNC. The entries will be now Ready to Sync.
Items did not sync
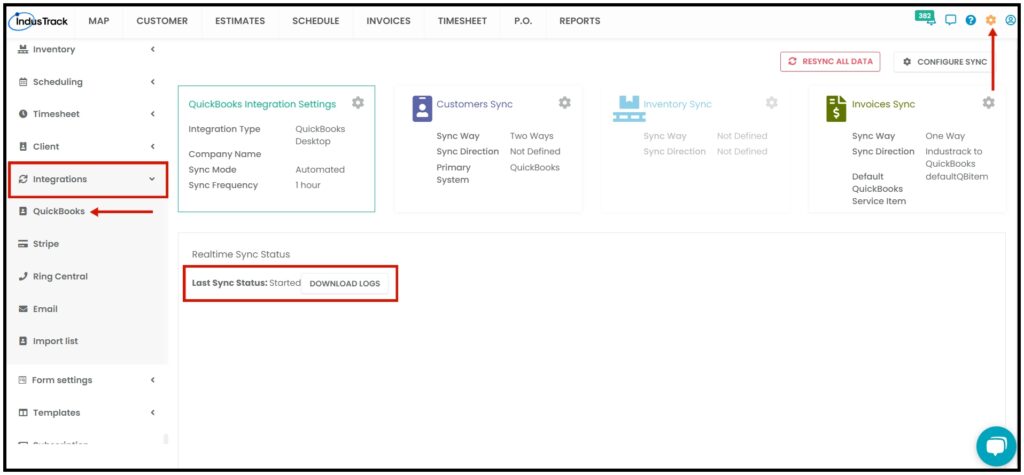
The Download Logs button will allow users to view information that is not synced properly. The errors that occur when the sync is processing will be logged as the users can easily know what made that information not sync properly between their QuickBooks and IndusTrack accounts.
When clicking on the Download Logs, this will download an Excel file on your PC with all the items that were not synced and the reason why it did not sync.
0 Comments