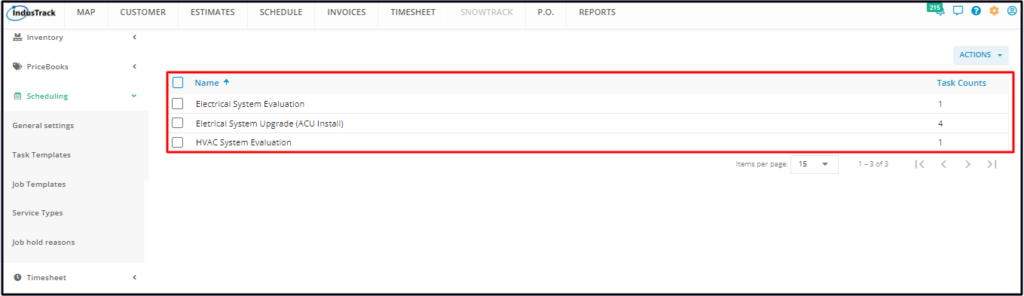
Add and Manage Task Templates
Task templates are useful in situations wherein you have standard tasks or services that are performed in many jobs. Load a saved task template for ease of documentation and report generation. You also eliminate missed tasks due to set-up errors plus you do not have to enter the same information repeatedly when you create similar jobs.
To set up and manage Task Templates, go to Settings > Scheduling > Task Templates.
Create a Task Template
To create a new Task Template, go to the Actions button. Click on it and select + Add New Task Template from the drop-down.

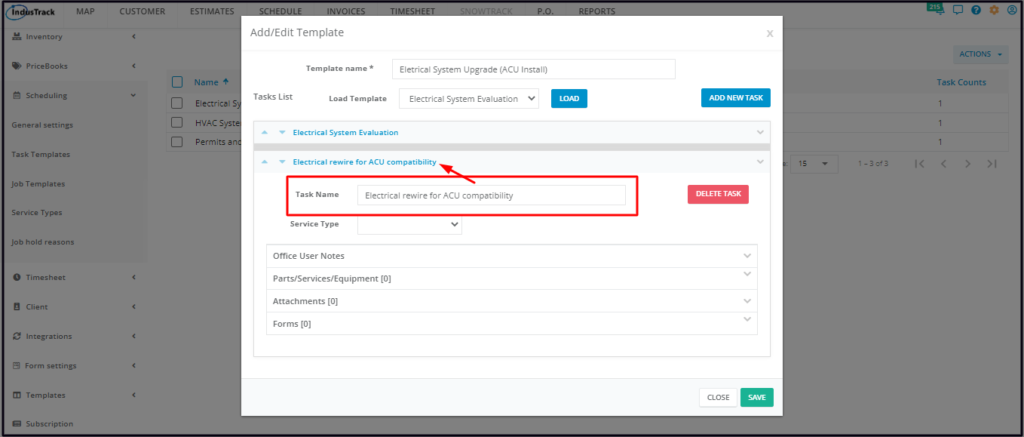
Fill in the Task Template details on the Add/Edit Template window. Fields with * are required.
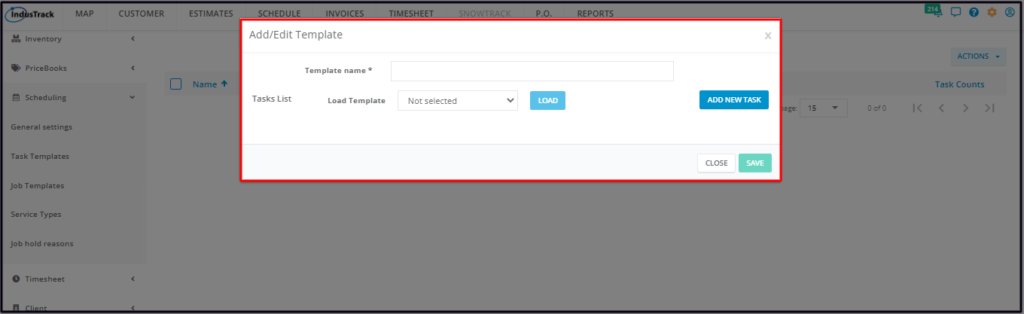
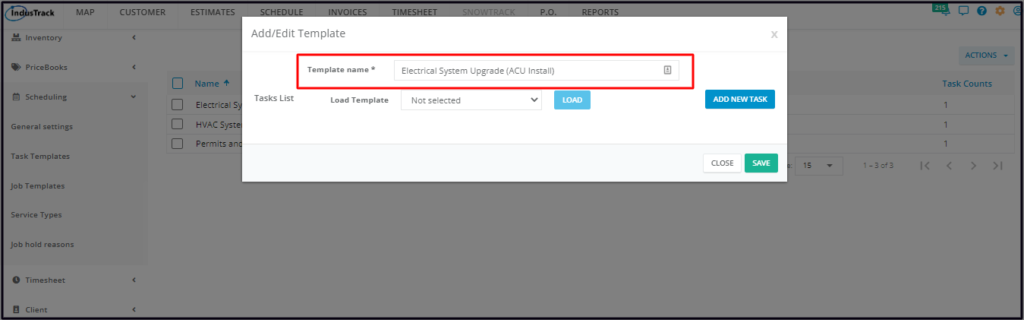
Template Name*
- Key in the assigned name of the Task Template.
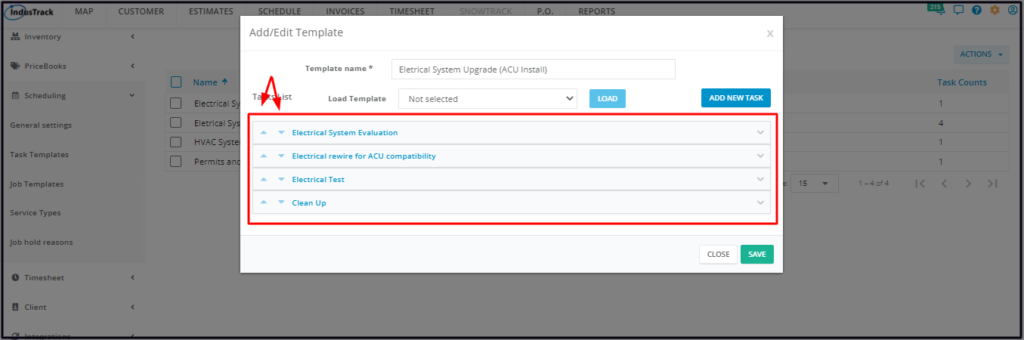
Tasks Lists
Add the associated task or tasks. There are 2 ways to add tasks: (1) load one of the existing task templates and (2) create a new task.
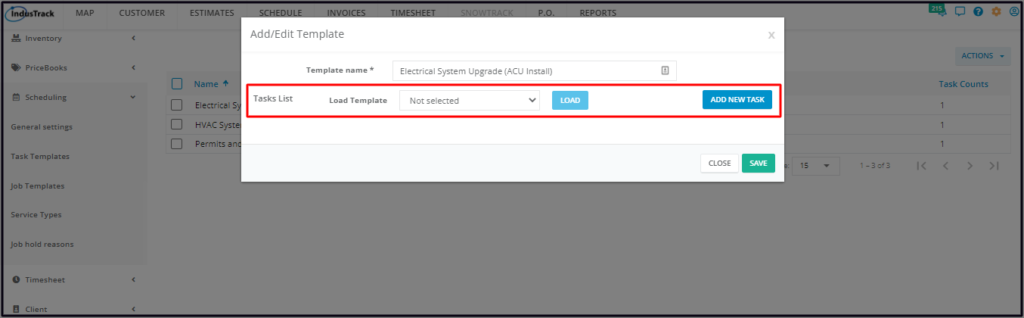
Load one of the existing Task Templates.
Loading an existing Task Template will create a template inside a template.
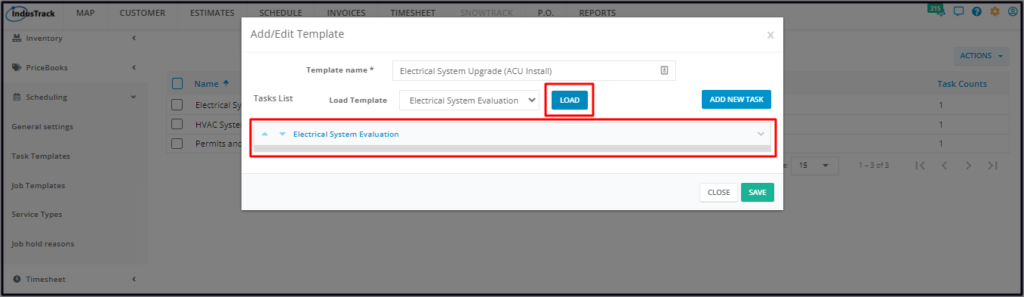
Click on the Load Template field. Select the Task Template to be used in the new template.
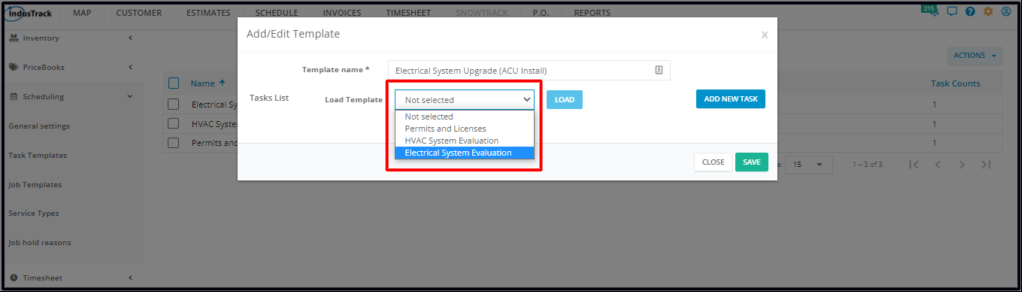
Click the Load button. This will add the associated task(s).
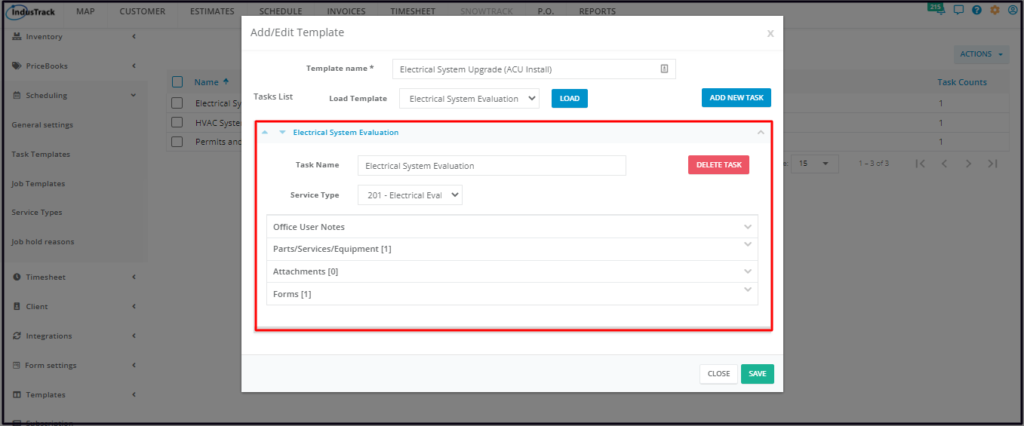
Update or Edit the loaded task details as needed. Changes made will be reflected on the new task template only and will not affect the original one. Edit a loaded Task the same way you would a new task (see below).
To add more than one Task Template, save the loaded template first. Open the Task Template in edit mode and add another one. Continue to add task templates as may be needed. Save each loaded template as you go along.
Create a new task.
Go to the Add New Task button. This will expand the new task fields. Fill out the details.
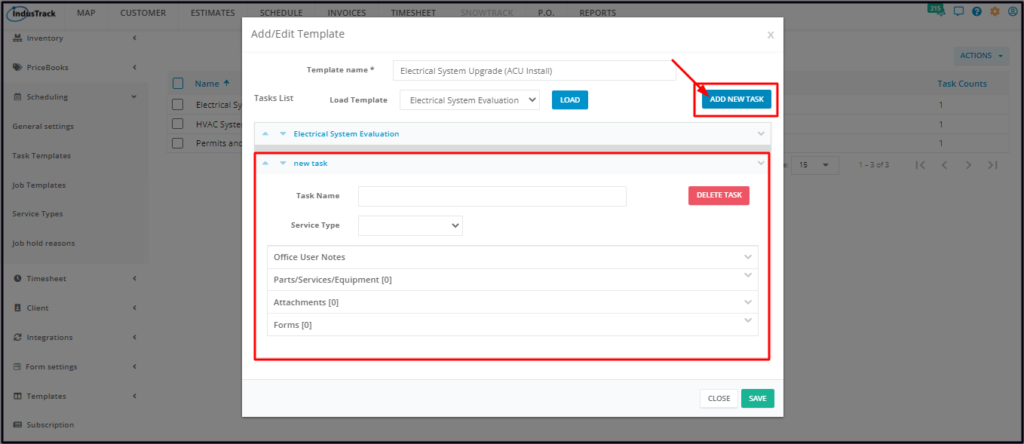
- Task Name
- Assign a name for the task. Once this is done, the new task name will be updated.
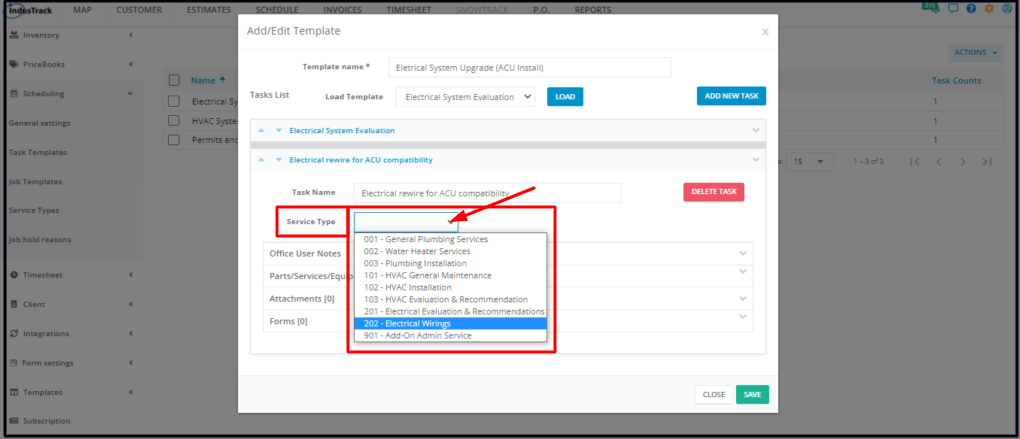
- Service Type
- Select the correct one from the drop-down list.
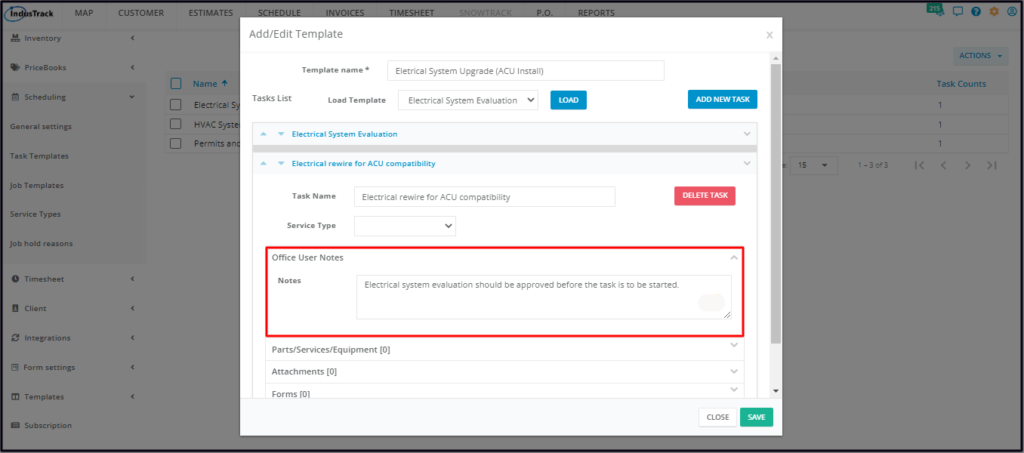
- Office User Notes
- Click on the field to expand. Key in a note, a reminder or special instructions on the Notes field.
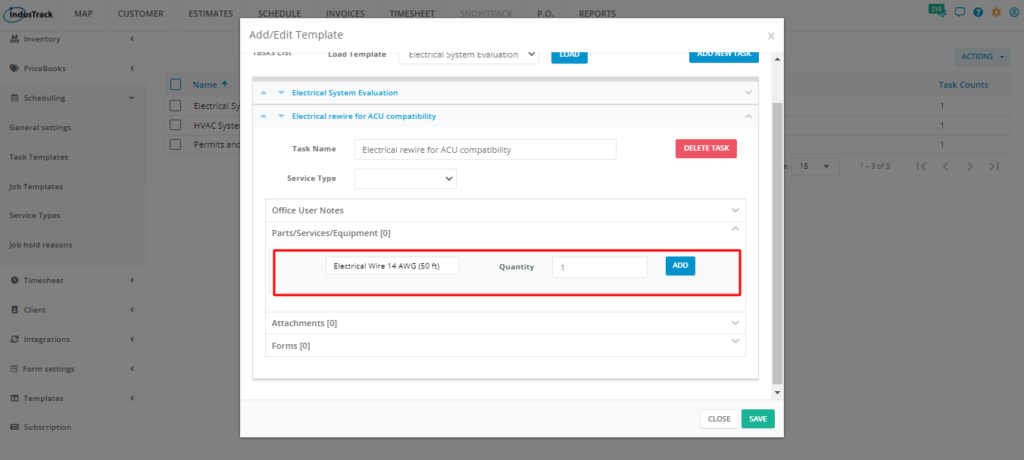
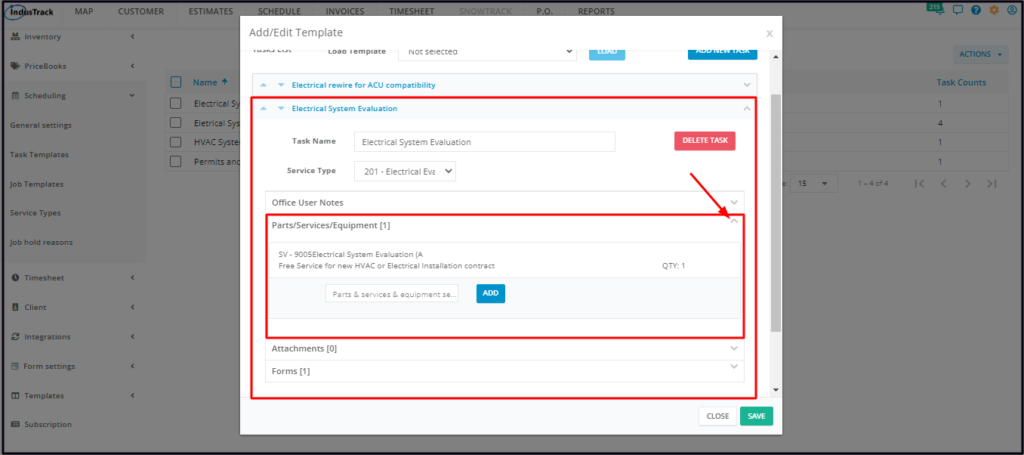
- Parts/Services/Equipment (select)
- Click on the field to expand.
- Key in the item name on the field. Whenever applicable select:
- The part or material (inventory or non-inventory) to be used in the performance of the task.
- The service to be performed to complete the task.
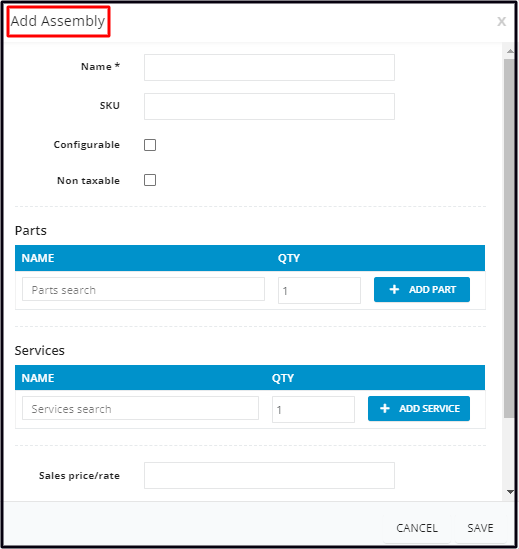
- The assembly to be used to complete the task.
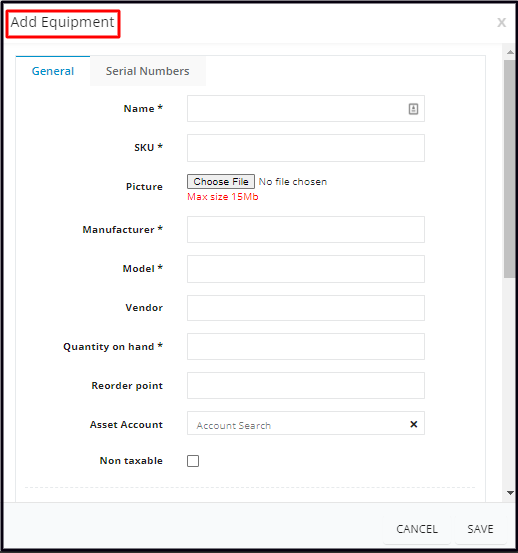
- The equipment to be installed.
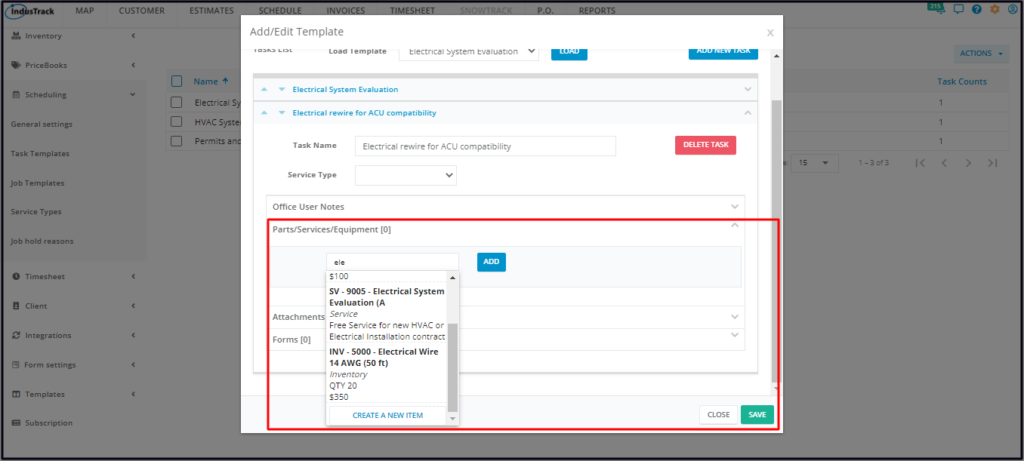
- Parts/Services/Equipment (add)
- For each part/service/assembly/equipment selected, set the quantity to be used.
- Click the Add button to the right of the quantity.
- This will add the selected item with quantity to the task.
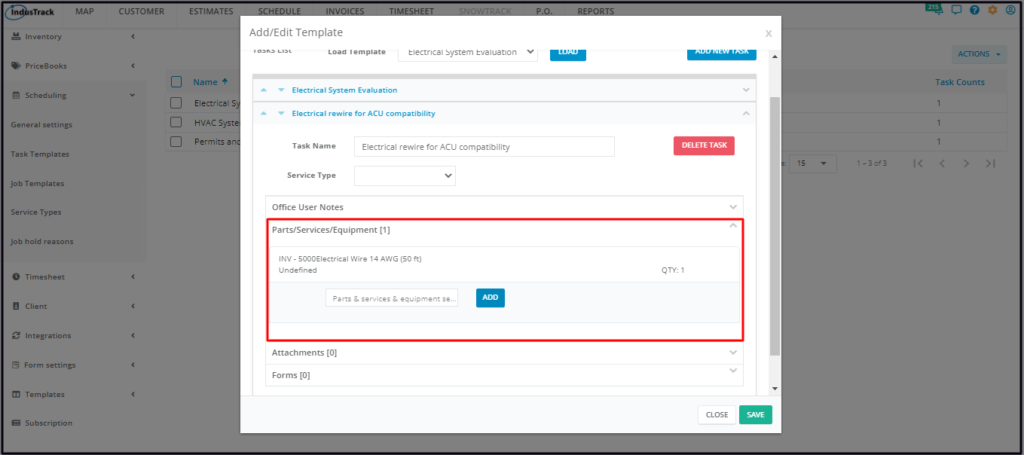
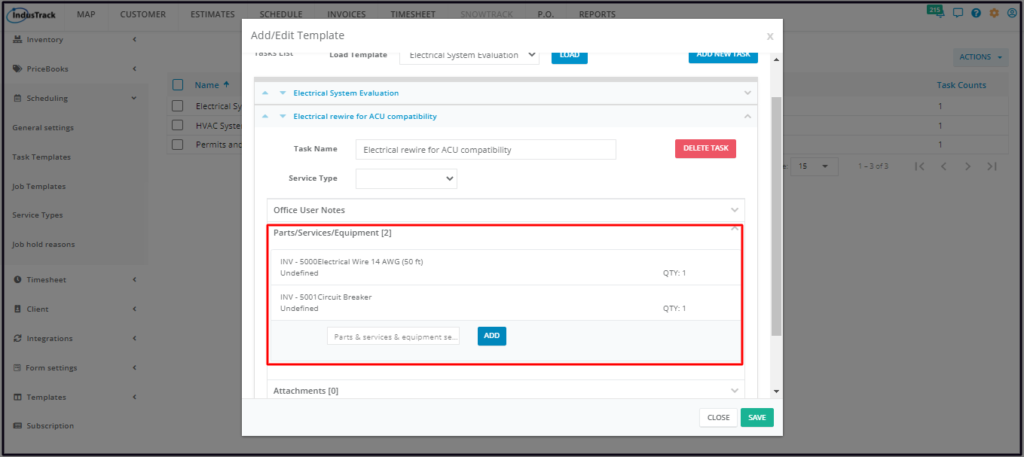
- Parts/Services/Equipment (add other items)
- Select and add other items as may be needed.
- Items appearing in this section will appear as line items when the job is converted into an invoice.
- Parts/Services/Equipment (create a new item)
- If the item is a new one and has not been entered into the system (not on the list), create a profile for it first. To do this, go to the Inventory or Equipment page OR create the profile straight from the Task Template page.
- Below is the instruction on how to add a new inventory/non-inventory/service/assembly/equipment item from the Task Template page.
- From the Parts/Services/Equipment field, go to Create a New Item.
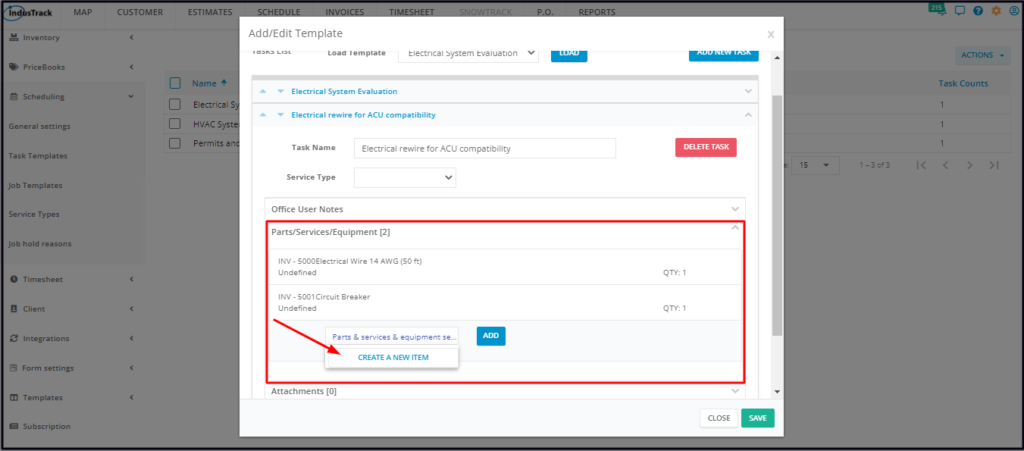
- Select the Inventory Type. This could either be Inventory, Non-inventory, Service, Assembly or Equipment.
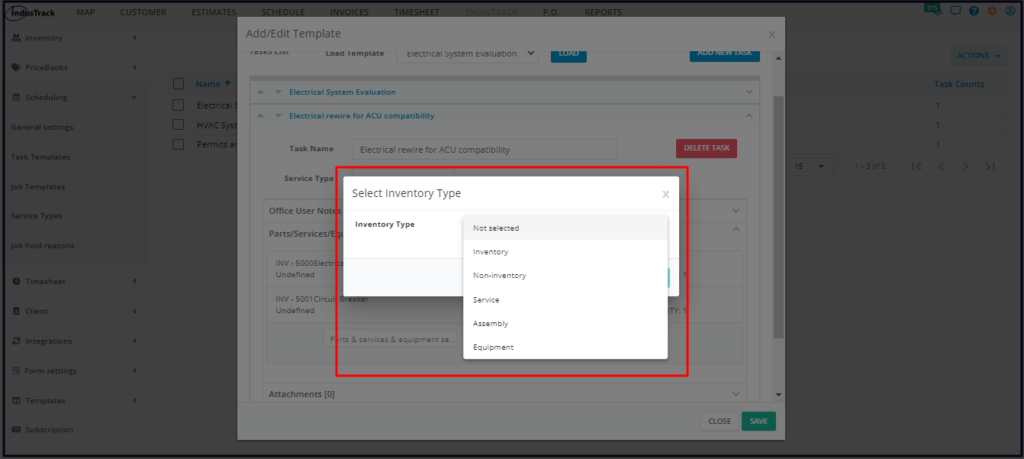
- Depending on the selected Inventory Type, create the item profile on the corresponding window.
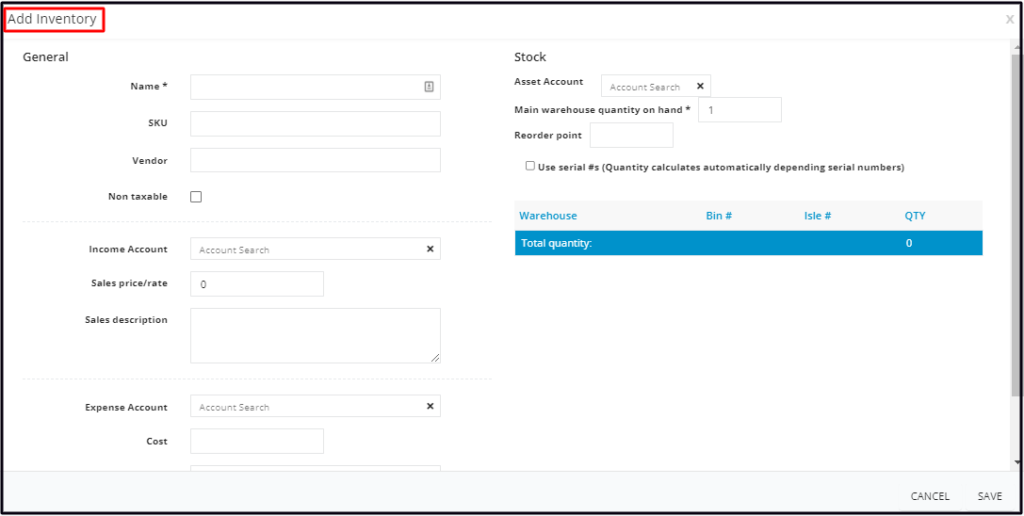
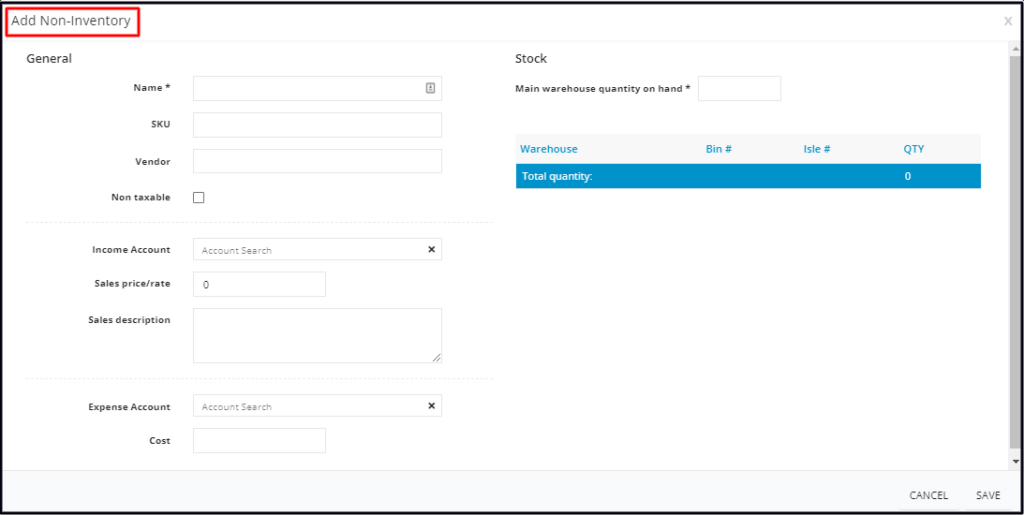
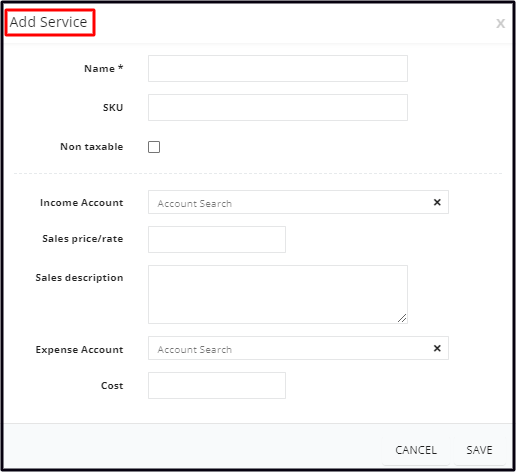
- Once done, Save the new item. The screen will return to the Add/Edit Template window.
- Add the new item to the task’s list of parts/services/equipment.
- Proceed with the preparation of the Task Template.
- The new item will be added either to the Inventory or Equipment List.
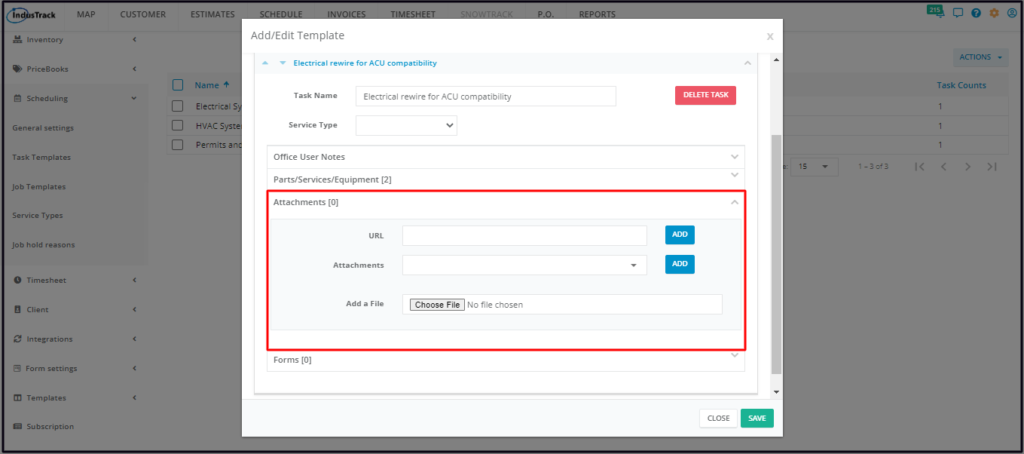
- Attachments
- Click on the field to expand. Add pictures, installation manuals or other relevant references. Either add a URL, attach a file or upload one.
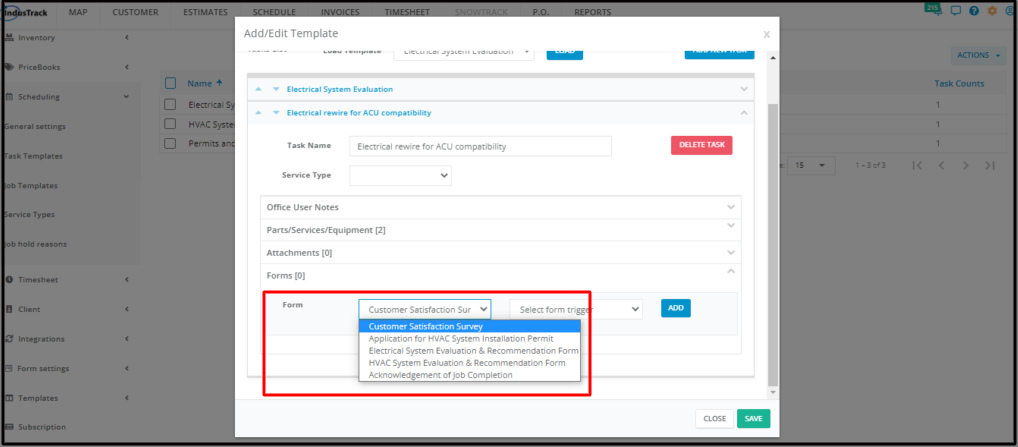
- Forms
- Add a form that has been set up in the system. These forms may be ones that need to be filled out or signed by the field employee or the customer.
- If the form needed has not been added to the system, you can either upload the form to the Attachments section or add this to the system from the Forms page.
- Add a form that has been set up in the system. These forms may be ones that need to be filled out or signed by the field employee or the customer.
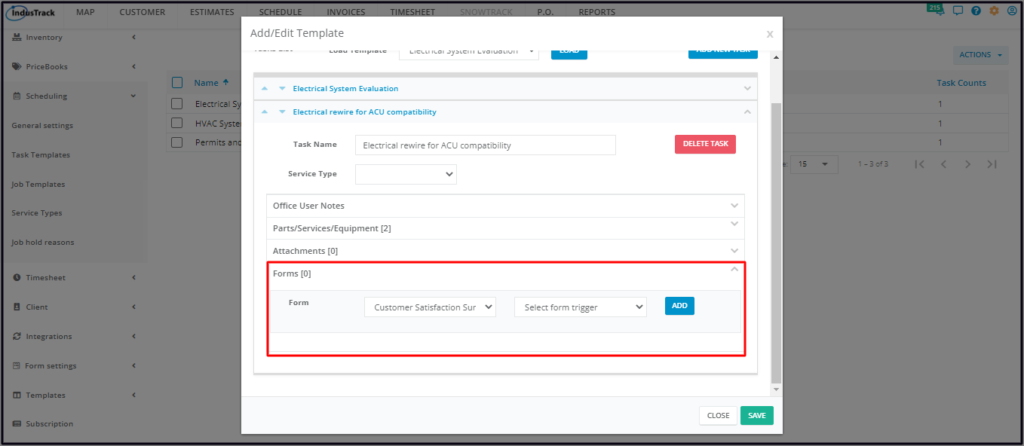
- Form (select form)
- Click on the field to expand.
- Select the form to be added to the task from the list.
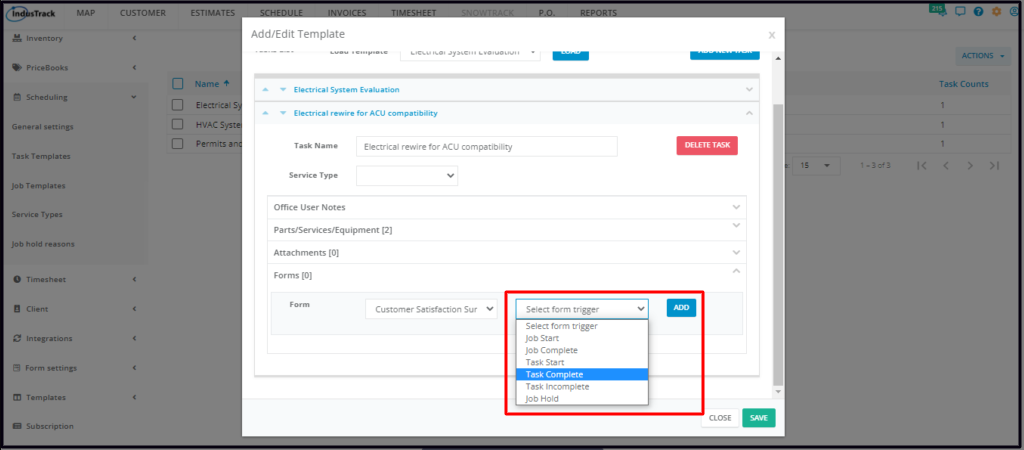
- Form (select form trigger)
- Select the form trigger from the given options.
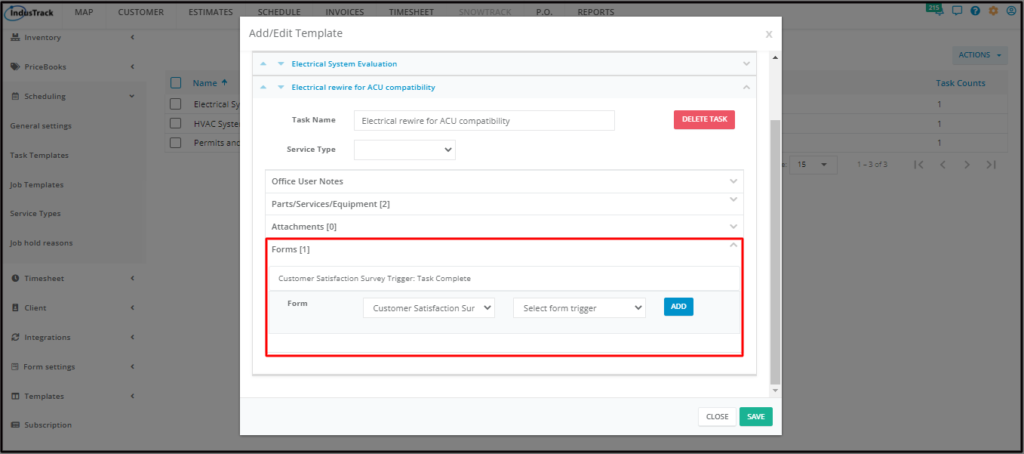
- Forms (add other forms)
- For each selected form and trigger, click the Add button.
- The form will be added to the task.
- Add other forms as needed.
Add more tasks as needed.

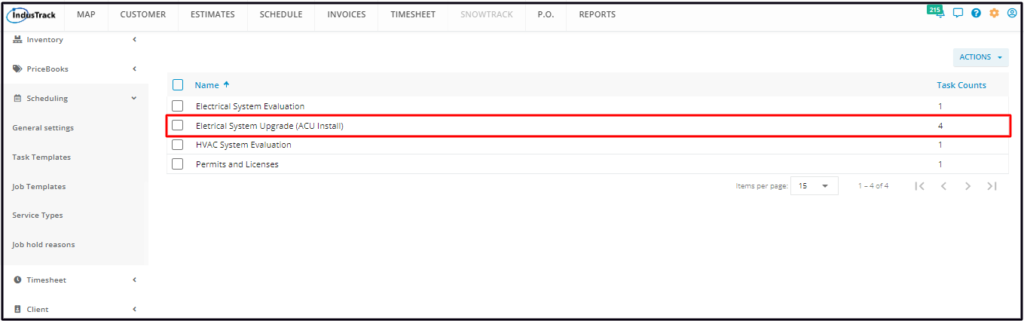
Save the new template. This will be added to the list of task templates.
Working on the Tasks
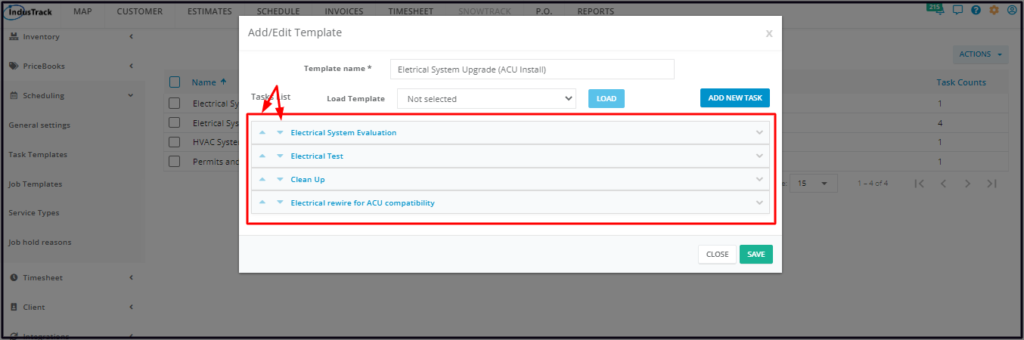
- Use arrows to the left of the tasks to switch the order(s).
- Use the arrows to the right to expand/compress the task details.
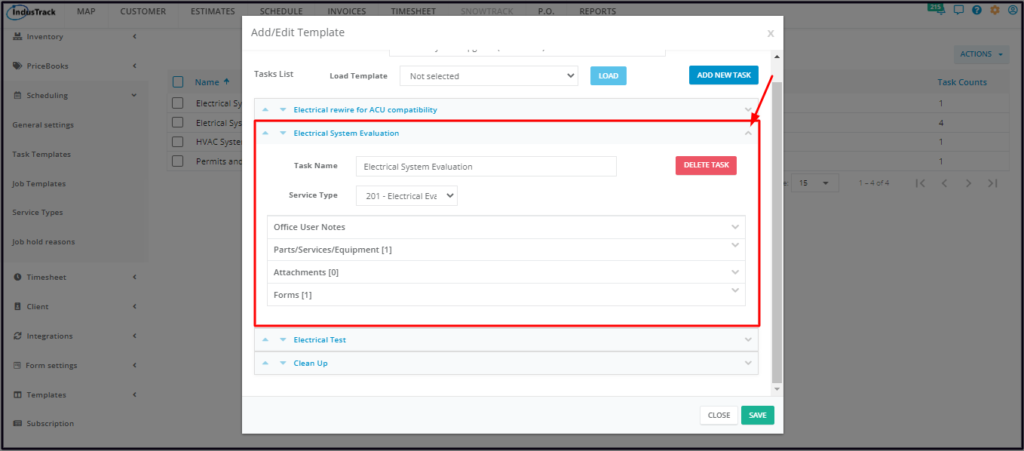
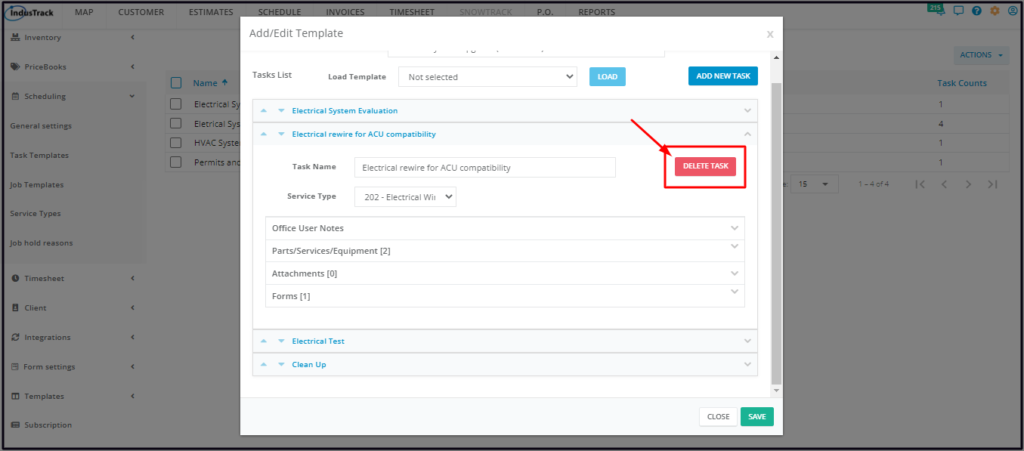
- Click the Delete Task to remove a Task.
Edit a Task Template
Find the Task Template to be updated from the list. Click on it to open in edit mode.
Update the template as may be needed.
- To remove a task from the Task Template, click the Delete Task button.

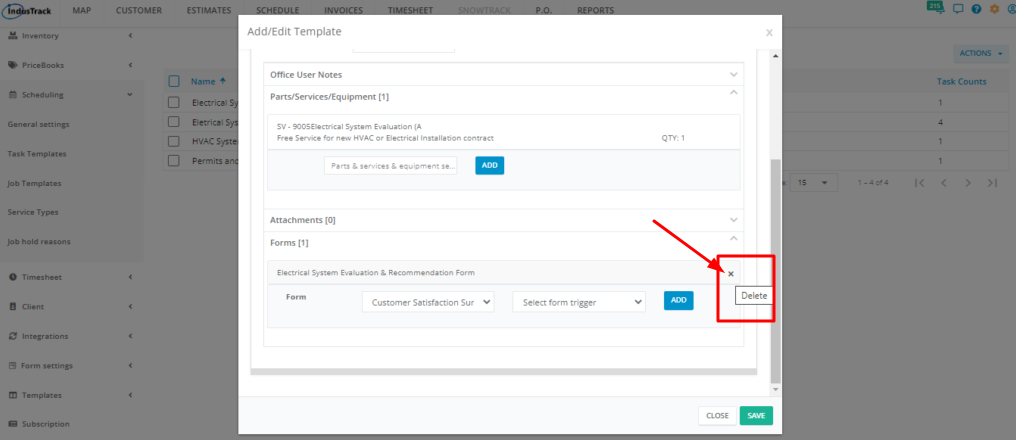
- To remove a form, an attachment or a part/service/equipment, click the delete icon (x) to the right of the item to be deleted.
Delete a Task Template
Delete a Task Template that is no longer in use or was created in error. It is wise to exercise caution when using this function. Deleting a template may have an effect on other functions, settings or data. This action can not be undone.
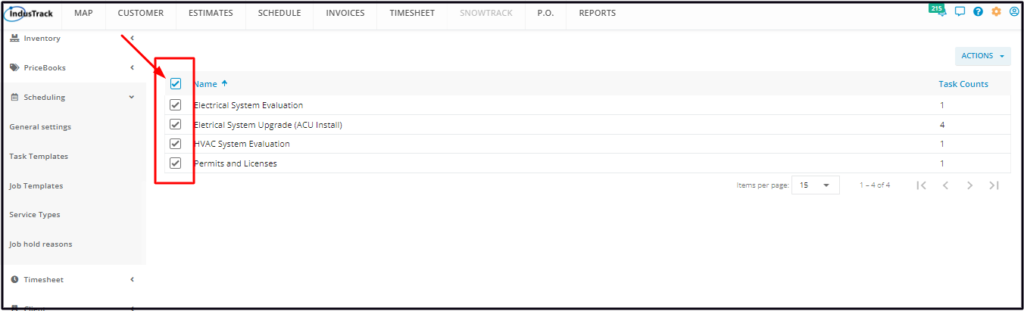
Find the task template to be deleted from the list. Tick the checkbox to its left.
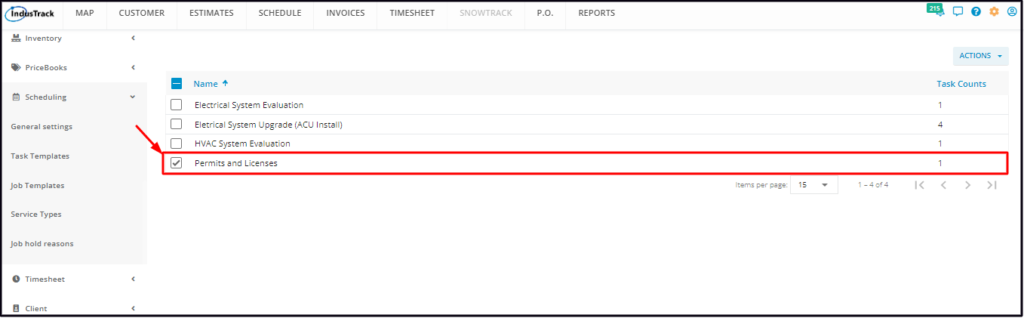
- To delete multiple task templates from the list, tick the checkboxes to the left of all. If all items will be deleted, just tick the checkbox of the Name header.
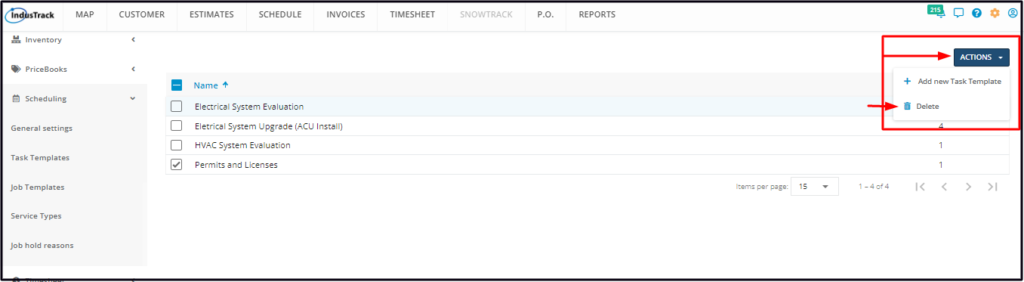
Go to the Actions button and select Delete.
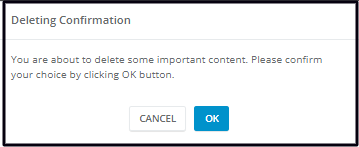
A warning window will come up. Click the OK button to continue with the deletion and Cancel to abandon the action.
The task template will be removed from the list.