
SnowTrack for Office Users
SnowTrack is Industrack’s module for services such as Snow Plowing, Salting or Shoveling. It also allows users to track the employees currently engaged to the services.
Access SnowTrack Page
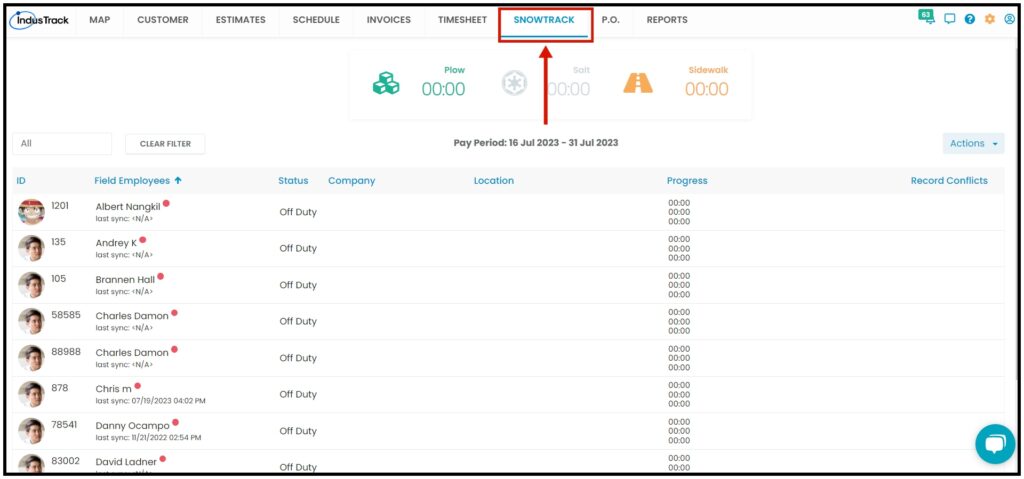
After getting into the Industrack page, select Snowtrack. The Snowtrack tab can be grayed out which indicates that your company does not have access to the Snowtrack Page. The list of employees is displayed along with their details such as the following:
- Status
- Company
- Location
- Progress
- Record Conflicts
Creating SnowTrack Record
There are two ways to create SnowTrack records.
A. Create a new record by clicking an employee name on the SnowTrack page.
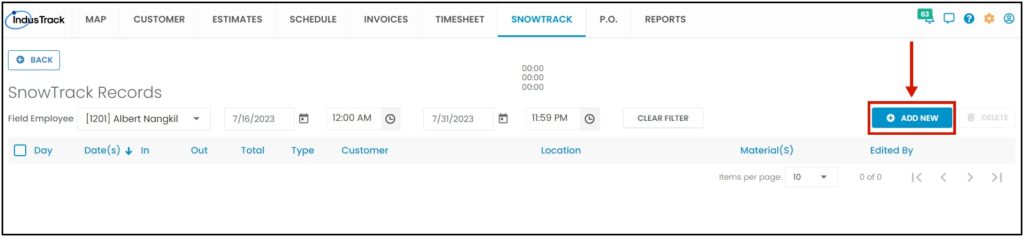
- Once you click an employee, it will take you to the SnowTrack Record’s page.

2. Inside the SnowTrack Record Page, click on the Add New button to open up the Add New pop-up page.
Add New SnowTrack Record
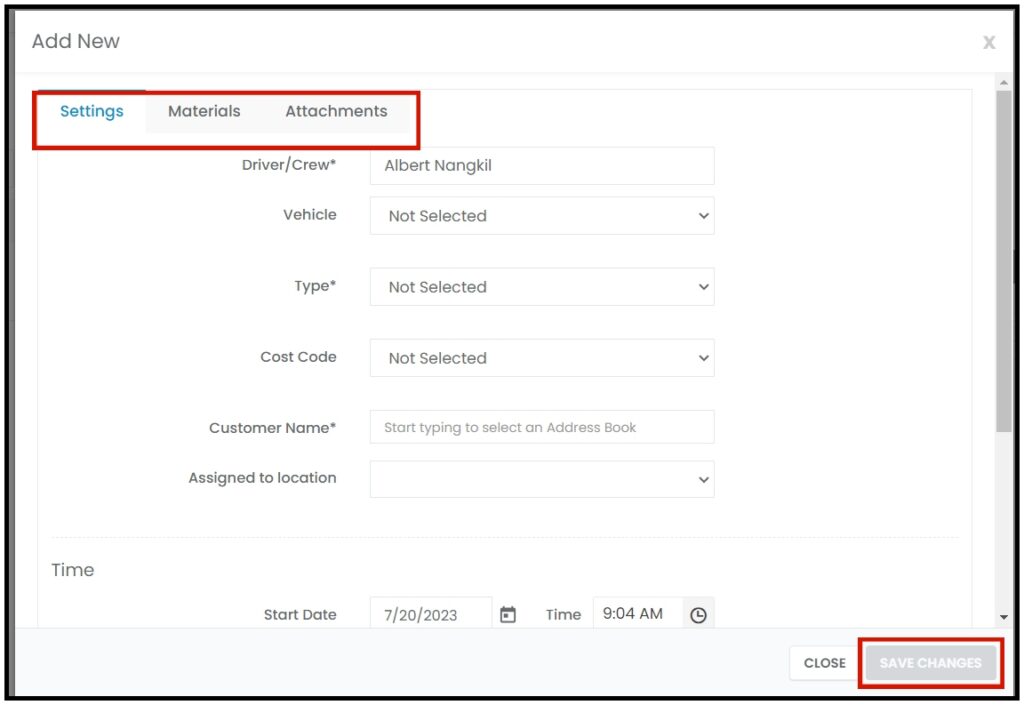
The Add New pop-up page has three tabs namely, Settings, Materials, and Attachments. Fill out all the required fields indicated with an asterisk mater (*). You can visit the other tabs before hitting Save Changes to finalize the record. The Save Changes will be greyed out if the required fields are not filled out.
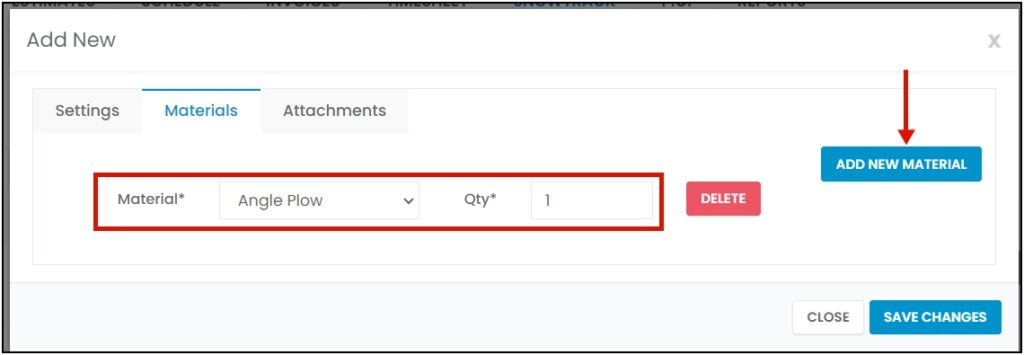
Inside the Materials Tab, you will be able to add a variety of materials and also its quantity. Click on the drop-down to select the material type then put a value on the quantity. If you need to add another set of materials, click the Add New Material on the right corner of the page. Click on Delete if you wish to remove the material you added.
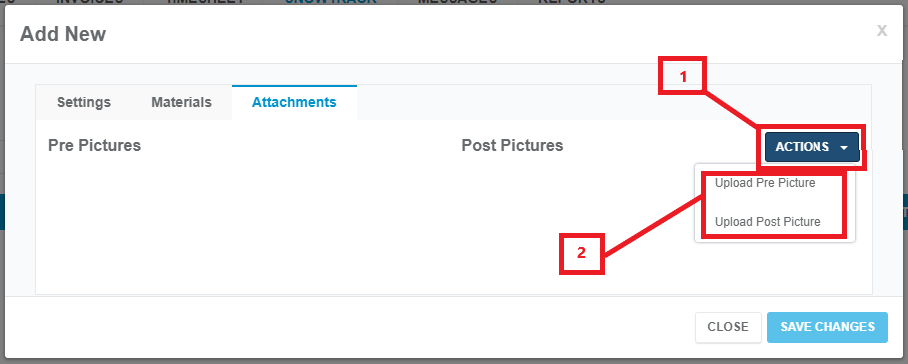
The Attachments Tab allows you to upload images. Click on the Actions button and select which of the image types you need to upload.
B. Create a new record by through Action button
While inside the SnowTrack Page, click the Action button then select Add New SnowTrack Record. it will take you to the SnowTrack Records Page, very similar to how you create a new record by clicking the employee name. The only difference is that the name of the employee is blank. To select a field employee, click on the drop-down list and it will display all the field employees.

Changing Field Employee and Time Period
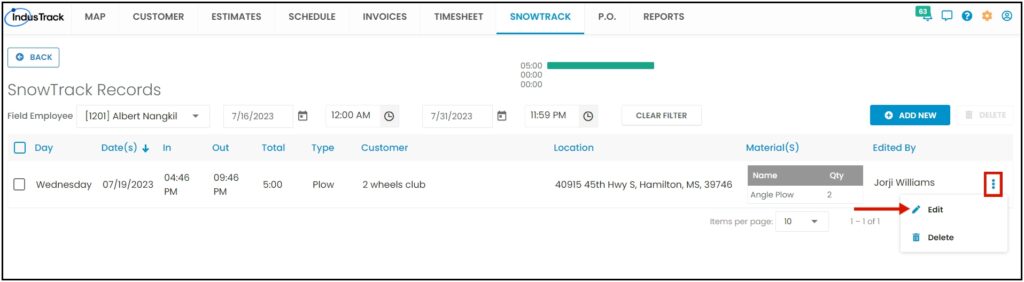
Inside the Snowtrack Records page, you will find the time entries about the selected field employee according to the time period. You can change the time period by clicking on the start date and end date. If you need to change to another field employee, you don’t need to go back to the dashboard, you can simply select from the dropdown menu on the upper left as highlighted on the image.

Edit Time Entry
To edit a time entry of the field employee, click on the three dots located in the right corner of the entry. It will give you a pop-up that will allow you to edit the time entry.
View Completed Snowplow
To view all the completed Snowplow of each month click on Actions > View Completed Snowplow.

Manage List of Materials
Manage List of Materials that you want to show or hide from the drop-down when doing Snowplow.
Toggle Off the Materials you don’t want from your list on the mobile app. If a certain material is disabled from here, when doing a snowplow the material will not be available from the material dropdown list.
