Warehouse Inventory
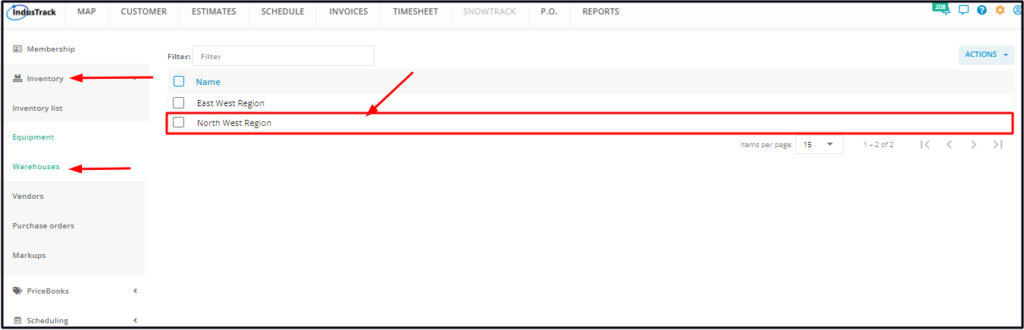
Manage the inventory of each of your Warehouses. Go to Settings > Inventory > Warehouses.
From the backend, Office Users who have inventory editing permissions are able to update the quantities of the Warehouse inventory. Included in the updates are assigning more inventory items to the warehouse, and adding and reducing quantities.
Assign/Add Inventory Items to Warehouses
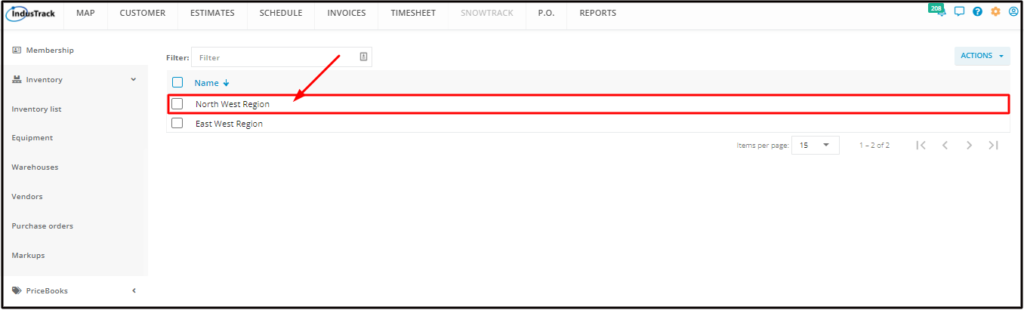
From the Warehouses List, find the one to be updated and click on it to open the profile in edit mode.
If unsure, go to the Assigned Inventory and check if the item to be added is not yet on the Warehouse’s inventory list. If it is, increase the quantity of the item, if needed, instead of adding a new one.
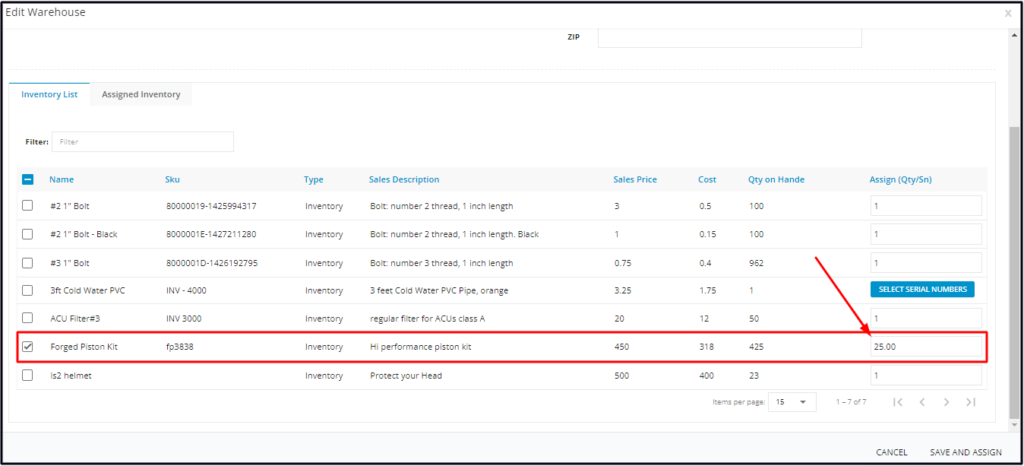
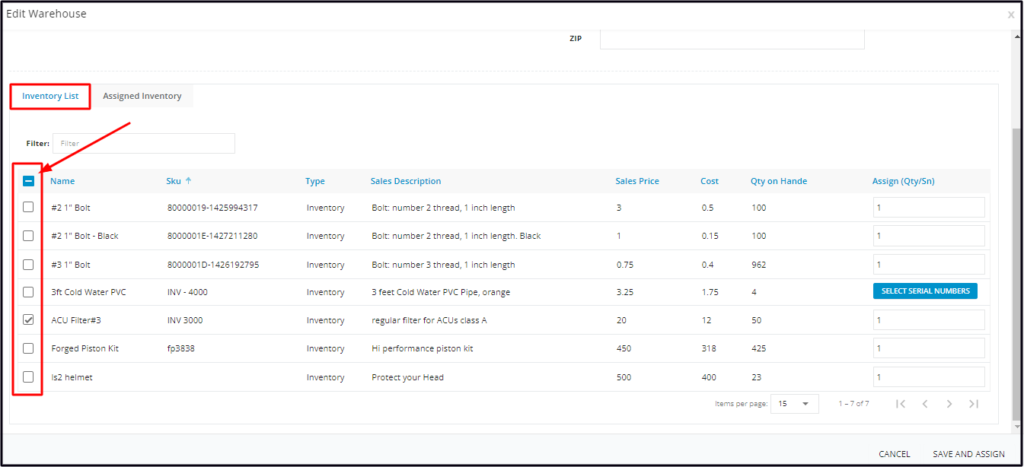
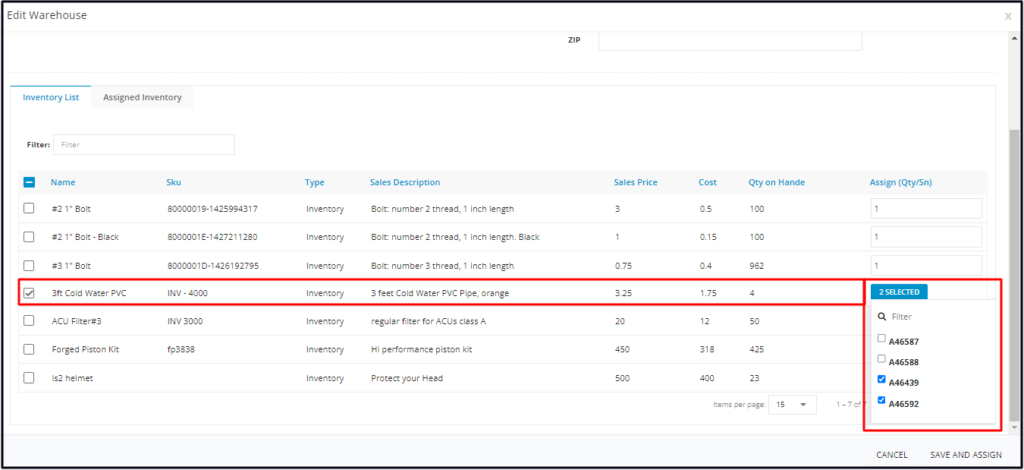
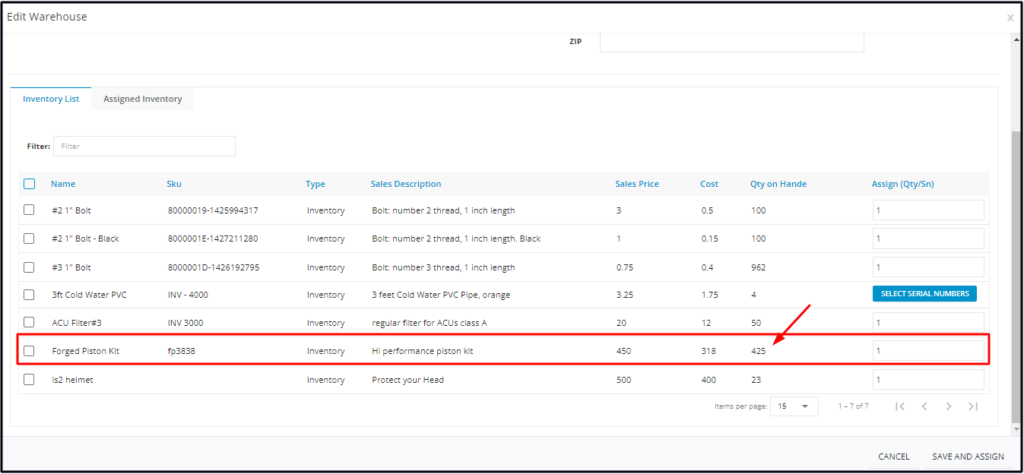
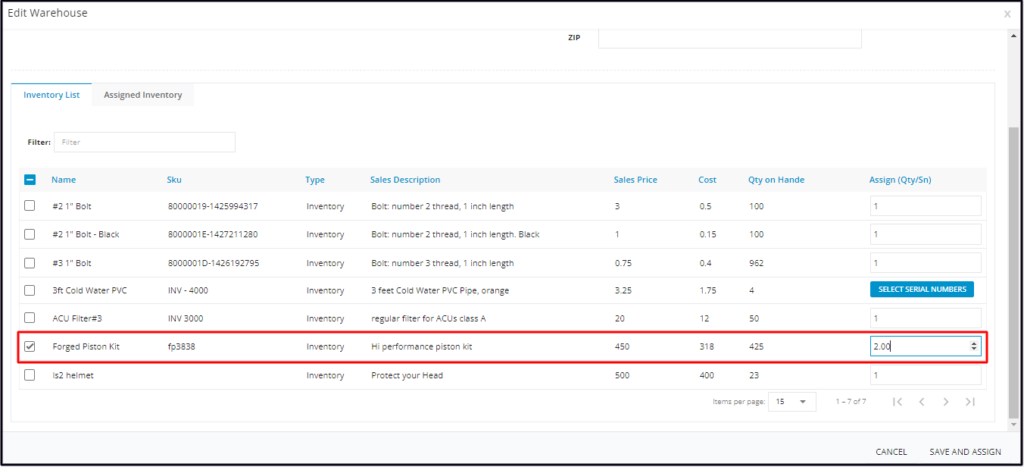
If the item to be added is not on the Warehouse’s list, go to the Inventory List tab and find the inventory item to be assigned to the Warehouse.
Tick the checkbox to the left of the inventory item. If this is not ticked, the item will not be assigned to the Warehouse even if the quantity has been set.
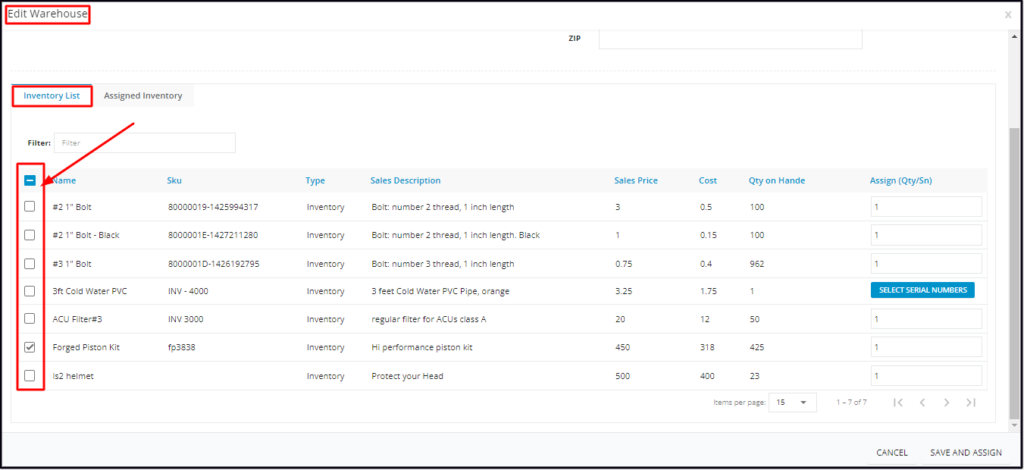
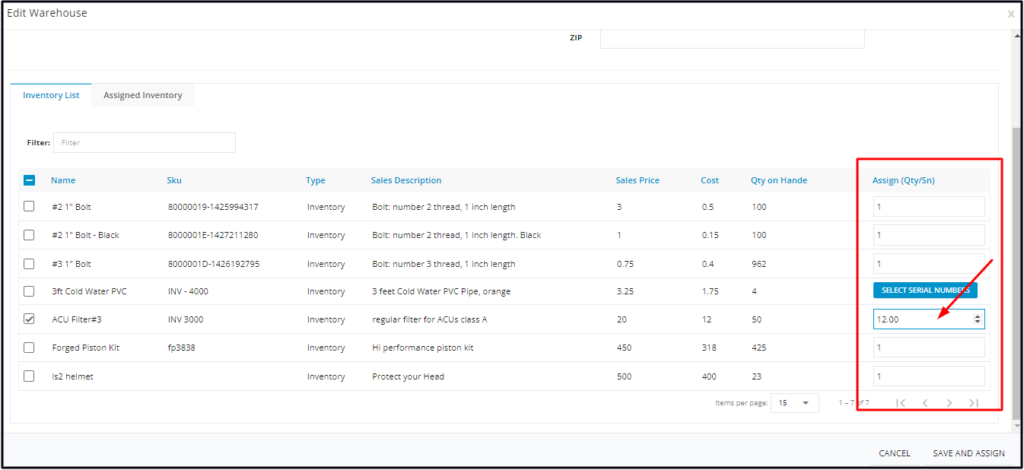
Under the Assign Qty/SN column, set the quantity or select the serial number(s) of the item to be assigned.
Only inventory items with quantity on hand can be assigned. The quantity to be assigned must not be greater than the quantity on hand. If it is, the system will not accept the data.
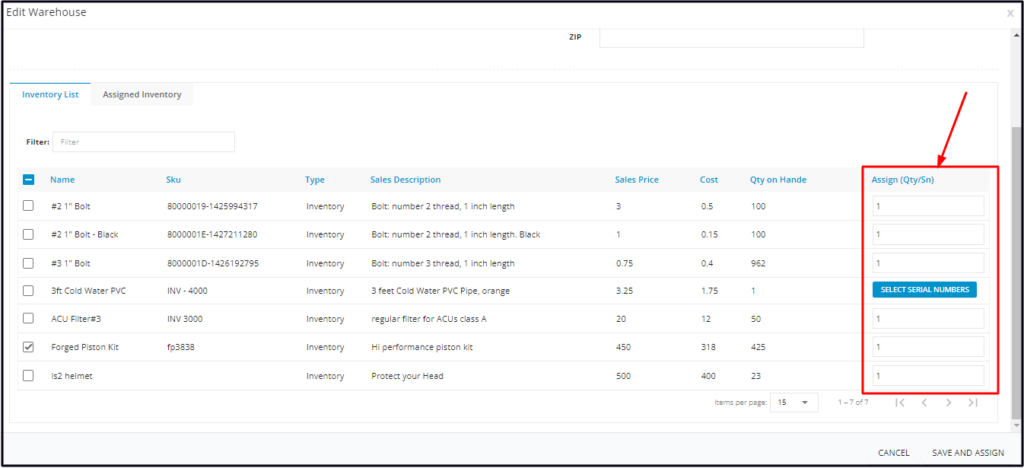
- Inventory Count
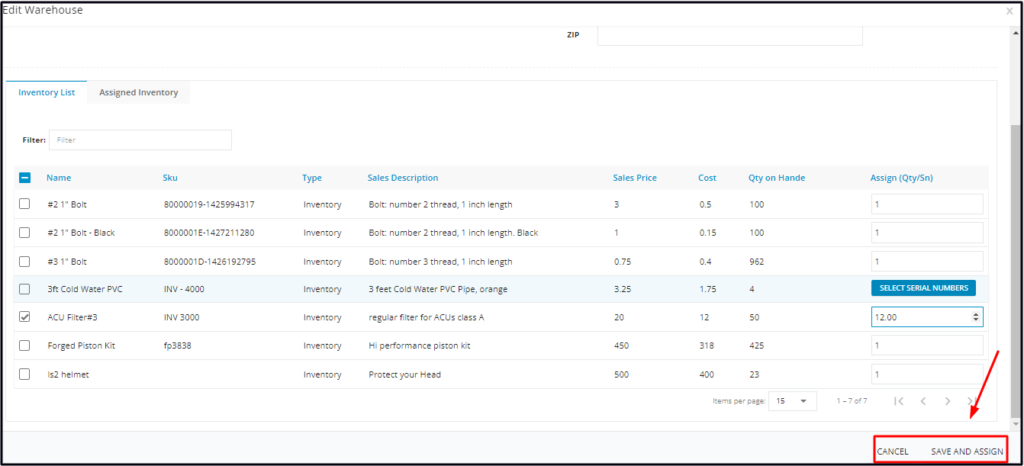
- Set the quantity to be assigned. The default quantity is one, edit as may be needed.
- If the check box of an item is not ticked, there is no need to update the quantity or set the 1 to 0.
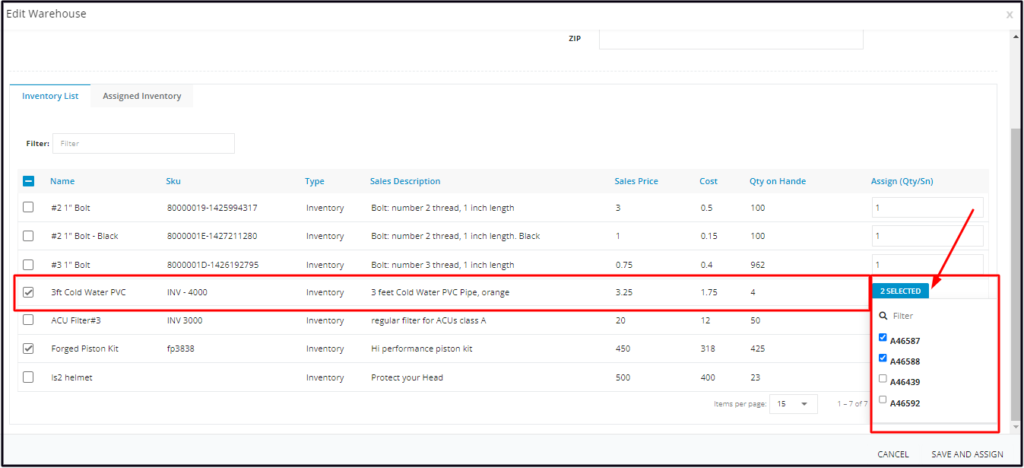
- Serial Numbers
- Click the Select Serial Numbers option to bring up the list of available serial numbers.
- Find the serial number(s) to be assigned. Use the Filter option to quickly find a serial number.
- Tick the checkbox(es) to select.
- Untick the checkbox to deselect.
- The item checkbox will automatically be ticked when a serial number is selected.
Once done, Save and Assign. The inventory items with assigned quantities or serial numbers will be added to the warehouse’s inventory.
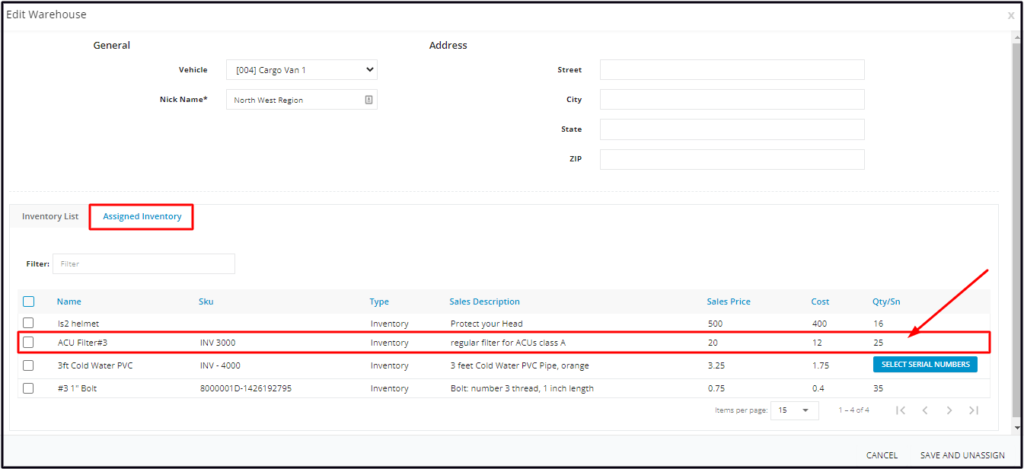
The count of assigned items will be automatically removed from the main storage facility’s inventory. The quantity on hand on the Inventory List will be updated. The warehouse is now accountable for the inventory.
Increase the Quantity of an Inventory Item
The Warehouse Assigned Items quantity on hand will be automatically updated when these are used and invoiced for a job.
Replenish the items used and update the Warehouse inventory.
From the Warehouses List, find the one to be updated and click on it to open the profile in edit mode.

Go to the Inventory List tab and find the item to be updated. Tick the checkbox to its left.
Key in the quantity to be added.
For inventory that uses serial numbers:
- Click the Select Serial Numbers option to bring up the list.
- Find the serial number(s) to be assigned. Use the Filter option to quickly find a serial number.
- Tick the checkbox(es) to select.
- Untick the checkbox to deselect.
Save and Assign the additional quantity or serial number(s).
At the Assigned Inventory tab, the additional quantity or serial number(s) will be added to the item’s stocks on hand.
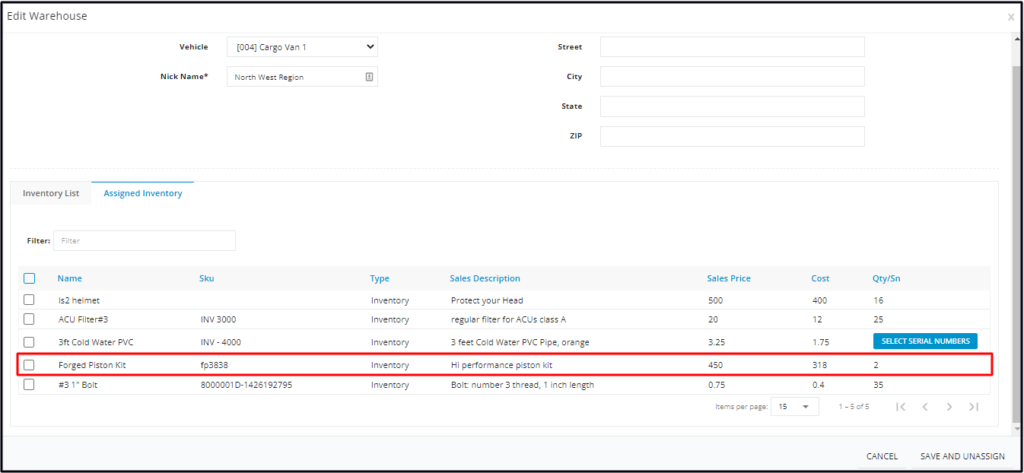
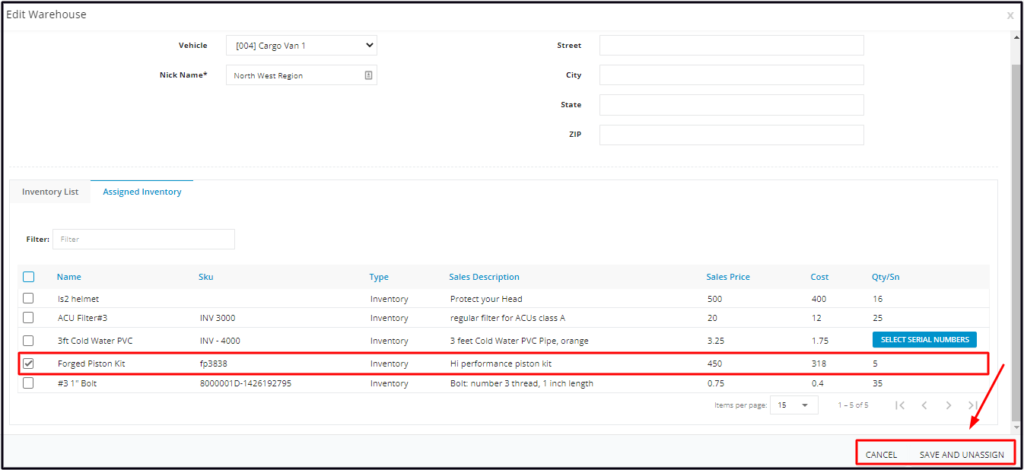
Unassign/Remove Inventory Items from a Warehouse
From the Warehouses List, find the one to be updated and click on it to open the profile in edit mode.
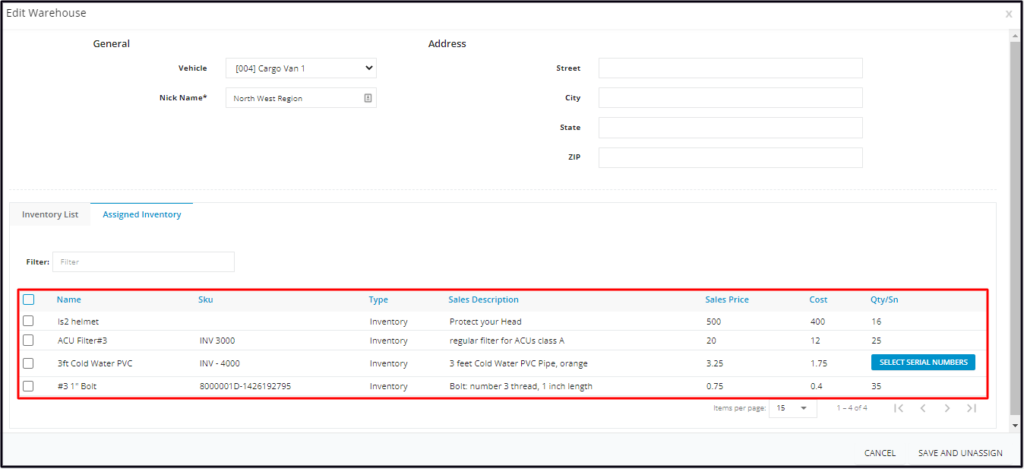
Go to the Assigned Inventory tab. Find the item from the list of assigned items and tick the checkbox to its left.
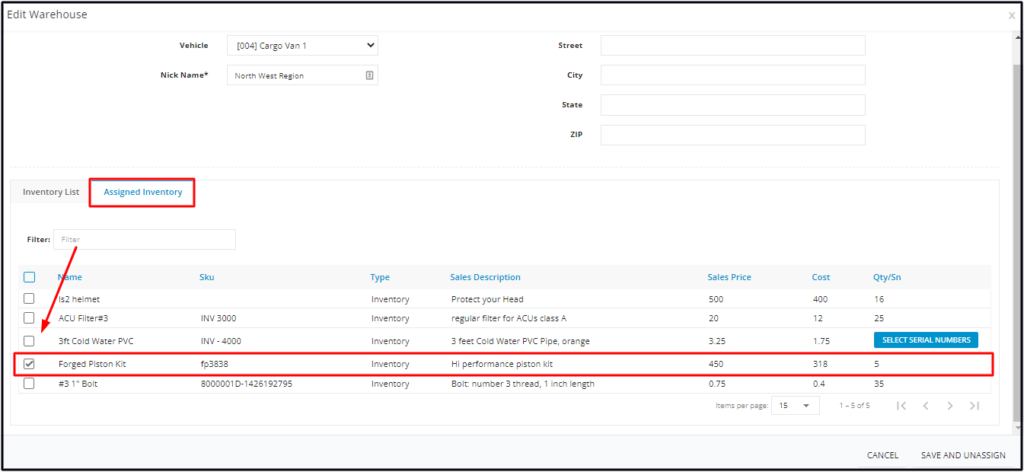
- To unassign multiple items from the list, tick the checkboxes to the left of all. If all items will be unassigned, just tick the checkbox of the Name header.
Save and Unassign.
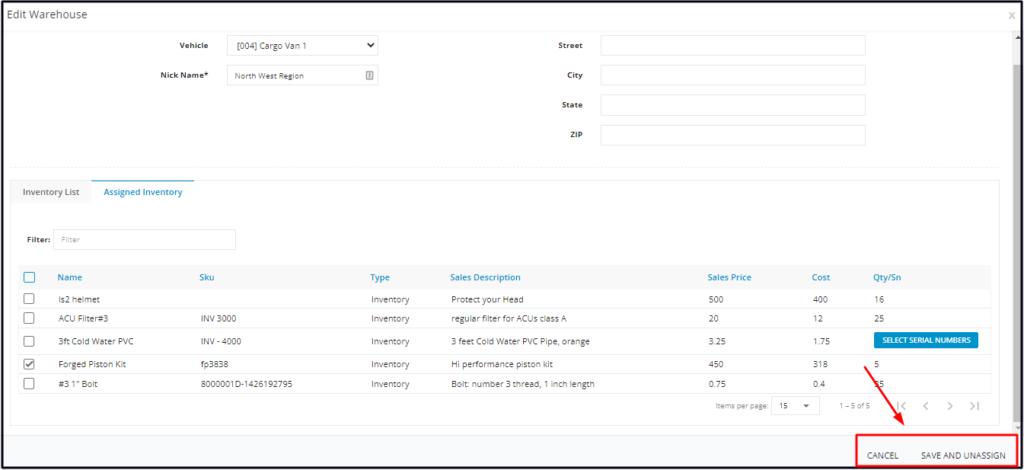
The item will be removed from the warehouse’s inventory list. Any quantity that is still held on hand will be added back to the inventory of the item at the main storage. The Inventory List tab will reflect the change.
Decrease the Quantity of an Inventory Item
The Warehouse Assigned Items quantity on hand will be automatically updated when these are used and invoiced for a job. However, it is also possible to manually decrease the warehouse’s inventory count.
From the Warehouses List, find the one to be updated and click on it to open the profile in edit mode.

Go to the Assigned Inventory tab and find the item to be updated. Unassign this first.
Go back to the Inventory List tab and assign the item again with the new quantity.
Save and Assign. The item will be added back to the warehouse’s inventory list with a decreased quantity.