Add and Manage Field Employee Groups
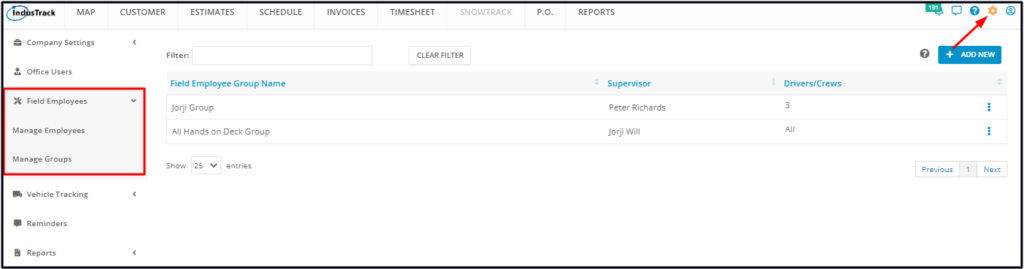
To access the Field Employee setup page, go to Settings > Field Employees which is further grouped into 2 sections: Manage Employees and Manage Groups.
- Manage Employees – Set up and manage individual field employees, including their permissions and, for some users, supervisor permissions.
- Manage Groups – Set up different field employee groups and assign individual field employees to these groups.
Field employees can be grouped into teams. Decide on how you would like them to be grouped – by schedule, by speciality, by area or whatever you decide. Create the teams and assign the group supervisor and the field employees.
From the backend, Office Users create and manage Field Employee Group profiles depending on their permissions.
Using the Field Employee Groups Table
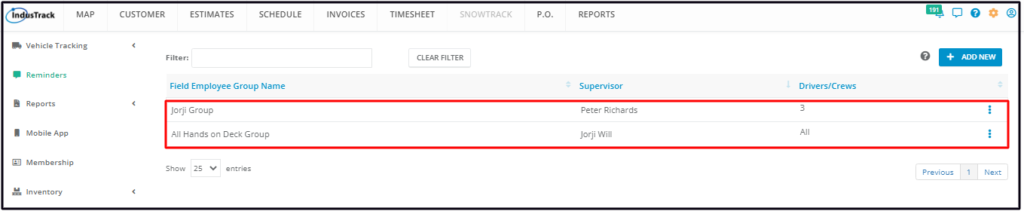
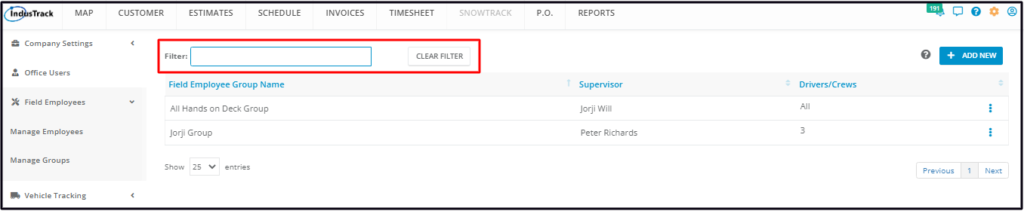
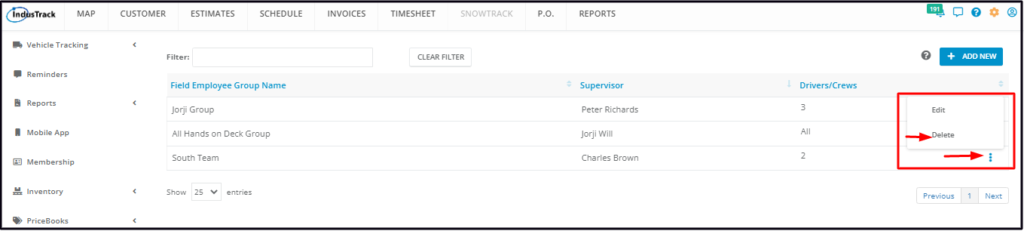
By default, the Field Employees Groups table is displayed when you move to the Manage Groups page.
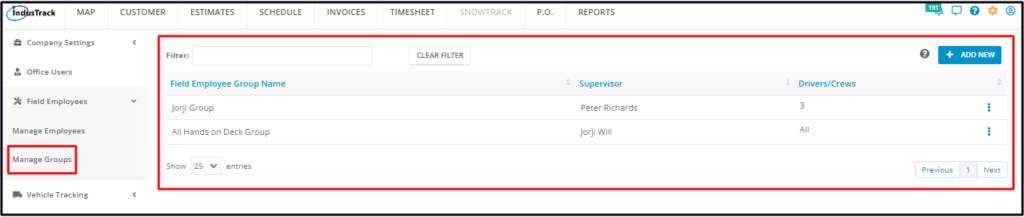
The Field Employees Groups table has 4 columns:
- Field Employee Groups Name – This column contains the names that have been used to identify the groups.
- Supervisor – This column contains the names of the field employees assigned as the Group Supervisors.
- Drivers/Crews – This column contains the number of field employees assigned to the groups.
- Actions button – The button is used to Edit or Delete the Groups.
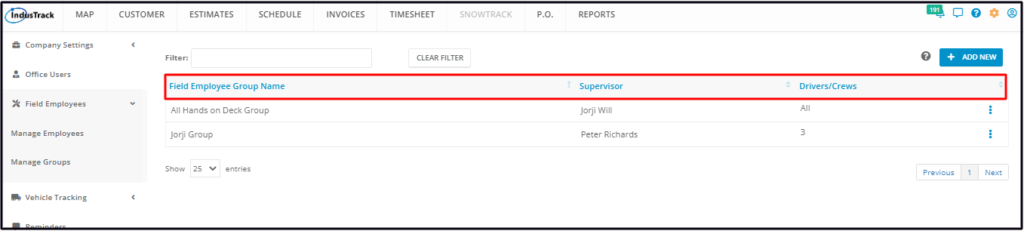
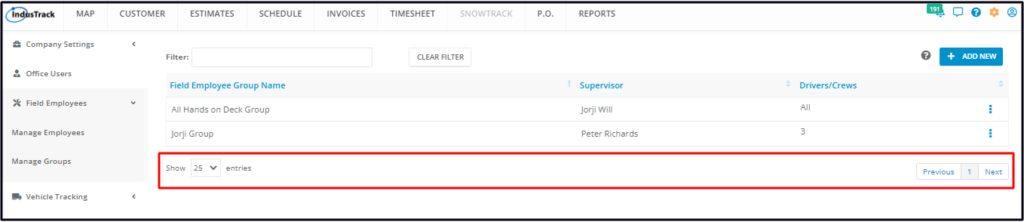
Sort the Field Employee Groups list
Click on the column header to sort the list according to the preferred field.
Add New Button
Use this button to create a Field Employee Group.

Filter Bar
- Use this function to narrow down the list of Field Employee Groups. This is especially useful for companies with multiple Field Employee Groups.
- You can filter for the Group and Supervisor names.
Clear Filter Button
Use this button to reset the table to its original format (remove the filter).
List Per Page
- Select the number of field employee groups to be displayed per page. Options to choose from are 10, 25, 50, and 100.
- Use the Previous and Next buttons to move from one page to another (if there is more than one page).
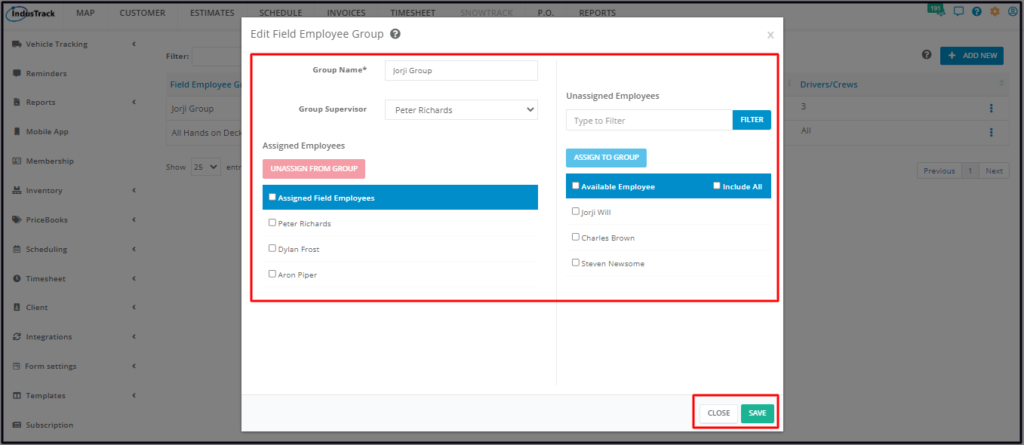
Create a Field Employee Group
Go to the + Add New button.

Fill out the fields on the Add Field Employee Group window.
- Key in the assigned Group Name* on the provided field.
- Select the name of the Field Employee to be assigned as the Group Supervisor from the drop-down list.
- Note that the Field Employees on the list are the ones whose profiles were set up with Supervisor Access.
- Field Employees with Supervisor Access cannot be assigned as a supervisor for multiple crews/groups.
- The Supervisor can also be added as a crew member below.

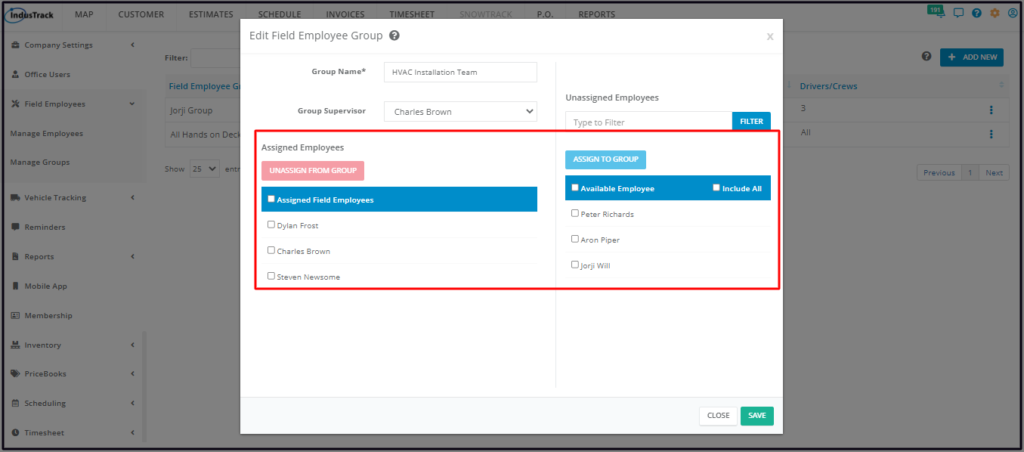
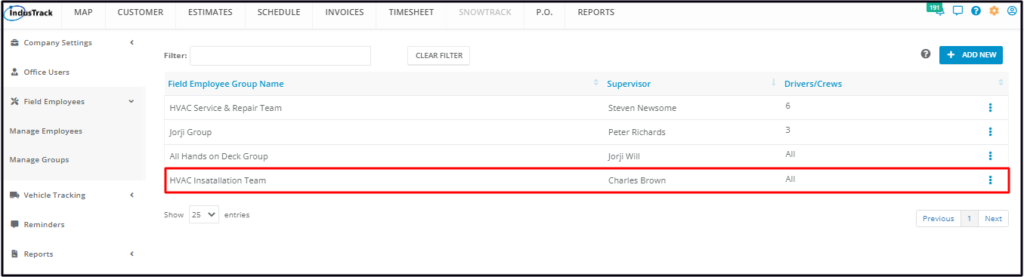
- Use the Save button at the bottom of the Add Field Employee Group window to create the new Group. The new Group will be added to the list of Field Employee Groups.
Update a Field Employee Group
Find the Field Employee Group to be updated from the list, click the 3-dot menu to the right and select Edit. This will open the group profile in edit mode.

Edit/Update as may be needed. Once done, Save the changes.
Delete a Field Employee Group
Find the Field Employee Group to be removed from the list, click the 3-dot menu to the right and select Delete.
A warning window will come up. Click the OK button to continue with the deletion of the group and Cancel to abandon the action.
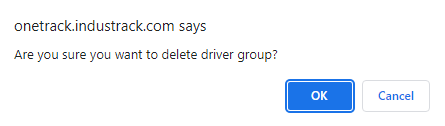
The group’s name will be removed from the list of Field Employee Groups.