
General
Brand your business in IndusTrack!
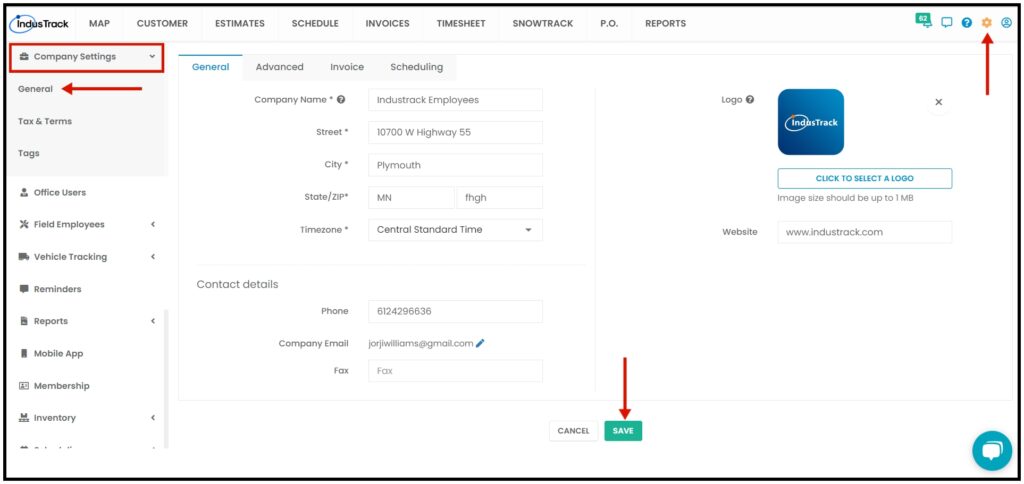
To access your company profile, go to Settings > Company Settings > General.
Information about your company is not just there for records purposes. Upload your company logo and we’ll add these to your estimates and invoices. Your website URL and contact details will always be on those documents too.
Some information about your company will already be in the fields. Go over them and update where necessary and fill in any missing items. Fields with (*) are required. As much as possible, provide complete details.
Company Name – This is your company’s registered name. Make sure that this is correct (double-check the spelling!). This will appear on many of your forms including estimates and invoices for your customers.
Address* – Similarly, check that everything is correct. Select your Timezone from the dropdown. By default, device timestamps are converted into your local timezone, but if you would rather see the timestamp local to the device in reports, tick the checkbox Use Device Timezone.
Contact Details – Provide the company contact details (Phone, Email, and Fax) and not the CEO’s or contact person’s information.
Always SAVE any changes you make! The Save button is at the bottom of the General tab.
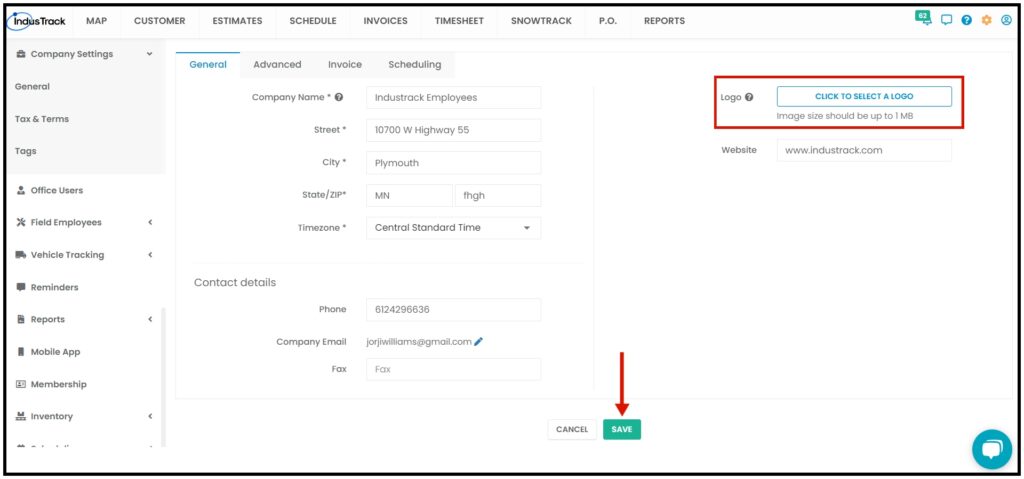
Upload the Company Logo
To upload your company logo, follow the steps below:
- Under Company Info of the General tab, go to Click to Select a Logo button.
- Select and upload the image from your device.
- Save the uploaded image by clicking the Save button at the bottom of the General tab.
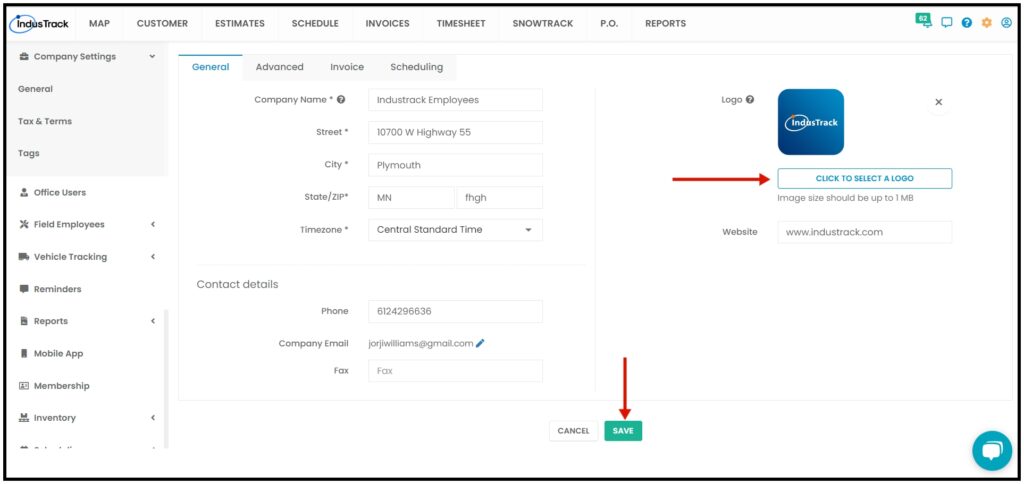
Change the Company Logo
- Under Company Info of the General tab, go to the Click to Select a Logo button.
- Select and upload the new image from your device. This will automatically replace the current uploaded logo.
- Save the new logo by clicking the Save button at the bottom of the General tab.
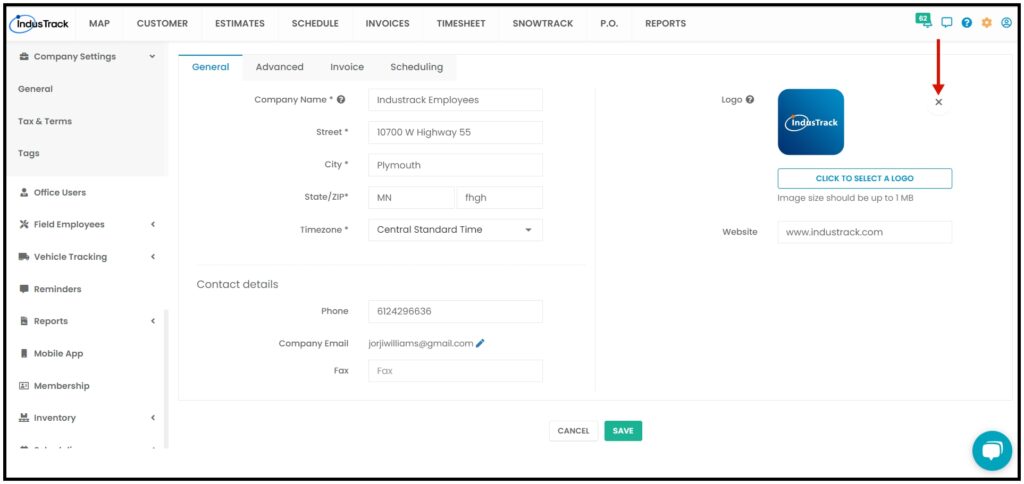
Delete The Company Logo
- Under Company Info of the General tab, go to the uploaded Logo.
- Click on the delete icon (X) to its right. This will remove the image from your profile.
Advanced Company Settings
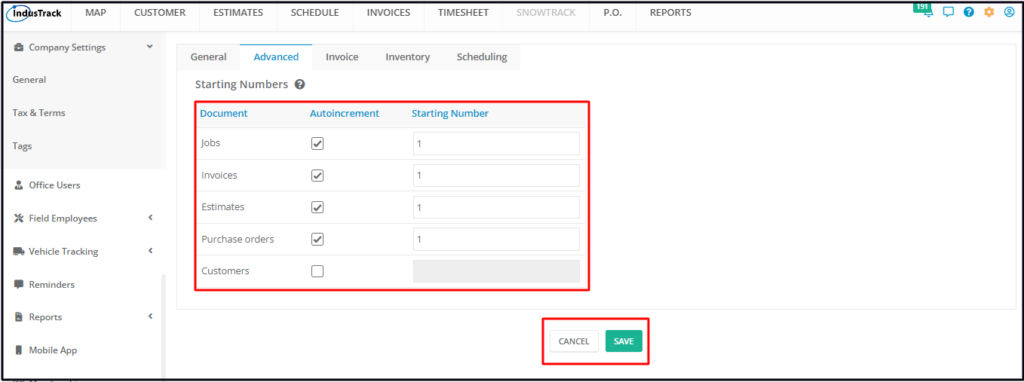
When you create invoices, estimates, purchase orders, jobs, and customer numbers, it is important that these are sequentially numbered. These numbers ensure proper tracking and documentation for tax and accounting purposes.
The number sequences are set up in this section. If you do not set this up, you will have to enter a number manually on each item or they will be unnumbered.
Set Up Auto Incrementing and Starting Numbers
To access the Advanced Settings page, go to Settings > Company Settings > General > Advanced.
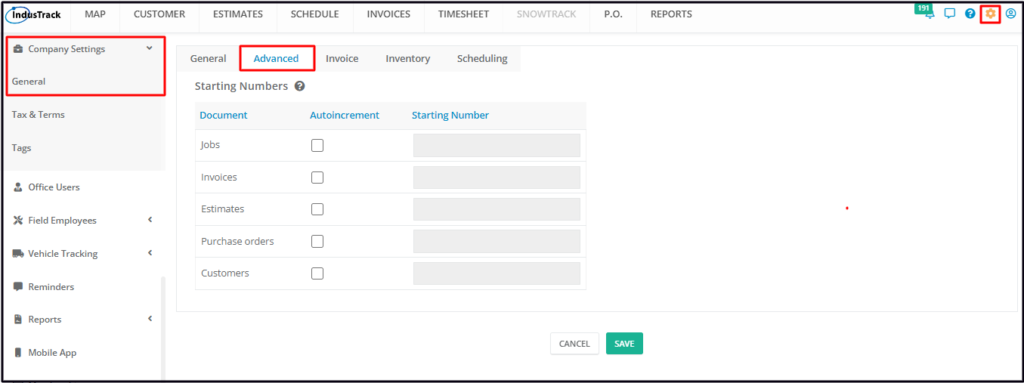
- Select the option to be set (Jobs, Invoices, Estimates, Purchase Orders, or Customers).
- Tick the checkbox for Autoincrement. This will enable the Starting Number field.
- Key in the starting number.
- Ordinarily, the sequence starts at 1. But if you already have existing invoices (for example) and you want to continue the numbering pattern, you can use the next number in the series.
- Repeat the same process for the other 3 options.
- Save the setup.

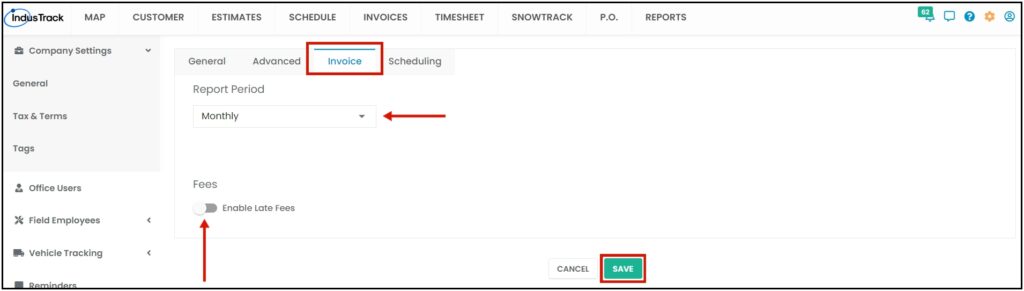
Invoice Settings
Set up Invoice Report period by monthly or weekly. Enable Late Fee if applicable. Always click on Save when making changes.
Scheduling Settings
- Automatically add job notes to invoice – When converting a job to an invoice, all notes from the job will automatically carry over to the invoice. If not enabled, you will have to manually add the job notes to the invoice when the job is converted.
- Automatically add Pinned notes to invoice – When converting a job to an invoice, the customer location’s site/pinned note will automatically carry over to the invoice. If not enabled, you will have to manually add the site notes to the invoice when the job is converted.
- Automatically add office user notes to invoice – When converting a job to an invoice, all office user notes that have been added to the job will automatically carry over to the invoice. If not enabled, you will have to manually add the office user notes to the invoice when the job is converted.
- Automatically add equipment notes to invoice – Will automatically add equipment service notes to the invoice once the job is converted. If not enabled, you will have to manually add the service notes to the invoice when the job is converted.
- Automatically add estimate notes to the job – When an estimate is converted into a job, notes from the estimate will automatically carry over to the job. If not enabled, when converting the estimate into a job you will have to manually add the estimate notes to the job.
- Lock the job from editing once invoiced – When enabled, the office users won’t be allowed to make changes or edit the job once it is invoiced. If not enabled, office users will still be able to make changes to the job after it is invoiced.
- Add job/Travel time to Invoice – When enabled, the field employees’ time spent on the job will automatically be added as a line item on the invoice. This will be disabled when Quickbooks integration is set up since we can also sync the timesheet entries to Quickbooks.
