
Convert a Completed Job into an Invoice
You can convert a completed job into an invoice from the completed jobs report of the Schedule Module in just a few clicks.
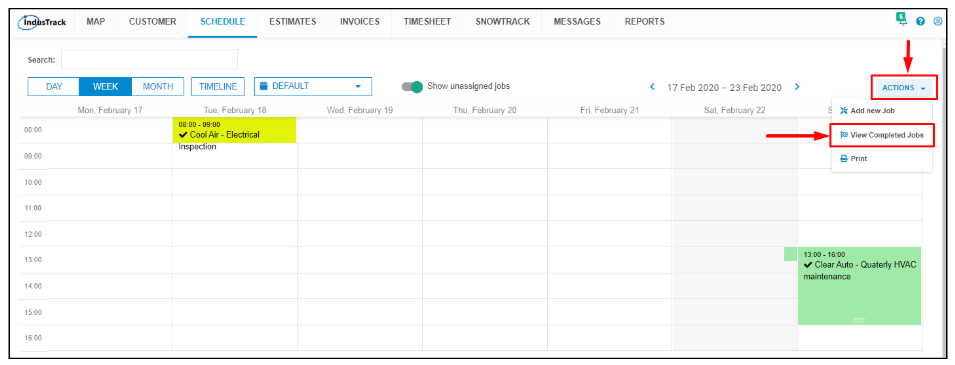
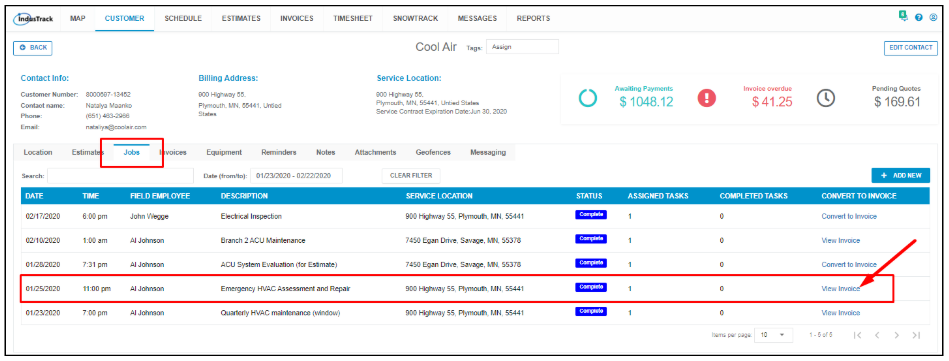
From the Calendar Page, go to the Actions button. Select View Completed Jobs.
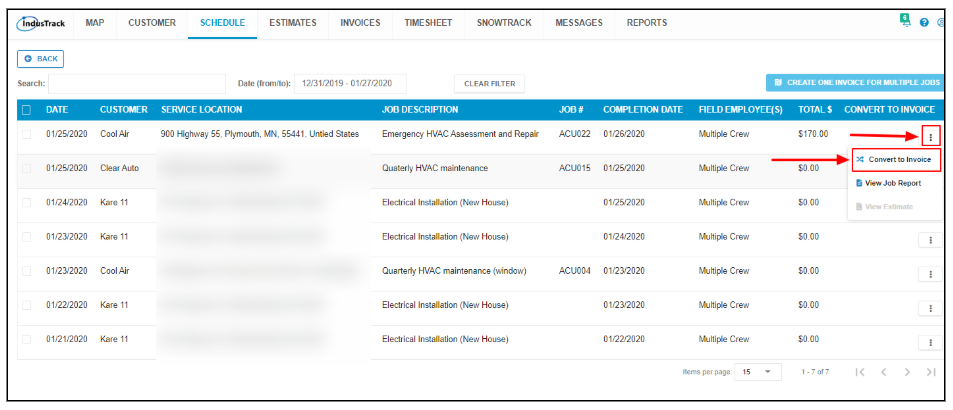
Find the specific job to be invoiced from the completed jobs list. Click the 3-dot menu to the right and select Convert to Invoice.
The successful conversion of the job to an invoice will come up at the lower right-hand corner of the screen.
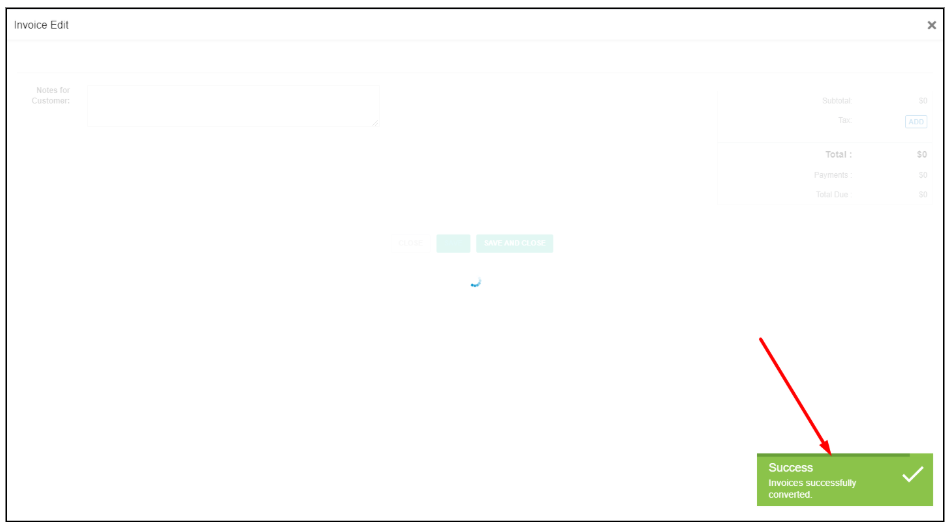
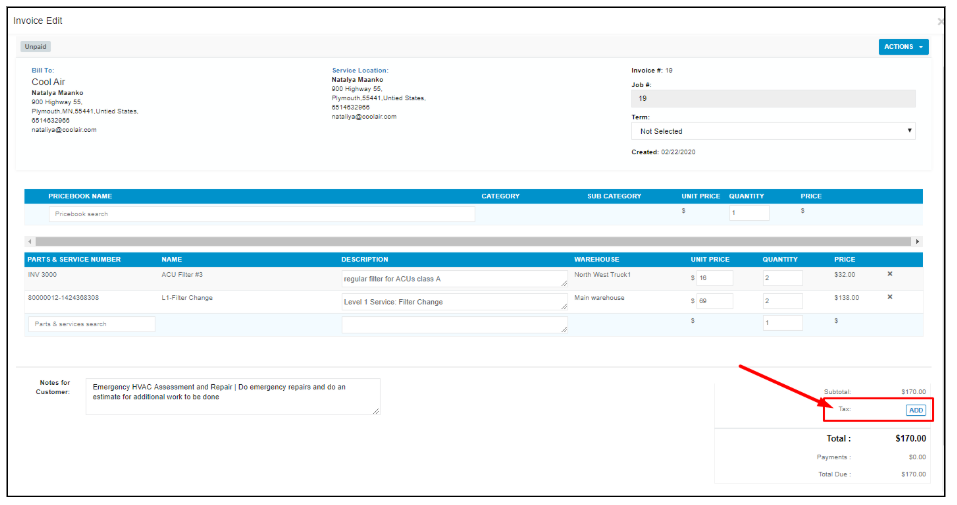
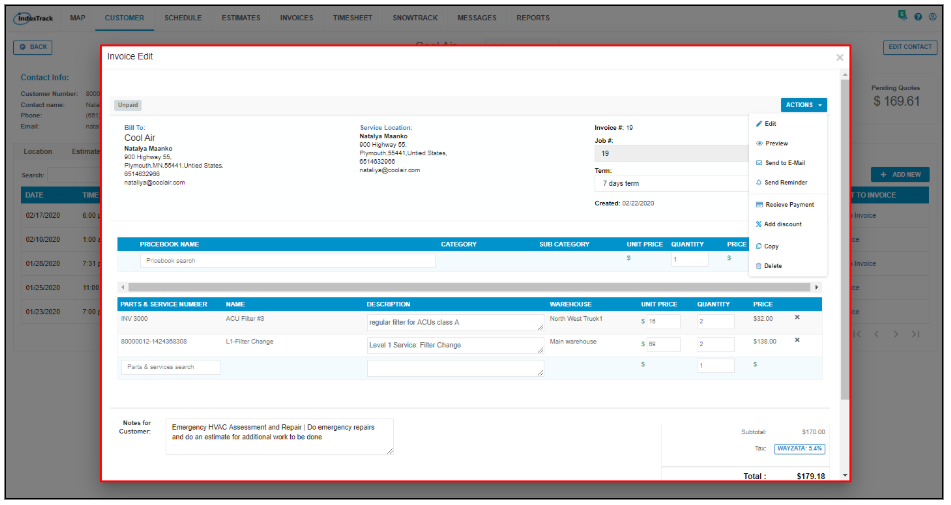
The created invoice will open.
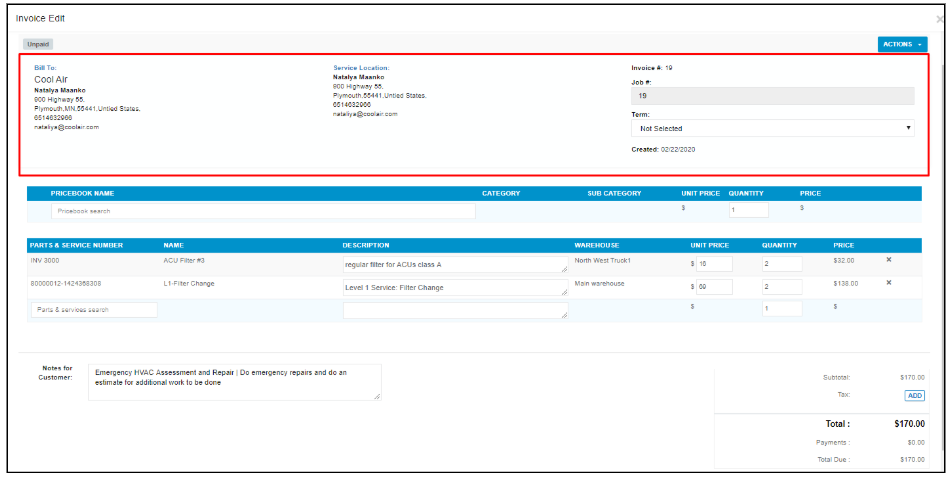
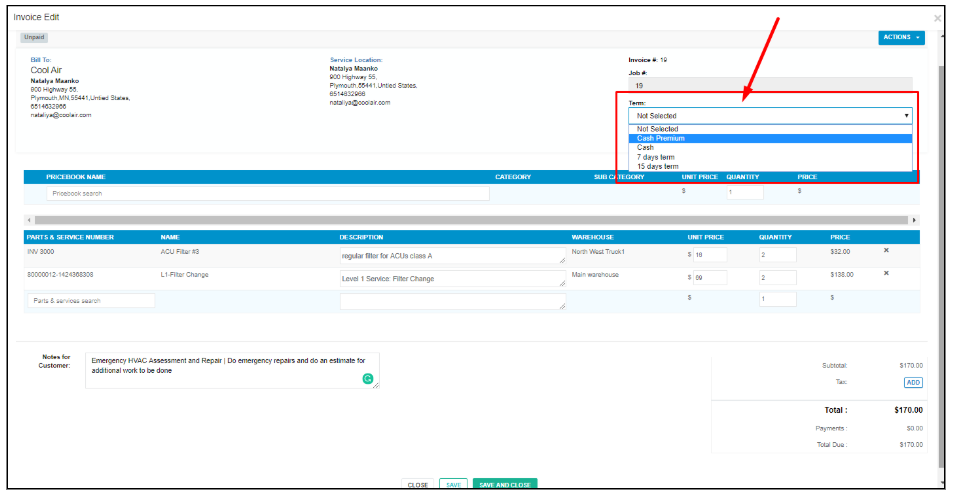
The Invoice number, if auto-increment is set up will be indicated on the Invoice. The job number, and customer details, including the terms of payment, will also be indicated.
If the Terms of Payment has not been set up for the client or you want to apply a different one, click the arrow down and select from the list.
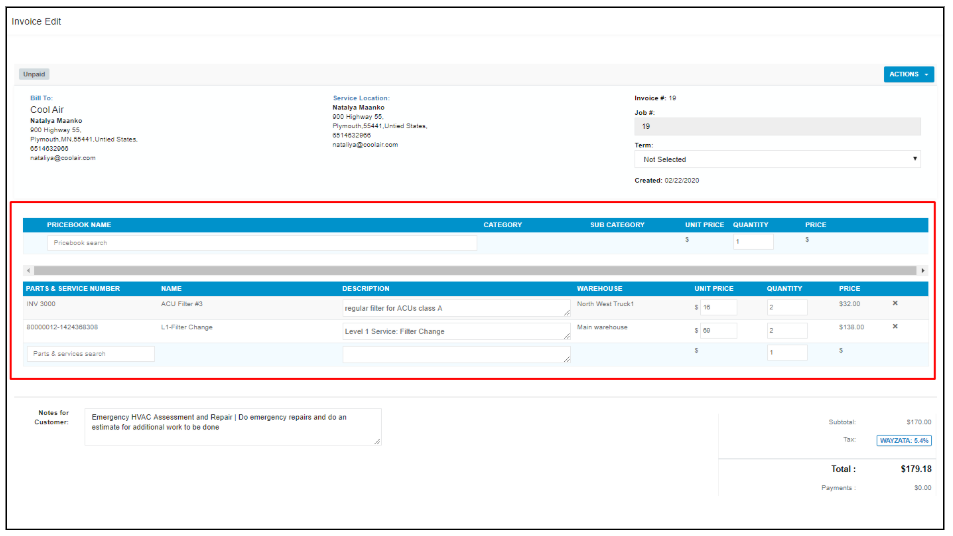
The job details such as the materials, services, and labor indicated on the job will also be indicated as line items on the invoice. The job details can be edited or deleted. You can also add more to it. To learn how to do this refer to Creating Invoices. The process is the same.
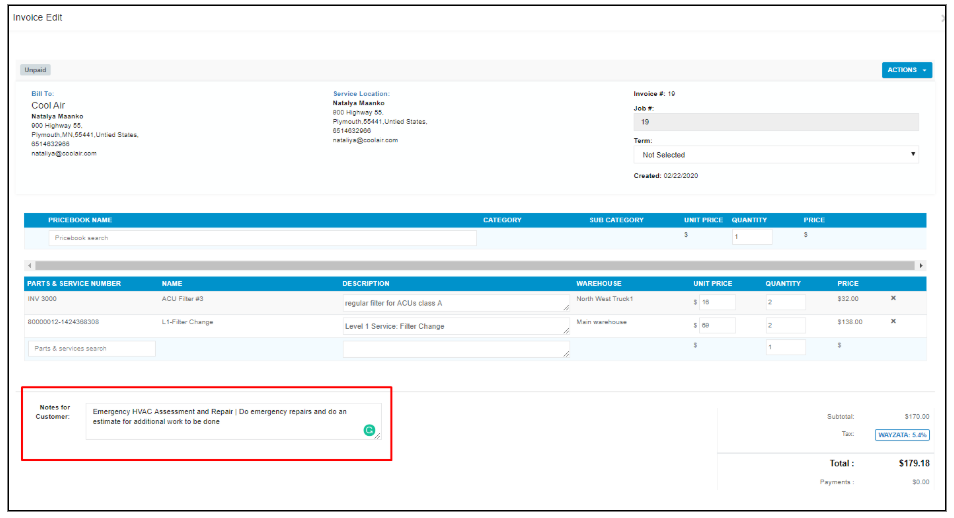
Any notes that have been added on the job will also be reflected on the invoice. You can edit or delete the notes or add a new one.
If the tax rate has been set up for the customer, this will already be on the invoice. If not, you will have to add the applicable tax rates. If necessary, you can also revise the tax rate indicated.
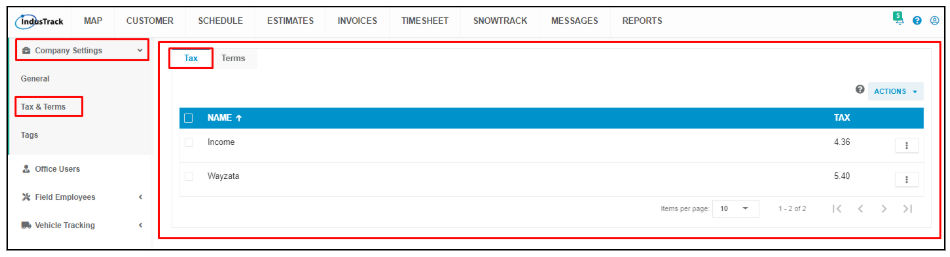
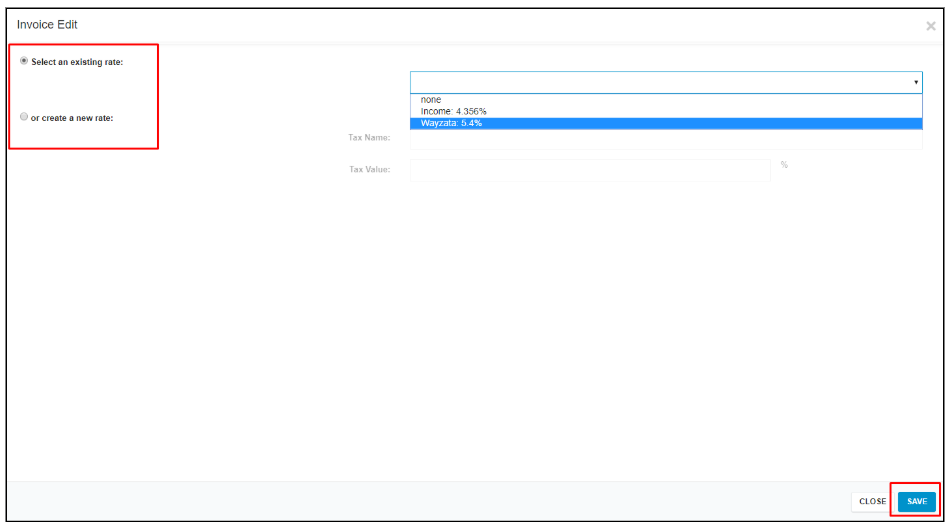
Tax Rates are set up under Company Settings. The Tax Rate applicable for a specific customer is assigned when their profile is created under the Customer Module.

If no tax rate is set up (not added to the customer’s profile), click Add on the tax field. If this is already set up but you want to revise it, click the tax rate on the tax field.
You can create a new tax rate or choose from a list of existing tax rates from the drop-down. Save the tax rate at the bottom once done.
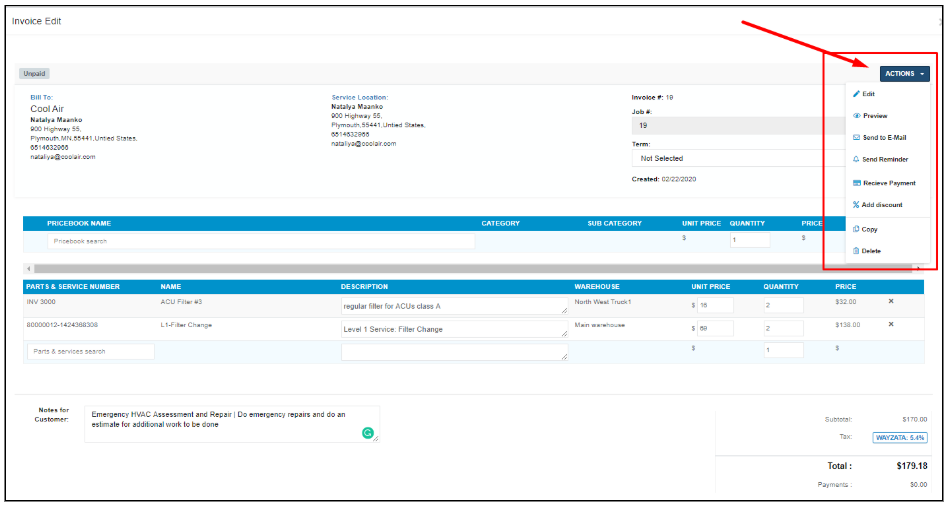
If you need to further manage the invoice, go to the Actions button and select the option from there. Refer to Manage Invoices for the procedures.
Click the Save button to save the new invoice. The invoice will remain open and you can continue working on it. To save and exit the invoice click the Save and Close button.
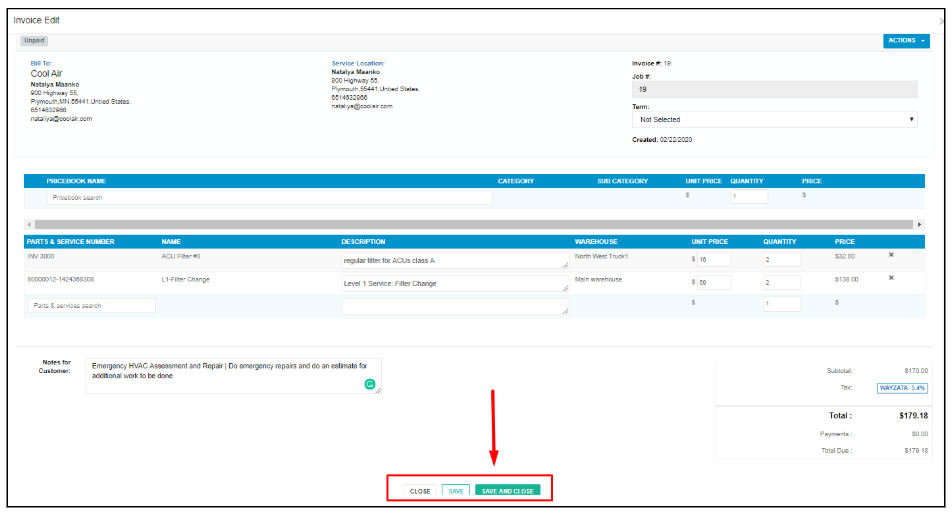
Your invoice has now been completed with just a few clicks.
Updated Lists
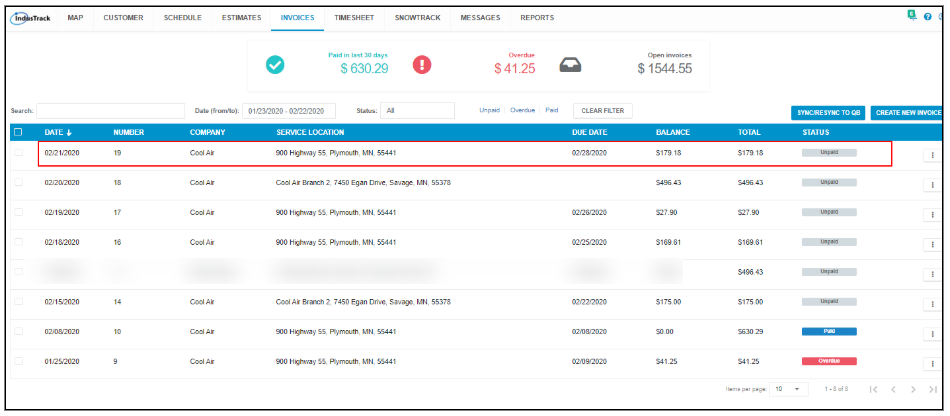
The new invoice will be added to the Invoice List in the Invoices Module. You can Manage the Invoice from here.
From the Completed Jobs Report on the Schedule Module, clicking on the 3-dot menu to the right of the job will now show View Invoice instead of Convert to Invoice.
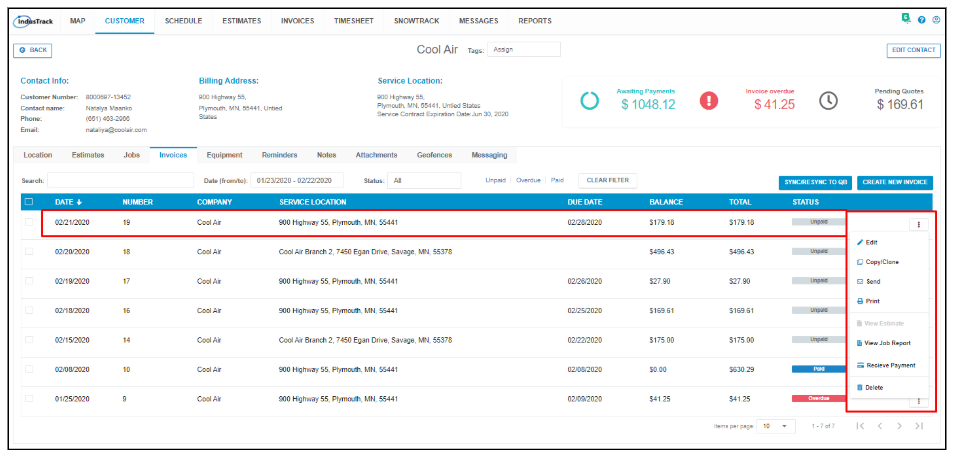
The customer’s profile will also be updated. The new invoice will be added to their Invoice list found in the Invoices tab. You can Manage the Invoice from this tab.
In the Jobs tab, you can view the invoice.
Click on the link and the Invoice Edit window will come up. You can Manage the Invoice from here.
0 Comments