
Forms
With IndusTrack, you can create a customized form that can be added to the Task of a Job and can be accessed by the Field Employee through the Mobile App and sign it with the Customer.
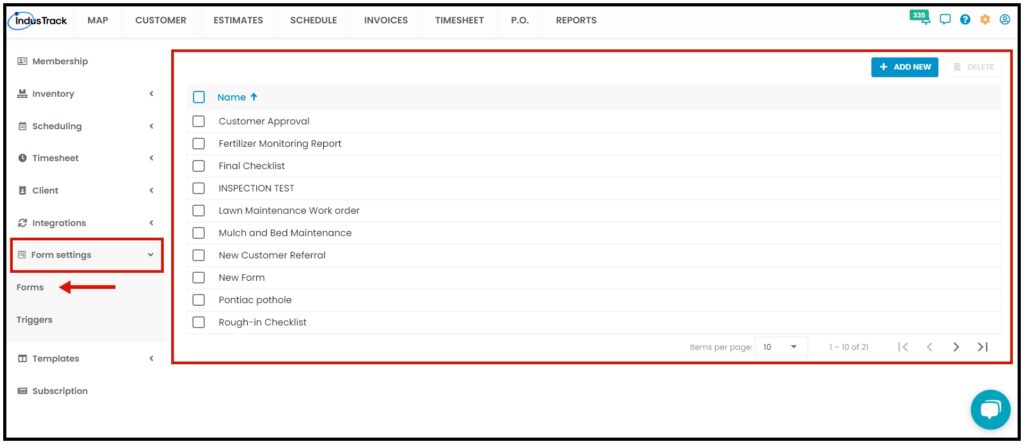
To access the forms page, go to Settings > Form Settings > Forms.
The forms page contains all of the forms that have been created and will be created in IndusTrack.
From this page, you will be able to view, create, edit and delete forms.
Sort the Forms List Alphabetically
Click the Name column header to set the list according to the form name:
- Arrow up – Form names are arranged alphabetically from Z to A.
- Arrow down – Form Names are arranged alphabetically from A to Z.
Items Per Page
- Select the number of forms to be displayed per page. Options to choose from are 10, 25, 50, and 100.
- Use the side arrows to move from one page to another (if there is more than one page). If there is only 1 page, this feature is disabled.
CREATE A FORM
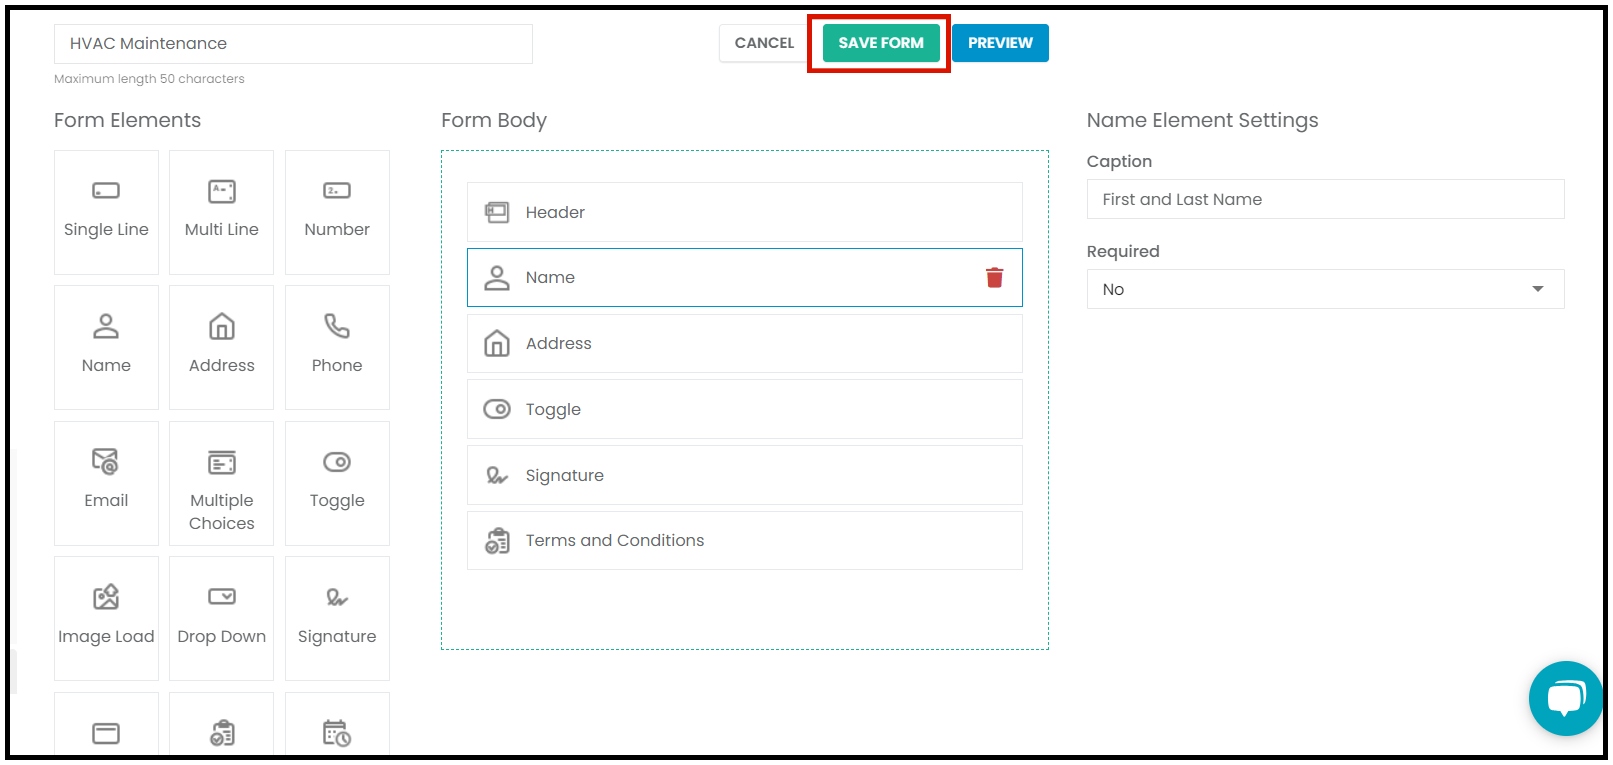
To create a Form, click + ADD NEW.

Name the form.
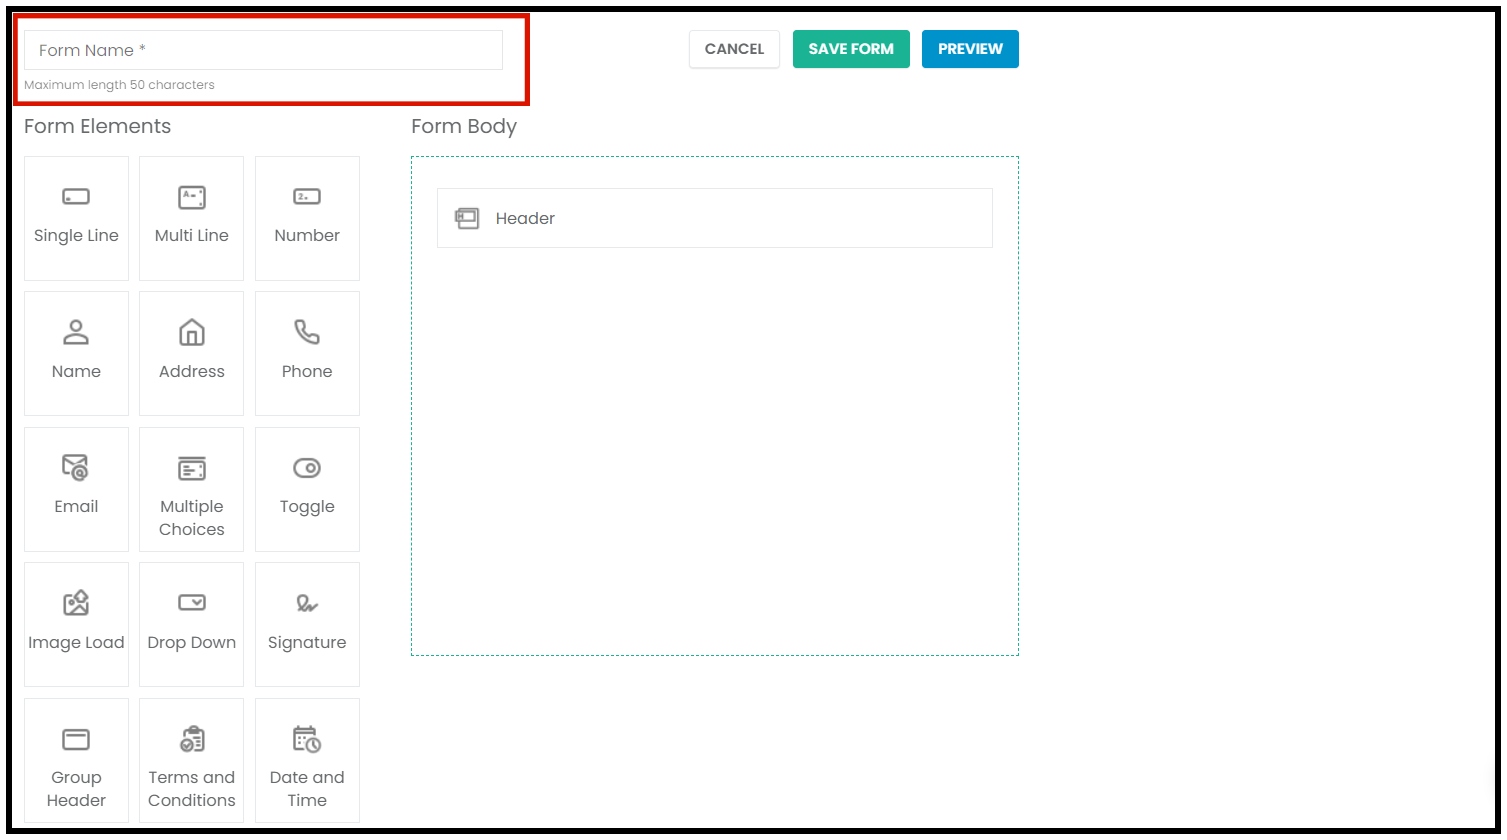
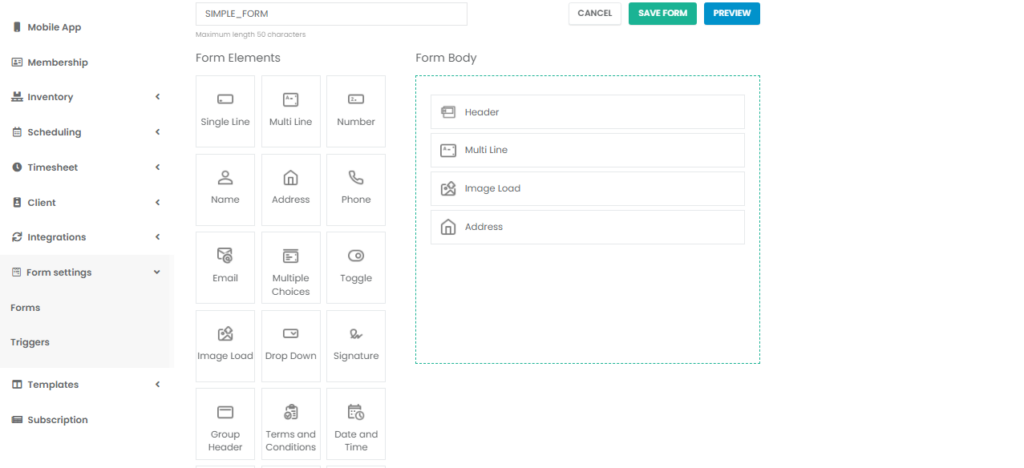
Select the Form Elements to be used. Drag and drop these into the Form Body, according to the hierarchy that the form needs.
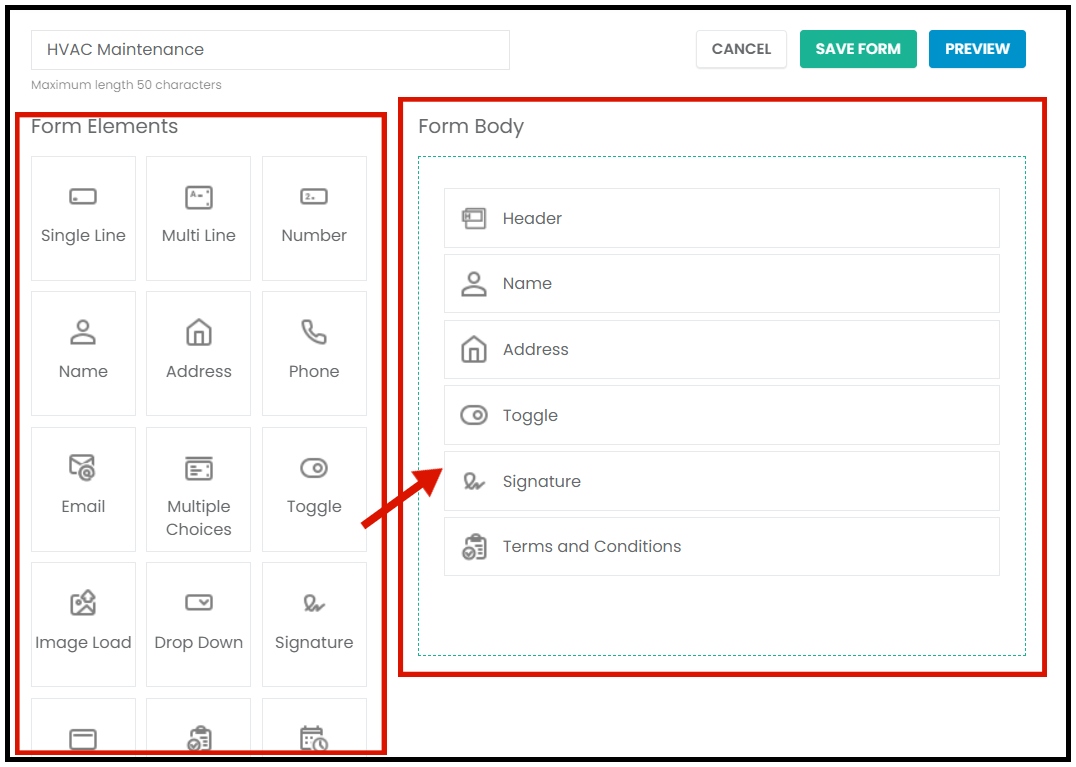
Form Elements
- Single Line
- Multi-Line
- Number
- Name
- Address
- Phone
- Multiple Choices
- Toggle
- Image Load
- Drop Down
- Signature
- Group Header
- Terms and Conditions
- Date and Time
- Page Break
- Checklist
- Multi Column Text
- Job Number
- Customer Info
- Job Time
- Field Notes
- Office Notes
- Job Parts and Equipment
- Header
Click the Elements inside the form body and set the settings of each. Note that each element has its own setting.
Select, too, if the element is required to be filled or not.
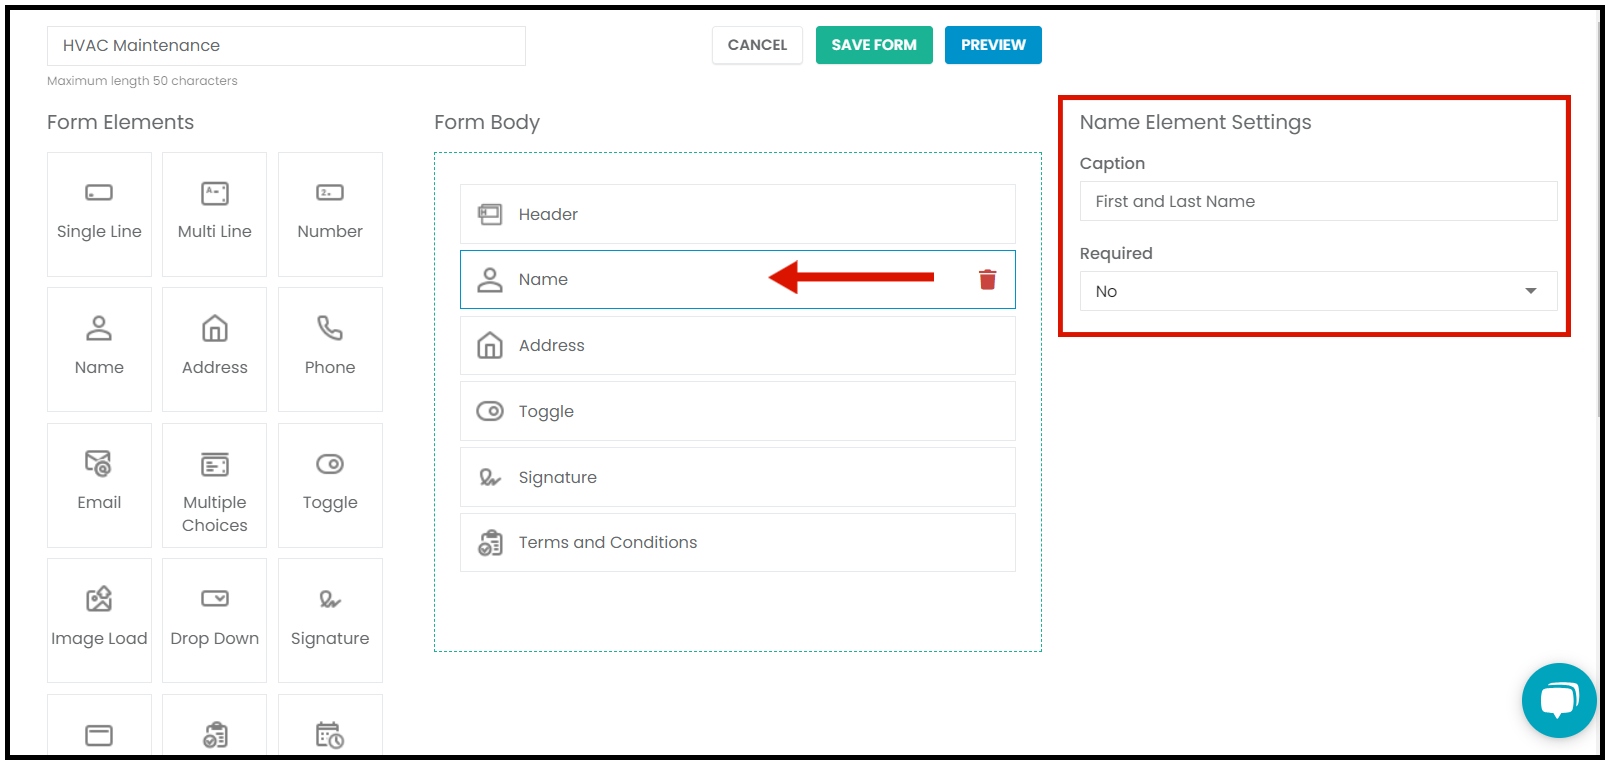
Drag and drop the elements to rearrange them. Click the trashcan icon to remove the element from inside the Form Body.
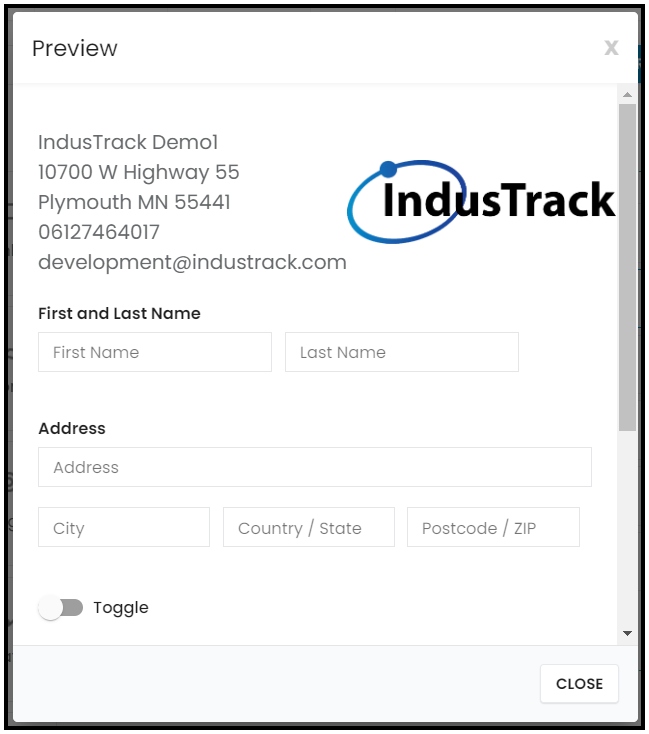
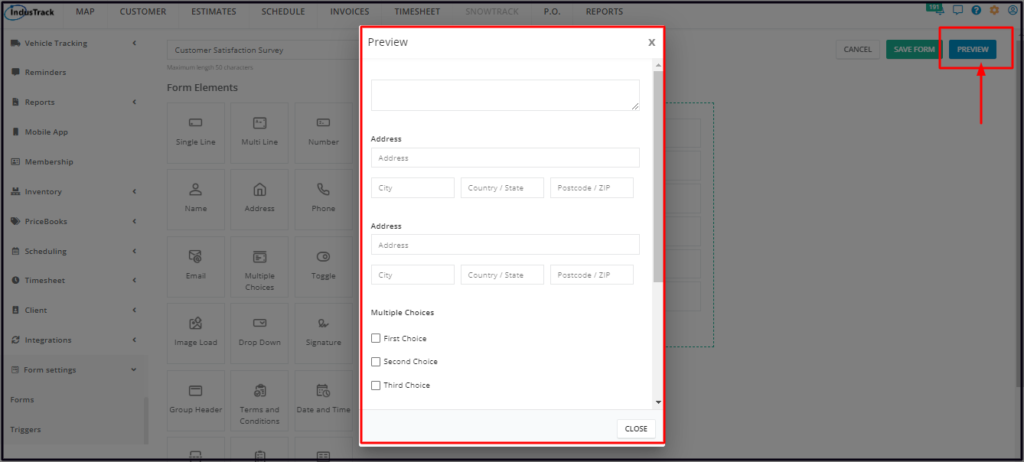
Click on the Preview button to see what the form looks like.
Save the form.
EDIT A FORM
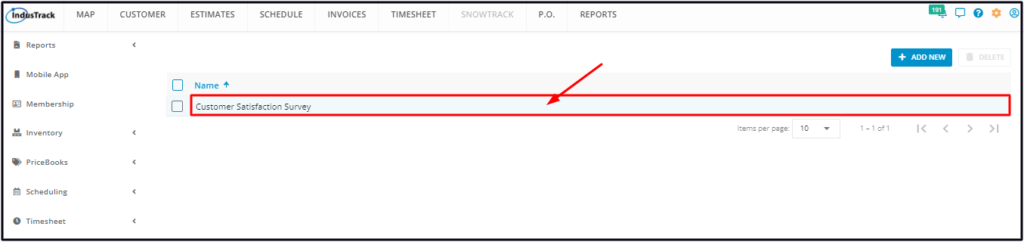
Click anywhere on the row of the form to be edited. This will open the form in edit mode.
Edit the form as needed. Save once done.
DELETE A FORM
By default, the Delete button is disabled. Select the form to be deleted and tick the checkbox to its left. Click on the Delete button which will now be enabled.
To delete multiple forms, tick the checkboxes of these forms and hit delete.
To delete all forms, tick the checkbox to the left of the Name header.

VIEW A FORM
To view an existing form, click anywhere on the row of the form. This will open the form in edit mode.
Click on the Preview button to see what the form looks like.
MORE ON FORMS
Add Triggers to your forms to automatically have the forms completed when the trigger is activated.
Add a form to Task Templates so that this may be automatically added to a Job when the template is used.